HTML: Web Design 1
Structuring Your First Website
Introduction
Outcomes and Objectives
The following is a brief summary of the outcomes and objectives expected to be achieved by the end of this
tutorial on the essentials of HTML:
- Functioning and role of HTML in building a website
- Different HTML editors and how to use them based on different operating systems
- Basic HTML tags (to be practiced with the help of replit in the manual)
- HTML document structure
- HTML attributes
- HTML headings
- HTML comments
- Formatting text in HTML
- Understanding paths
- Understanding links
- Inserting images
- Creating lists
- Inserting tables (additional material)
- Classes and IDs (additional material)
- How a website looks with both CSS and JavaScript encoded along with HTML
What is HTML?
HTML (Hyper Text Markup Language) is a formatting and markup language that is used to create webpages. HTML
is a cornerstone technology on the web; it is the foundation of practically every webpage and website on the
internet.
The language works by labelling different pieces of content on your webpage with tags. When a web browser
opens the webpage, it is able to interpret and differentiate between each piece of content, and display it
correctly on the page.
A Brief Note About Web Development
If you are looking to build a fully functioning website from the ground up, there are three main web
development languages to learn: HTML, CSS, and JavaScript.
- HTML (HyperText Markup Language) is for building content and linking to other pages and
resources on the internet. At its core, HTML is simply a labeling system for information (like text and
images) so that web browsers and other computer systems can interpret and work with it. HTML is the
language for web content.
- CSS (Cascading Style Sheets) is for determining how content gets styled and presented -
things like color, layout, size, fonts, etc. CSS is the language for styling and
presentation of web content.
- JavaScript is for adding interactivity and more advanced functionality to a web site.
Note that this is different from Java, which is a completely separate and unrelated programming language
(that just happens to have the same word in its name). It is the language of
interactivity on the web.
HTML serves as the starting point for building content for your own website, but a modern website
will take time and practice with all three core languages.
If you wish to put together a website without starting from scratch and writing code, services like
Wordpress and Squarespace are fast and easy ways to create websites using pre-built
templates and content. For many people, these services are sufficient, and may be a better option if the
goal is to get a web site up and running with minimal fuss.
If your goal is to really understand what goes into making a website, this manual is the place to start!
Web Technology Overview
Before we dive into working with HTML, it's important to understand the fundamentals of how the web works.
So, what happens when you type a website's URL into a web browser? Well, there are many steps that take
place, but here's a general idea:
-
You type a website's URL into the browser.
-
The browser uses the internet to look up the IP address of the server where the website is hosted.
-
The server then transfers the requested data back through the internet to your web browser.
-
Your web browser then interprets the data and displays it to the screen.
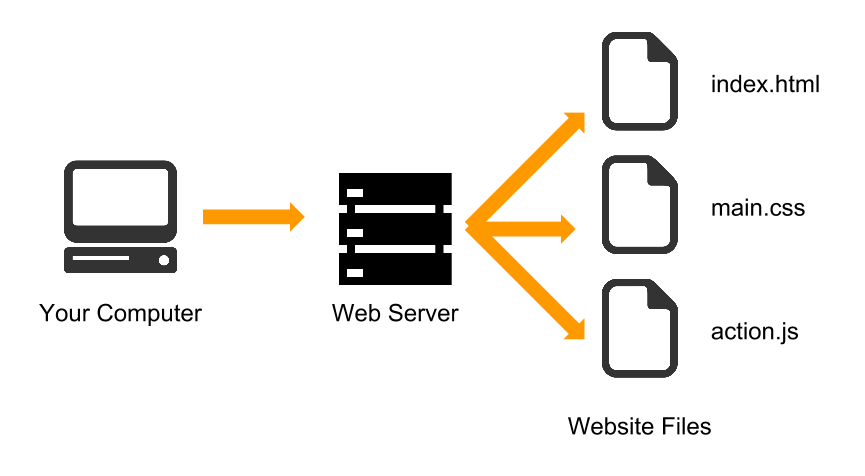
To summarize, when you visit a website, your computer connects to a physical server somewhere in the world
using the internet. It then downloads a series of files (HTML, CSS, and JavaScript files) to your computer,
and displays them on screen.
Terminology
The Internet
A system of interconnected computer networks used to allow connections between any two computers in the
world. These networks use standardized communication protocols to facilitate the exchange of data between
millions of computers all around the world.
Server
A server is a computer that is used to hold a website's files and deliver (serve) these files to web
browsers when the files are requested. Servers can run almost any operating system (e.g. Windows, Mac,
Linux) and have innumerable features to tweak the performance of the webpages they stores. They are often
fast and expensive, but in reality, any computer can be used as a web server.
Most people, however, don't use their own computers as web servers. Instead, they use services (which can be
found online) to host their websites. Some of these services are free to use, while others require a monthly
hosting fee. The main benefit of using these services is that they're generally fast, affordable, and easy
to set up while requiring little-to-no maintenance on your part.
Web Browser
A web browser (or browser for short) is a software application that takes the raw data from the Internet and
converts it into a readable, graphic display (a process called rendering). Web browsers can also take input
from the user and transmit it back to the server.
Common web browsers include Chrome, Firefox, Internet Explorer, Opera, and Safari. Although these browsers
all serve the same purpose, they do have their differences, which can cause data to be displayed in
unexpected ways. Throughout this series of courses, (HTML, CSS, etc.) we will be addressing some of these
cross-browser issues and exploring a few ways to get around them.
Webpage and Website
A webpage is an individual page and/or document of information on the web. A
website is a collection of related webpages, images, videos, etc.
Basic HTML Syntax
Tags and Elements
As a markup language, HTML uses markup tags to describe the contents on the page. These tags can be
thought of as key words or descriptors, surrounded by angled brackets. Generally, a tag consists of three
parts:
-
Start tag (also called the opening tag)
-
Element content, which is everything between the opening and closing tags
-
End tag (also called the closing tag)
All three of these parts combined form what's known as an HTML element.
Commonly Used Tags
Below is a table containing a few common content tags in HTML.
| Opening Tag |
Closing Tag |
Description |
| <h1> to <h6> |
</h1> to </h6> |
Headings and subheadings. H1 is the main heading, H2 is the secondary heading, etc. |
| <p> |
</p> |
Paragraph text. |
| <a> |
</a> |
Anchor, or link to another webpage or file on the web. |
| <ol> |
</ol> |
An ordered list with numbers. |
| <ul> |
</ul> |
An unordered list with bullet points. |
| <li> |
</li> |
A list item nested inside an element such as <ol> or <ul>. |
Attributes and Values
Within the opening tag of each HTML element, we can assign specific attributes and values, with the structure
seen below. Each HTML element can have a vast variety of attributes assigned to it. We will specify their
capabilities at a later point.
Syntax Rules
As with most computer languages, the structure and formatting must be strictly adhered to in order for the
computer to interpret it properly. In HTML, there are a few basic guidelines you can follow to make sure all
of your code has proper formatting:
All tags must be closed.
Tags must be completely enclosed within each other.
All tags and attributes must be in lower case.
All attribute values must be in quotes.
Getting Started
Root Folder and Site Organization
When creating a website, it is important to stay organized. A disorganized site can quickly become a burden
to update and manage. Although everyone has their own organizational methods, the following is highly
recommended.
A website is a combination of images, videos, HTML/CSS/JavaScript files, and much much more. Every website
has what's called a root folder, or a directory containing all of the content that builds
the website.
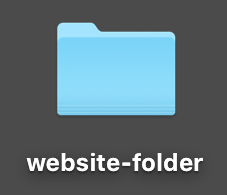
Before moving on to the next section, create a root folder somewhere accessible on
your computer to hold all of your website files.
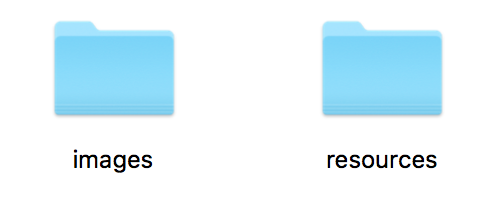
Inside of this folder, create two more folders. Name the first one images, and
the second one resources. The images folder
will be used for all pictures found on the website, meanwhile the resources
folder will contain all of our CSS and JavaScript.
Again, this structure is optional, and only a recommendation. If you find a different organizational method
works better for you, then use it.
Creating Our First File
Since HTML is a computer language, all you need to start writing is a simple text editor, such as Brackets,
TextWrangler, TextEdit, or Notepad. When you've written the code, you'll need to save the file as a .html file, so it can be opened and viewed by a web browser.
We will begin by setting up a workspace in which we can edit and preview our code side-by-side. This process
should be similar on Mac and Windows machines alike.
-
Open a blank document in a text editor of your choice. In our examples, we will be using a program
called TextWrangler, which you can find for free online.
-
In the menu bar at the top of the screen, select File > Save As. Name
the file index.html then save it directly inside your website's root
folder. Your root folder should now contain the following:
Congratulations! You now have your very first HTML file.
Naming Conventions
You may have noticed that we named our file index.html. But why this name?
Well, there are a few reasons:
-
When your web browser downloads your website files from a server, it immediately searches for the
first file to open and display. By default, you web browser will look for a file named "index". And
so, it is common practice to have your "index" file contain the homepage of your website.
-
The .html extension is necessary for the computer to recognize that
the file is an HTML document. In fact, almost every file on your computer has some sort of extension
signifying what kind of file it is. For example, pictures typically have a .jpg extension, Word documents have a .docx extension. etc.
Throughout the process of creating a website, you will accumulate many files within the root folder of your
website. It's important that you name your files properly.
When naming files, here are a few things you may want to avoid:
-
Any sort of strange symbol that is not a letter, dash, or underscore. For example: wisc.edu/my|dog's#1*fan!.html.
-
Overly long or complex names.
-
Periods that don't denote the file extension: wisc.edu/my.files/first.webpage.html.
-
Spaces within your filename.
Most of these symbols will work if you use them in file names, but in general, they're annoying and will
cause you pain at some point in the future. They are easily avoidable, so avoid them.
Setting up a Workspace
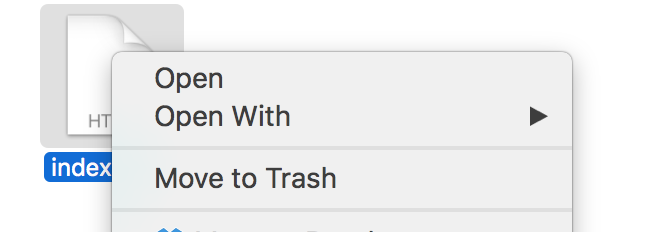
To edit your HTML file, open it with a text editor. To preview your HTML file, open
it in a web browser. To open a file using a specific program, right-click on the file, then
select Open With. This will allow you to choose whether you want to open the
HTML file in a web browser or a text editor.
We recommend that you open the text editor and the web browser side-by-side. This way, you can edit the HTML,
save the document, then refresh the web browser to see how the actual webpage looks.
Document Setup
Now that our website's root folder is ready, and we have created our first HTML file, it's time to begin
writing a web page. Every webpage follows a specific outline, or document structure in order for it to be
read properly. In this next exercise we will go through step by step, explaining and writing out the
document structure necessary for our webpage.
-
In your text editor, begin by writing the following line at the top of your document:
<!DOCTYPE html>
This statement is a declaration describing what type of document we are writing. When the web browser
opens our file, it will see this statement and understand to read it as a regular HTML file.
-
We will now need to mark the beginning and end of our code in the document. We can do this by
enclosing all of our code within the <html> tag. The browser
will not read any HTML code written outside this tag.
<!DOCTYPE html>
        <html>
        </html>
-
Inside of our <html> tags, there are two more sections we would
like to add:
-
Head: The head contains information about the webpage that is usually not
displayed. It is often used for linking external scripts and stylesheets, adding metadata,
and changing the title and description of the webpage.
-
Body: The body holds all of the information that is displayed on the
webpage. Any content that is written outside of the body tags will not show up in the
browser window.
To add these sections into our document, we can use the <head>
and <body> tags.
<!DOCTYPE html>
        <html>
        <head>
        </head>
        <body>
        </body>
        </html>
-
The final piece we will add to our document structure is a <title> tag within the head of our document. This will set the
title of our webpage.
<!DOCTYPE html>
        <html>
        <head>
            <title> Title goes here </title>
        </head>
        <body>
        </body>
        </html>
Let's practice using the <title> tag
Congratulations! You have officially structured your first HTML document. Now we are ready to add some
content.
Formatting Text
Earlier in this manual, we previewed a series of basic HTML tags to add content to our page. In this section,
we will utilize these tags to begin building our webpage.
Paragraph Text
The most essential element we can add to our page is basic text. In order to add paragraph text, we can
enclose it within the <p> tag we saw earlier.
-
In the body of the document, add some text enclosed by two <p>
tags. (Remember that <p> acts as the opening tag, and </p> acts as the closing tag.
<body>
        <p>Hello world!</p>
        </body>
Practice using the paragraph tag
-
Save your HTML file, then refresh your browser to see the result. You should now see "Hello world!"
displayed in your web browser.
-
Each <p> element in HTML will act as its own paragraph, and
space itself accordingly. Continue to add paragraph text to your document, until you have a
significant amount of content. If you need filler text to fill the page, look to the file called
sample-text.txt in the class files.
Headings
Now that we've added some basic content to our page, we want to title and properly mark each section. In HTML
we can use the heading tags to create headings and subheadings, for different sections and sub-sections of
our website.
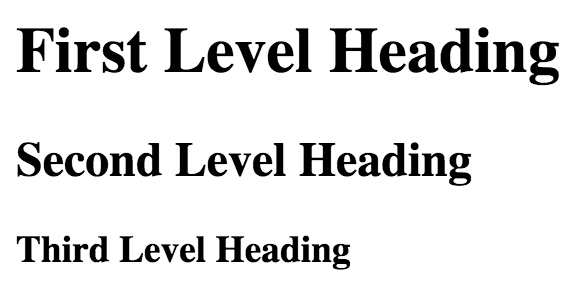
There are six different levels of headings we can use, ranging from <h1> to <h6>. The first
three are previewed to the right.
Headings are used to establish hierarchy within a webpage. For example, an <h1> tag may mark the beginning of a section of content, then a series of
<h2> tags may be used to mark sub-sections.
<h1>Section Title</h1>
        <h2>Sub-section Title</h2>
        <p>Paragraph text here.</p>
        <h2>Sub-section Title</h2>
        <p>Paragraph text here.</p>
Practice using the heading tags
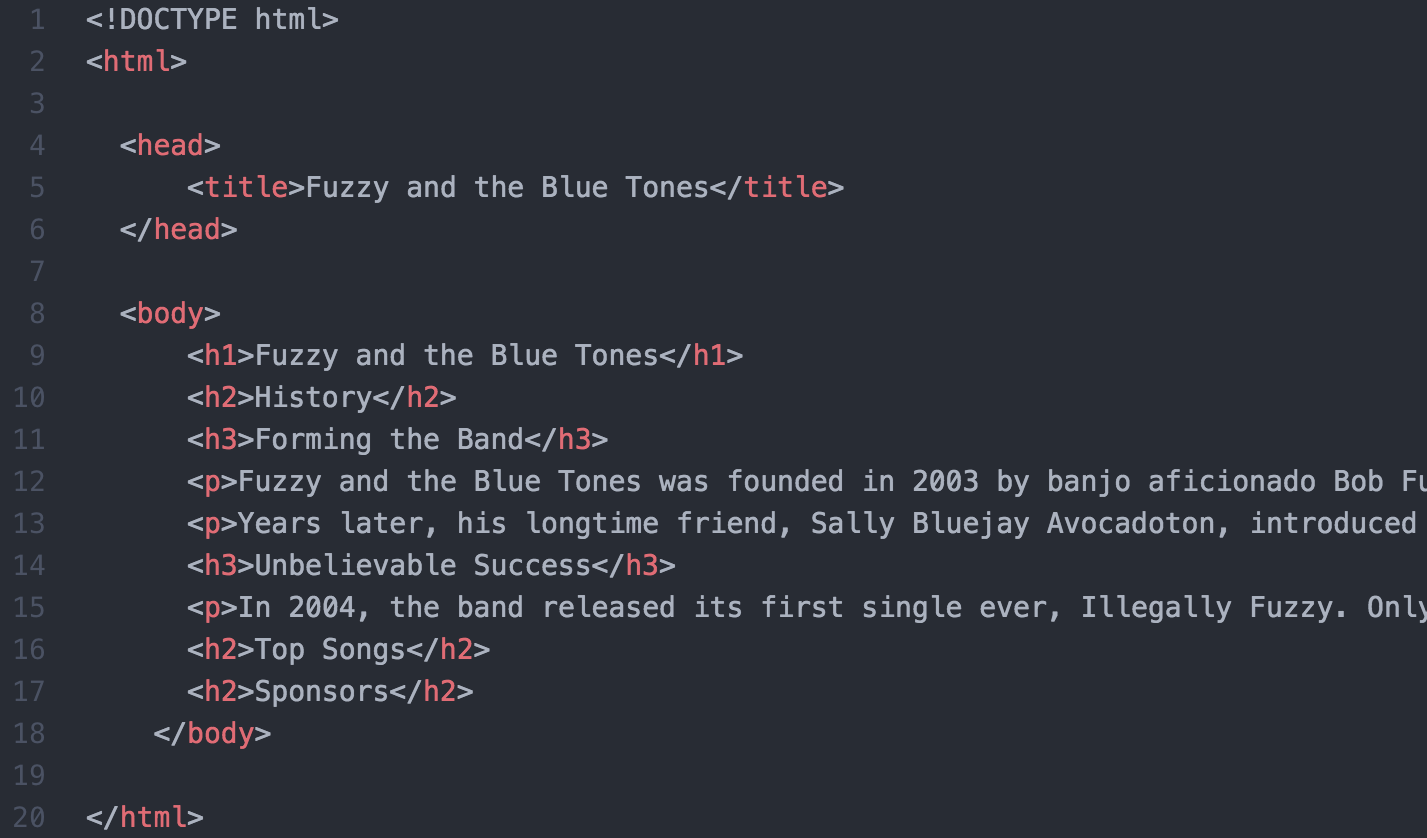
Take some time to add a title to the top of your webpage, then add titles for each
sub-section of content on your page. When finished, your HTML document should look similar to the
following. (Note, the paragraph text is cut off in the preview below.)
Bold, Italics, and Line Breaks
In order to make a specific word, sentence, or paragraph bold, you can surround it with a <b> tag. Likewise, to italicize your text, you may surround it with the
<i> tag. An example of each are given below.
<p>This word is <b>bold</b>.</p>
        <p>This word is <i>italisized</i>.</p>
Within a paragraph of text, you may also add a line break. To do so, you may use the <br/> tag. This tag is unique, because it does not have an
opening or a closing. Instead, it is a singular tag that will break text to a new line wherever
it is placed. An example of its use is demonstrated below.
<!-- example of break tag -->
        <p>This is my first line of text, <br/> and this is my second line.</p>
Practice using Bold, Italics and Break tags
Document Structure
With the introduction of HTML5, we received new tags that make it easy to divide our webpage into sections in
order to stay more organized and give additional meaning to certain parts of the page. These tags allow us
to structure the document, also making it easier for us down the road when we interact with our webpage
using CSS and JavaScript.
Below is a list of commonly used document structure tags. To find a more comprehensive list, visit the quick
reference guide at the end of this manual.
| Opening Tag |
Closing Tag |
Description |
| <header> |
</header> |
Contains introductory content for a webpage (e.g. banner, navigation), or a section of a page. |
| <nav> |
</nav> |
Contains navigation bar, usually linking to other pages. |
| <aside> |
</aside> |
Contains content that is tangentially related to the main content of the page, as one would find in
a sidebar. |
| <footer> |
</footer> |
Contains footer of a page. Typically the footer contains information about the content, such as the
author and a copyright statement. |
-
At the top of your webpage, there should be an <h1> element that
acts as the page title. Surround this element in a <header>
container.
-
Inside of the header, add a <nav> container. Keep it empty for
now, we will utilize it later.
<header>
        <h1>Fuzzy and the Blue Tones</h1>
        <nav></nav>
        </header>
-
Add a <footer> container at the bottom of the body. Feel free to
write in the footer with whatever content you wish. We will be utilizing the footer of our website
to contain copyright information.
<footer>
<p>©2017 Fuzzy and the Blue Tones. All rights reserved.</p>
</footer>
In HTML, some symbols need to be represented using a specific code for that symbol. In the example
above, the copyright symbol (©) is written as ©.
Lists and Tables
Lists
Comparing list styles
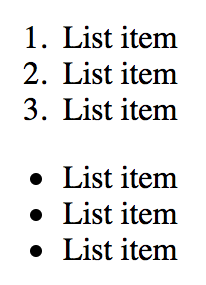
Lists are an easy way to display information in a nice, structured format. HTML supports two types of lists,
ordered lists and unordered lists. Ordered lists are enumerated, meaning
they display with numbers next to each item. Unordered lists use bullet points instead. Let's outline the
structure used to make lists.
-
The <ol> tag is used to begin and end an ordered list.
-
The <ul> tag is used to begin and end an unordered
list.
-
The <li> tag is used to contain each individual item within a
list.
For further clarity, take a look at the example below.
<ul>
        <li>First list item</li>
        <li>Second list item</li>
        <li>Third list item</li>
        </ul>
Let's go ahead and add a few lists to our webpage to practice.
-
Near the bottom of the document, but before the footer, add a new section to your webpage. In our
example website, we will be adding a section called "Top Songs", to list the most popular songs for
our imaginary band.
-
Add opening and closing <ol> tags to begin creating a list.
<h2>Top Songs</h2>
        <ol></ol>
-
Begin populating the list by adding <li> tags for each list
item.
<h2>Top Songs</h2>
        <ol>
        <li>Illegally Fuzzy</li>
        <li>Papa Smurfgrass</li>
        <li>Jet Fueled Finish</li>
        <li>Monkey in the Banana Stand</li>
        <li>The Gettin' Jiggy Jig</li>
        </ol>
Let's practice using the ordered and unordered lists:
Tables
Much like lists, tables have a unique structure that make them slightly more difficult. We will not actually
be adding any tables to our example site, so feel free to skip this section if it is of no interest.
We will be re-creating the table below piece-by-piece to learn how to make tables.

-
Tables open and close with the <table> tag. Add these tags to
your document to create a table element.
-
Each row of a table is opened and closed with a <tr> tag. Our
table has three rows, so add three opening and closing <tr>.
<table>
        <tr></tr>
        <tr></tr>
        <tr></tr>
        </table>
-
To add information into specific columns, we can add <td> tags
inside of each table row. Because we have two columns in our table, add two <td> tags inside of each table row tag.
Once this is done, you may populate the table with information.
<table>
        <tr>
            <td>First Name</td>
            <td>Favorite Color</td>
        </tr>
        <tr>
            <td>George</td>
            <td>Orange</td>
        </tr>
        <tr>
            <td>Allan</td>
            <td>Blue</td>
        </tr>
        </table>
-
In most tables, the top row acts as a header for the information being displayed. The header (top
row) of the table is usually styled differently than the rest of the table for clarity.
In HTML, we can mark a table header by using <th> tags instead
of <td> tags in the top row.
<table>
        <tr>
            <th>First Name</th>
            <th>Favorite Color</th>
        </tr>
        <tr>
            <td>George</td>
            <td>Orange</td>
        </tr>
        <tr>
            <td>Allan</td>
            <td>Blue</td>
        </tr>
        </table>
Let's practice creating a table:
Now our table is complete. When previewing in a web browser, it will look different from the example pictured
at the top of this section. This is because the table above has a small amount of CSS, or styling applied to
it for readability. HTML simply provides the structure of the table, and CSS is what is used to
change it visually.
Links
By far, links are one of the most important aspects of a webpage. In fact, links are the only way we can
navigate and move between pages on the web. In the website we are building, we will use links in the
navigation bar to bounce between multiple pages on our website. First, let's learn how to create links.
Link Structure
Links begin and end with the <a> tag.
<a>This is my link</a>
However, the format above is incorrect. There is a crucial piece of information we are missing: where
will the link take us? The whole point of a link is to move a user from one page to another, and if
the link does not have a destination, it cannot take us there.
In an earlier section of this manual, we learned that HTML elements can have attributes and
values. In order to give our link a destination, we can add the href (Hypertext Reference) attribute to our element. Take a look at the example
below.
<a href = "#">This is my link!</a>
We have successfully added this attribute to our link tag! Great! The value of the attribute is currently a
symbol, "#". This is where we place the destination, or the path to where we would like to
go. For example, if we wanted our link to take us to Google:
<a href = "http://google.com">This is my link!</a>
Let's practice using links in our webpage:
Relative and Absolute Referencing
There are two ways we can write references (destinations) for our links, that are crucial to understand:
using relative paths and absolute paths. Both are described in-depth
below.
Absolute Paths: These paths point to a specific page or file on the web with zero ambiguity.
The path will lead to the same place, no matter what page the user may be on. Examples:
Relative Paths: These paths lead to a location that is relative to the user's
location. Examples:
Consider this analogy. If I provide you with GPS coordinates of my exact location, you would be able to find
me no matter what your location. GPS coordinates would be an absolute reference to my location.
On the other hand, I could give you instructions: To find me, drive for one mile, turn left, then turn
right. In this case, the destination is dependent upon the location of the user. This would be a
relative reference to my location.
Adding Links
We would now like to put this into practice, and add links to our own website.
-
At the bottom of our webpage, before the footer, create a new section. In this section, create a
list, then add links inside of each list element.
In the example site we're building, we decided to add links to our band's biggest sponsors.
<h2>Sponsors</h2>
        <ul>
        <li><a href = "http://www.bluegrassmuseum.org/">Bluegrass Museum</a></li>
        <li><a href = "http://www.spbgma.com/">SPBGMA</a></li>
        </ul>
-
We now want to form a navigation bar at the top of our webpage. Inside the <nav> element, create a list and populate it with links, like in
the example below.
<!-- nav bar example -->
        <ul>
        <li><a href = "index.html">Home</a></li>
        <li><a href = "albums.html">Albums</a></li>
        <li><a href = "tour.html">Tour</a></li>
        </ul>
Pages
We now want to add new pages for our website. In our navigation bar, we added links to an "Albums" and "Tour"
page, so these are the pages we can create.
-
In your text editor, navigate to the menu bar and select File > New.
-
Name your file albums.html, then save it inside the root folder of
your website.
-
Repeat the same process to create a page titled tour.html.
-
Take some time to populate these HTML files with content with the same structure we used to make our
homepage.
Your website's root folder should now look similar to the following:
Each HTML file now represents a different webpage. In the previous section, we have already written the links
to each of these HTML files in our navigation bar. Test your navigation bar by
clicking between the three different pages.
Images
The final important topic we'll cover in HTML is adding images. Images are added to your document using a
single tag, with no opening or closing. The image tag also has an attribute that will allow us to point to
the image's location in our website's root folder.
-
Find an image by searching online, or by using the image provided in the class files folder.
-
Place this image into the images folder within your website's root
folder.
-
Within the header, directly below the navigation bar, place an image tag and link it to the image in
our website's root folder. Our example is given below.
<img src = "images/concert.jpg">
As you can see, we used a relative reference to link our image.
-
Refresh your web browser to preview the image on your page. Remember that the image will show up at
its full size, with zero formatting. We will be able to better position our images using CSS in our
next class.
-
To complete our image tag, there's one more attribute we can add: the alternative text. The alt (alternative text) attribute contains a small, written description
of the image. It will not show up on your page, however, it will help search engines find your
images, and it will also help in the case that the link to your image breaks.
<img src = "images/concert.jpg" alt = "Fuzzy and the Blue Tones Concert">
Classes and IDs
One final concept we would like to introduce is the idea of classes and IDs. These become
very useful when you start incorporating CSS and JavaScript. Essentially, you can think of classes and IDs
as labels or descriptors for certain elements in your webpage. In HTML, every element can be
labelled with a class or ID to categorize it.
Lets look at some examples of elements with classes attached to them.
<p class="highlight">Sample text here</p>
<h4 class="highlight">Sample title here</h4>
<div class="highlight">Sample text here</div>
Each one of these elements has the highlight class attached to it. The
name of the class is arbitrary, and you can name your elements whatever you like. IDs are
structured in a very similar way.
<span id="hidden">
This <span> element is labeled with an ID called hidden.
So, how are classes and IDs useful? When it comes to styling our page using CSS, or writing JavaScript that
interacts with our page, we can use them as selectors.
For example, in CSS you could select every element with the class highlight
and change it to have a light blue color. Instead of writing code for each individual element, you may
select them all at once using the class applied to them. Likewise, you could write JavaScript code that
selects the element with the hidden ID, and hide it.
IDs vs. Classes
The main difference between IDs and classes is that class tags can be used on to multiple
elements in a single page, while ID tags can only be used once on any
given .HTML document.
If the same ID is re-used multiple times in a document, it is only applied to the last element with that
ID.
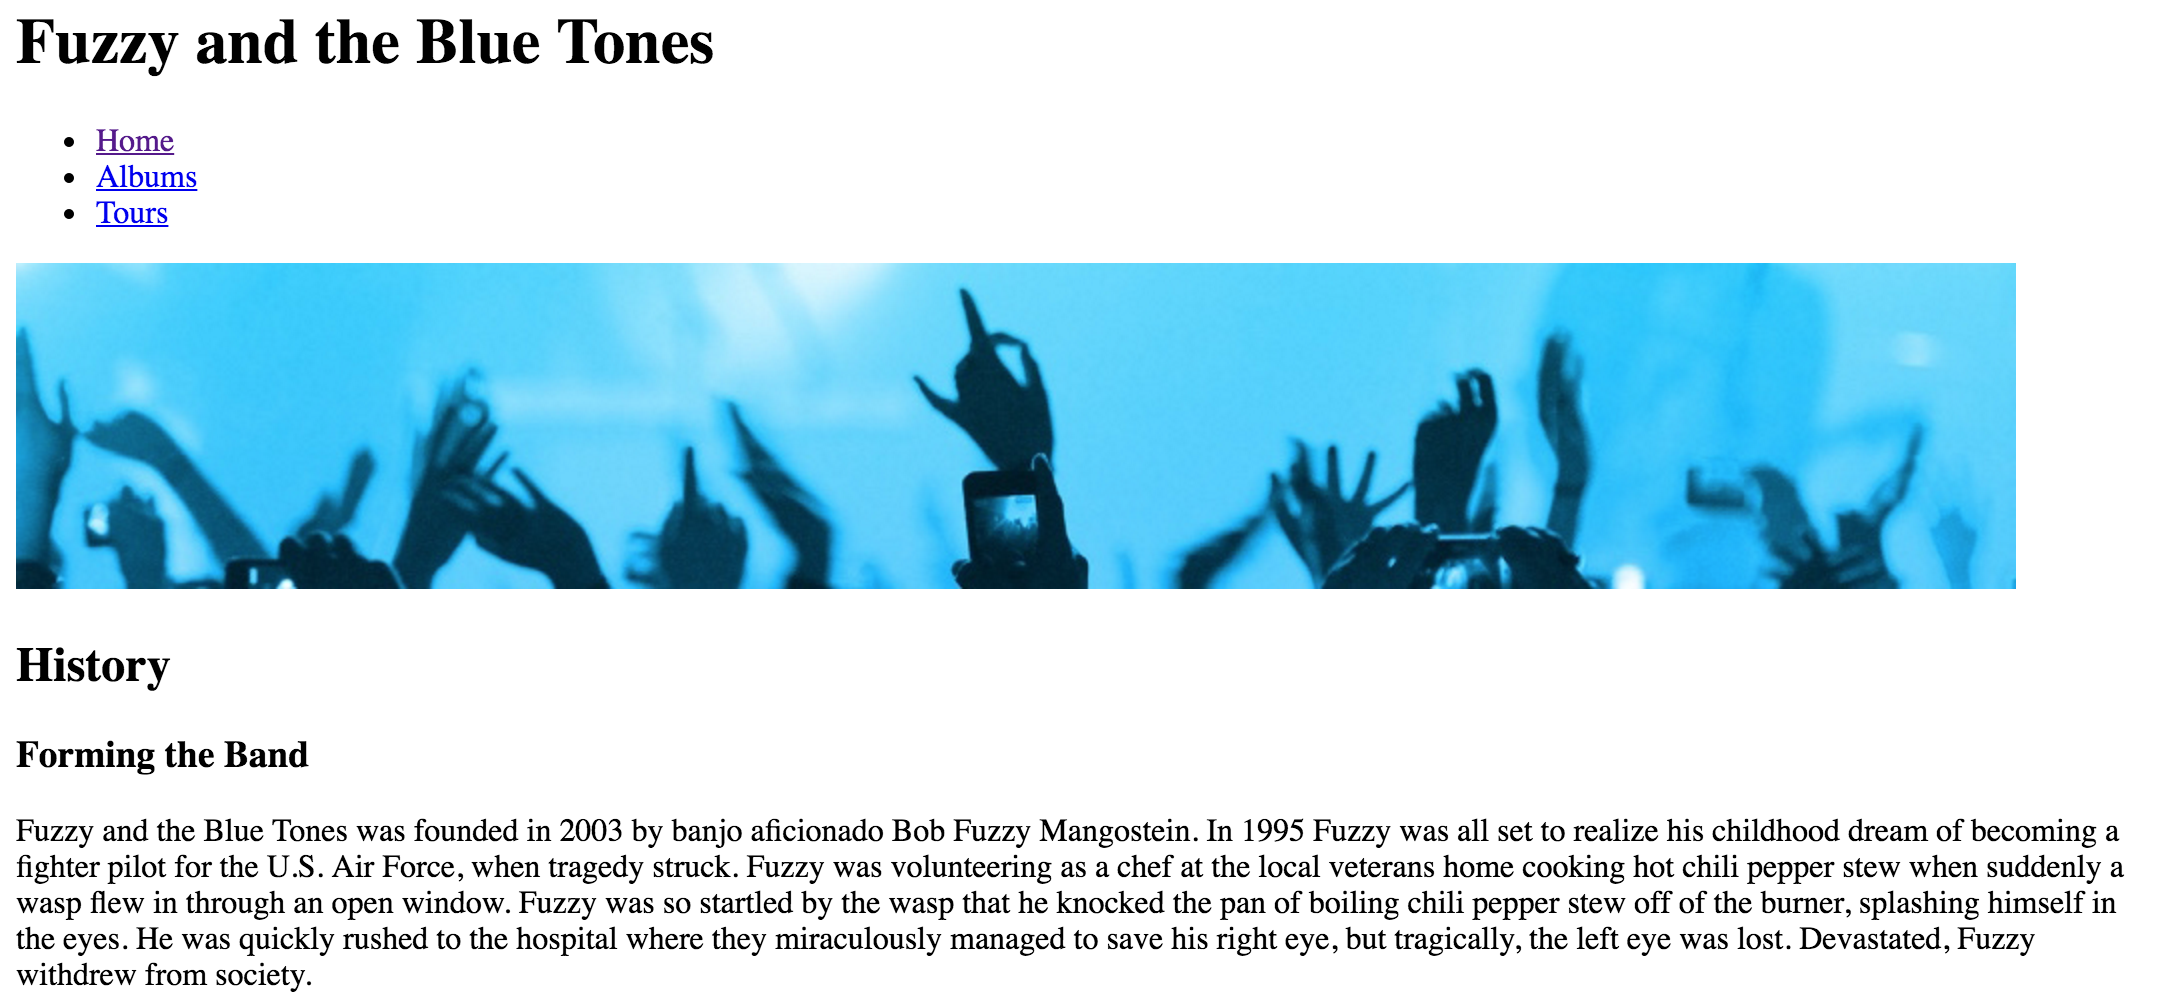
CSS Preview
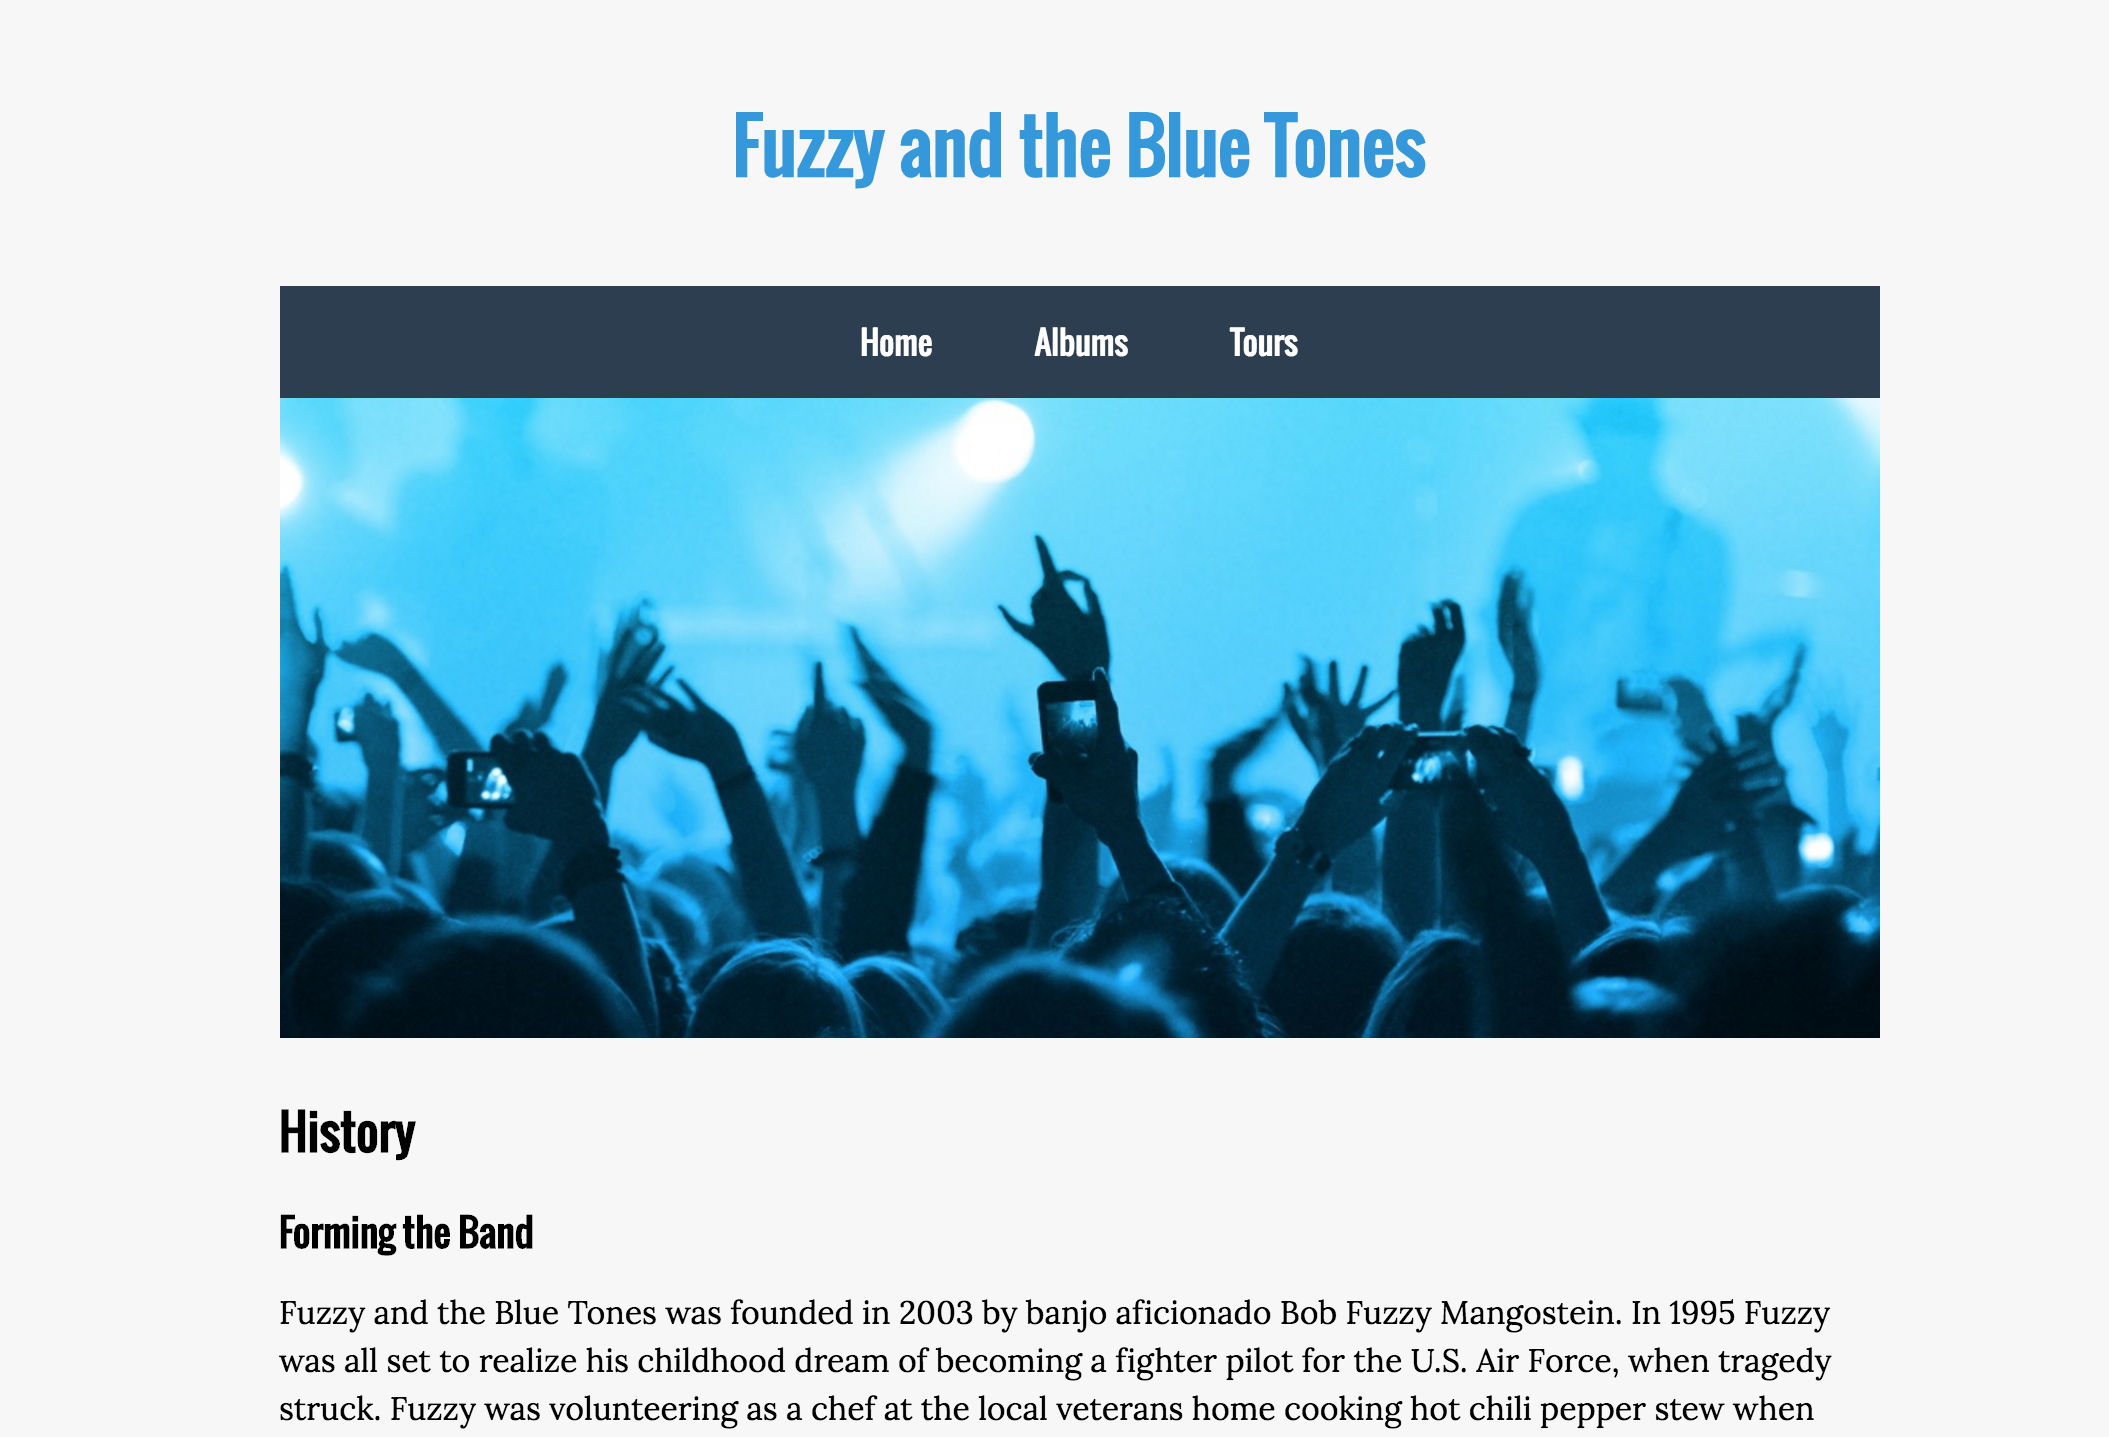
By the end of this class, you website should look similar to the following:
Of course, this site is far from ideal. The next step is to add color, fonts, formatting, and styling to our
page in order to make it appealing. We can do this using another web language called CSS, which has been
referenced throughout this manual.
Just for show, we would like to preview how exactly CSS can change a webpage, and how dramatic of a
difference it can make. In you class files folder, open up the finished-website-example folder, and open its index.html file. You should see something similar to the following:
The two sites are exactly the same, only the latter has a small amount of CSS applied to it.
To continue building your web development skills, we recommend the following classes/manuals from
Software Training for Students:
-
CSS 1
-
CSS 2
-
JavaScript 1
-
Wordpress.com
Activity
LEARNING OBJECTIVE:
This exercise will help you to practice basic HTML tags learnt in this tutorial.
Activity #1:
Start by creating a new .html file in editor of choice
Develop a basic web page using the HTML tags you learned
in class.You can select a preferred theme to apply the following elements in ANY order for your webpage.
This allows exploring your creativity.
- Give html, head, and body tags
- Use different levels of heading tags wherever appropriate
- Insert the following phrase, without the quotes, as your title tag:
“HTML Review Exercise by <insert your first and last name>.” Example: HTML
DoIT Activity by Bucky.
- Display an appropriate background color. (This is the only part that is
out of the scope of this tutorial but worth knowing!)
- One unordered list of items (must include at least
three items)
- One ordered list of items (must include at least three items)
- A bold word or phrase anywhere on the page
- An italicized word or phrase anywhere on the page
- At least one hypertext link to other site on the Internet
- Add an image
- For this exercise, download an image from the web and use
it.
When the exercise is complete, you may check
a solution provided for this activity in this manual (must be dowloaded and run
seperately).
HTML Tag Quick Reference
This section is a reference for commonly used HTML tags, to use as you work on your own website. There are
also a number of tags in here that were not discussed during the course, and may be useful to know.
Content Tags
| Tag |
Description |
| <h1> to <h6> |
Headings and subheadings. |
| <p> |
Paragraph text. |
| <a href = "#"> |
Link. |
| <ul> and <ol> |
Unordered and ordered lists. |
| <li> |
Individual list elements. |
| <!-- and --> |
Comment. Anything in-between these tags is ignored by the computer. |
Container Tags
| Tag |
Description |
| <div> |
Generic container for a block of content. |
| <span> |
Generic container for in-line content. |
Document Structure Tags
| Tag |
Description |
| <html> |
Opens and closes HTML document. |
| <head> |
Contains information about the webpage, like title and metadata. |
| <body> |
Contains all content displayed on the webpage. |
Semantic Tags
| Tag |
Description |
| <header> |
Contains introductory content, such as website name and navigation. |
| <nav> |
Contains primary navigation for website. |
| <main> |
Contains main content of page. |
| <aside> |
Contains content tangentially related to main content, like a sidebar. |
| <nav> |
Contains the footer at the bottom of a page. |
