InDesign: Creating Documents with InDesign: Layout and Type



About InDesign
InDesign is an industry-standard software used to create and publish professional layouts for print and digital media projects. It’s a great choice for creating multi-page projects, such as brochures, digital magazines, books, and interactive PDFs.
What Is InDesign Best For?
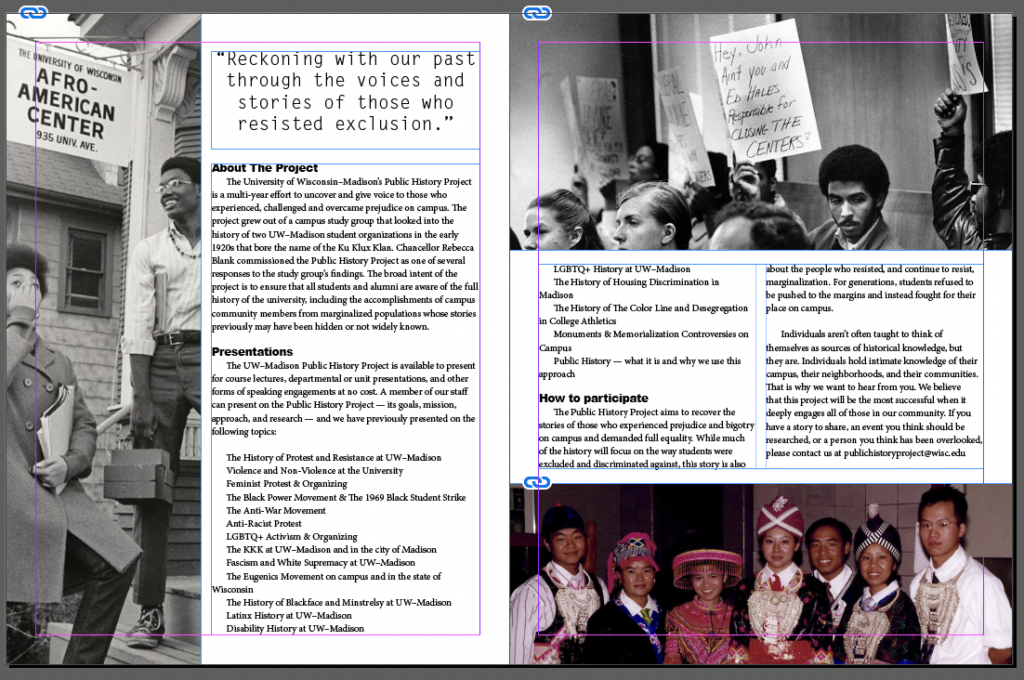
InDesign is perfect for laying out projects, importing existing elements such as pictures and text, and adding simple lines and shapes to a project.
What Is InDesign NOT Suitable For?
It can be helpful to think of InDesign as a tool for organizing existing content, rather than a tool for creating new content. InDesign does not provide any photo editing tools and is not recommended to create elaborate vector graphics with. Instead, we recommend you use tools like Adobe Photoshop and Illustrator to create these elements to later import into your InDesign project!
The InDesign Interface
InDesign Workspaces
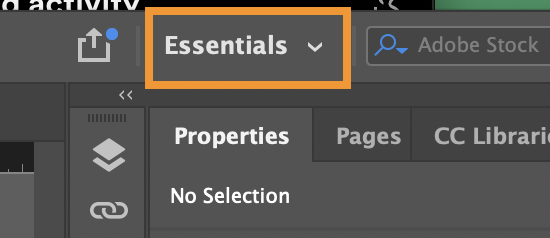
This manual covers the ‘Essentials’ Workspace
Different workspace views bring up different tools and panels that may be most productive for a specific kind of project. The Essentials workspace view is usually selected by default, and is often a great option for most projects. However, you can change this to be set to any workspace that you feel would be most beneficial.
Resetting the Workspace: Accidentally moved or got rid of a panel? Go to this Workspace View and select “Reset [Workspace]” to bring back all the original panels. This name changes based on what workspace you are currently selected on.
Interface Components
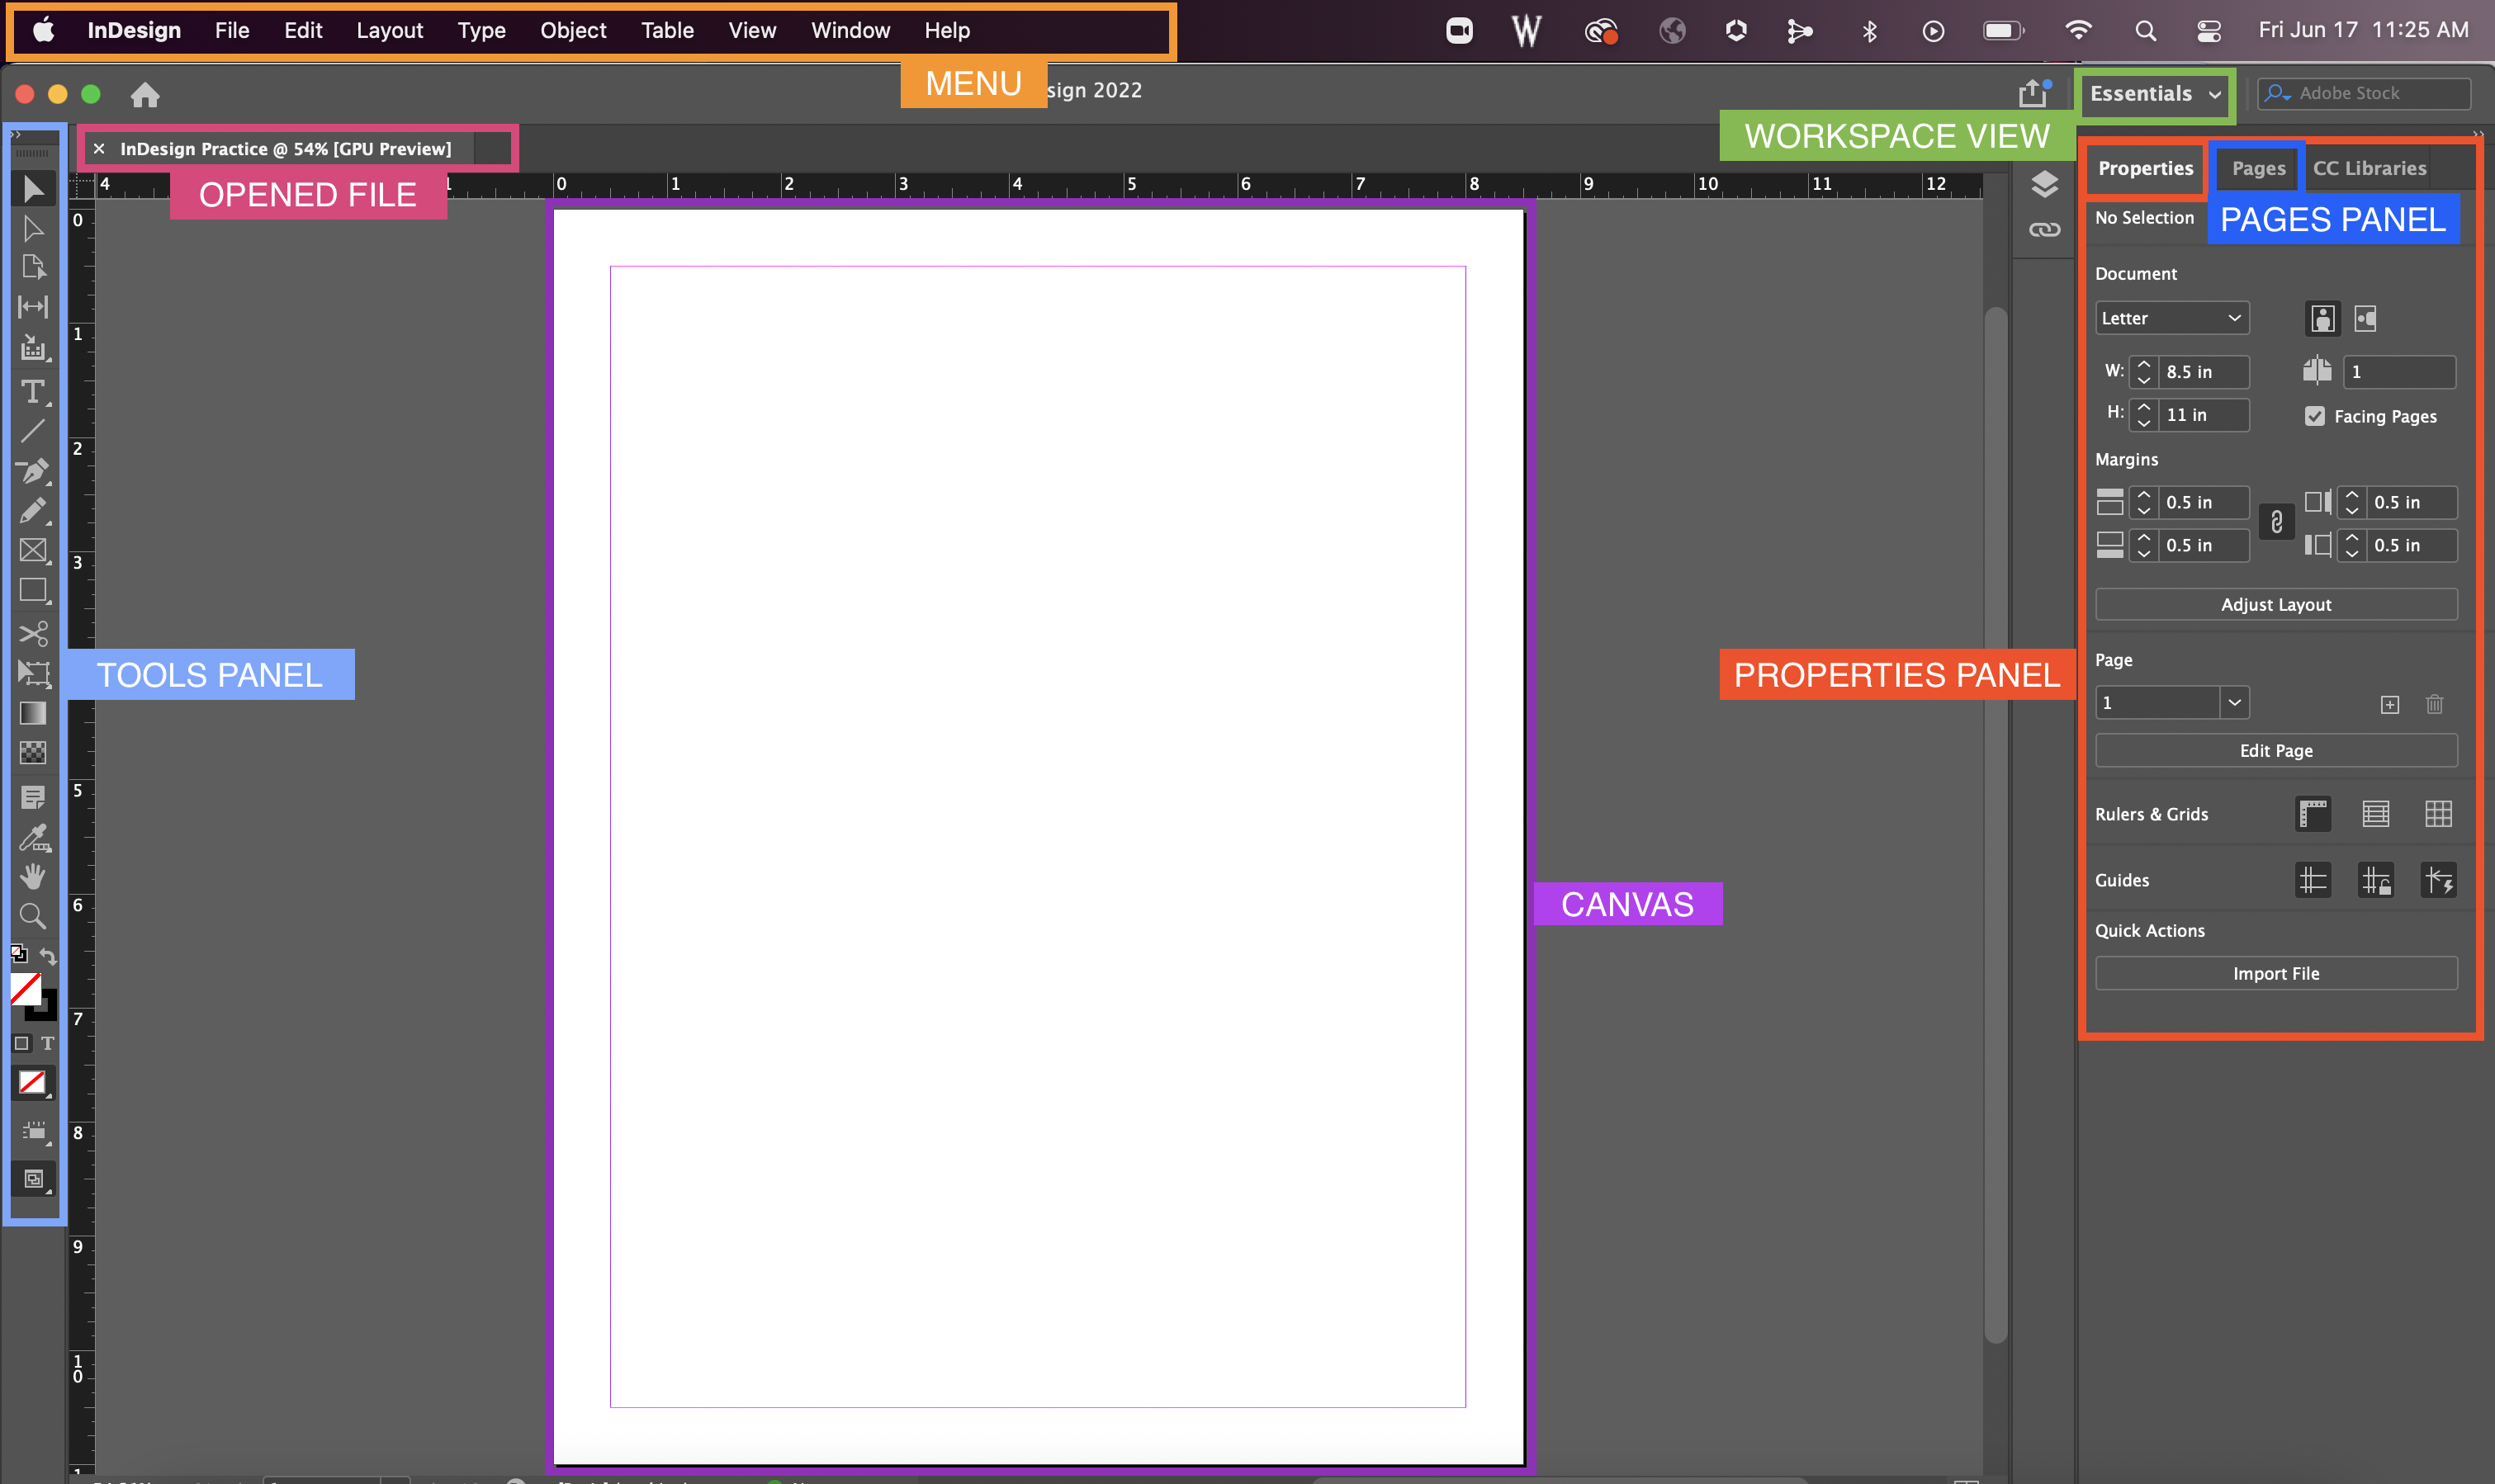
The InDesign workspace includes features common to other Adobe softwares like Photoshop or Illustrator, such as the Tools Panel, Menu, and Properties Panel.
Here we’ll explore the layout of the program itself. The different areas of InDesign are defined and summarized here, so if you get lost later in the manual you can always refer back to this section. The terminology here also applies to other Adobe design software like Photoshop and Illustrator.
Menu Bar
The Menu bar contains File, Edit, Window and other menus. These menus allow you to find and apply more tools and techniques to your project should you need them. We will cover a few of these as needed for our practice project.
The Windows Menu is especially helpful when you need help locating a specific Panel! Just click on this menu and select the Panel you’d like to bring up in your workspaces.
Opened File (Document Window)
After you create a new document or open an existing document in InDesign, it will appear in this area called the Document Window. If you have multiple files opened, each file appears as a tab in this Document Window.
Tools Panel
The Tools Panel contains tools used to create and modify objects on our project. To select a tool, simply click it. Tools with a triangle in the lower-right corner have additional tools hidden beneath them. To display hidden tools, click and hold a tool icon; a drop-down menu showing the hidden tools will appear.
Canvas (A Page)
The Canvas area displays the page(s) that will contain all text, shapes, and images to be saved and/or printed for your project.
Properties Panel
The Properties panel is a one-stop shop for additional tools that may be helpful as you work on your project. If there’s one panel to really get familiar with, it’s this one! This panel changes depending on the current tool or object you are selected on. When selected on just the canvas (page), this panel will give you the options to change your document size, margins, number of pages, and add rulers or guides.
Pages Panel
The Pages panel lets you manually add or remove pages from your project. This is where you can also edit the Parent Pages. Parent Pages are similar to templates, which allow you to add recurring elements (i.e. page numbers, headings, logo) on multiple pages without having to do so manually on each page. For large multi-paged documents, such as a book or magazine, this feature can save a lot of time and energy!
What Happened to the Tools on the Top??

Have you worked with older versions of InDesign? Miss the Control Panel that used to be at the top? The Properties Panel has essentially replaced this with a more effective, less overwhelming list of tools the program thinks would be most beneficial as you work through your project. If you really want the control panel, you can retrieve it from the Windows menu!
Navigating the Workspace
When working on any InDesign project, it is helpful to know how to move around your workspace! Below you will find the tools and keyboard shortcuts to zoom and pan around your project, and more about the Selection Tool.
Zoom Tool
The Zoom Tool allows you to zoom in or zoom out to increase or decrease the document display size. To zoom in, click on the location as many times as you need. To zoom out, hold down the option or alt key and click.

Keyboard Shortcut: Z
If using a trackpad, you can zoom in and out using the standard pinch-in or pinch-out method. Finally, you can also zoom using the following keyboard shortcuts while selected on any tool:
Zoom on Mac
(Keyboard Shortcuts)
Zoom In: command +
Zoom Out: command -
Fit to Page: command 0
Fit to Spread: command + option + 0
Zoom on Windows
(Keyboard Shortcuts)
Zoom In: control +
Zoom Out: control -
Fit to Page: control 0
Fit to Spread: control + option + 0
Hand Tool
Use the Hand tool to pan around Pages/Spread when the document is zoomed in beyond the workspace.

Keyboard Shortcut: Hold the Spacebar while on any tool (except while entering text in a frame). You can also use your trackpad to move around using a two finger dragging motion.
Selection Tool
The Selection Tool is used to select the different objects placed within your pages, such as text frames and graphics. It also allows you to resize and change the positioning of an object. Anytime you want to move around an object within your project, make sure you are selected on this tool!

Keyboard Shortcut: V
Getting Started
Creating a New InDesign File
- Open InDesign
- Click on the blue “New file” button on the left
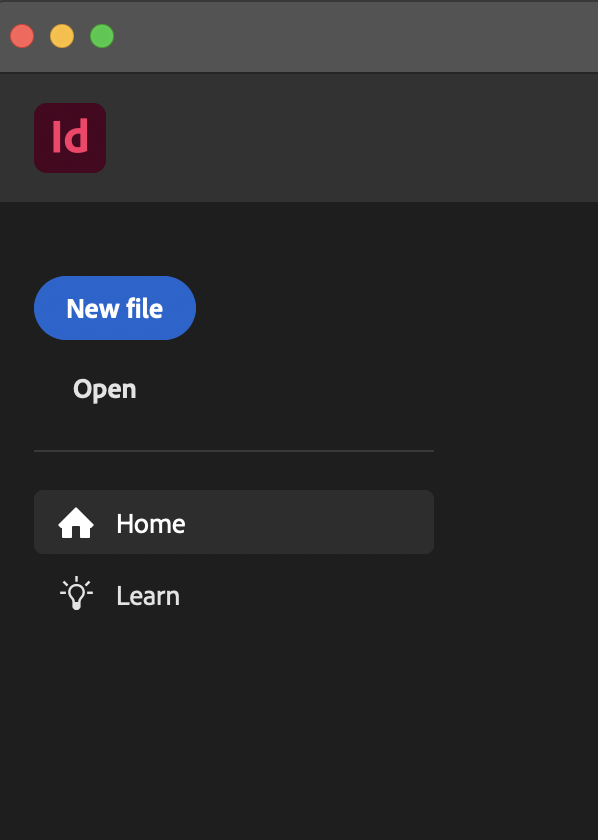
3. From the New Document pop-up, you will have the option to either choose any of the preset document sizes or change the dimensions and settings for your project manually.
Measurements!
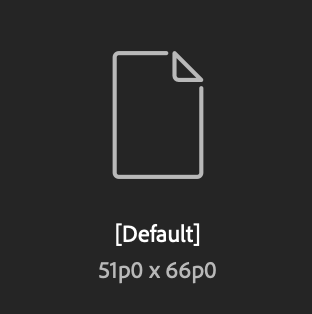
By default, your new project will be measured in picas (p0), a standard unit of measurement often used by graphic designers. However, you will probably feel more comfortable in either inches or centimeters, so make sure you change the units before you begin your project.
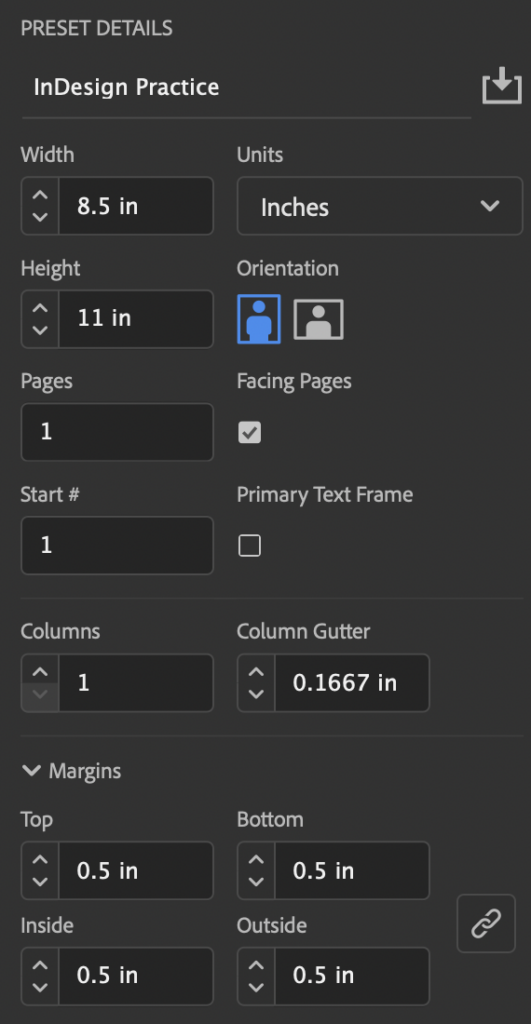
- Name: Remember to name your project something you can easily identify later! By default, it will be named a variation of “Untitled-1”
- Units: This is the unit of measurement used for the dimension you enter. Ensure your unit of measurement aligns with your project guidelines. Remember that 10×10 Millimeters is very different from 10×10 Inches!
- Dimensions: The size of your each page in your InDesign project
- Orientation: Portrait or Landscape
- Pages: Number of Pages specifies how many pages the document will start out with. You can always add additional pages once the document is created.
- Facing pages: Facing Pages makes left and right pages face each other in a double-page spread, generally for print materials like magazines and books. Deselecting this option will allow each page to stand alone, such as when you’re designing flyers or posters.
- Start #: Start Page # is useful for page numbering. It defaults to 1. If you prefer the page numbering to start on 692, for example, you can do so by typing the numerical value in this section.
- Columns: How many sections of content to divide your pages into. The default is 1. Based on your selection, the Column Gutter is the space between sections.
- Margins: The empty space (border) around your pages. The default is .5, but this can be changed to whatever you’d like.
What is Bleed?
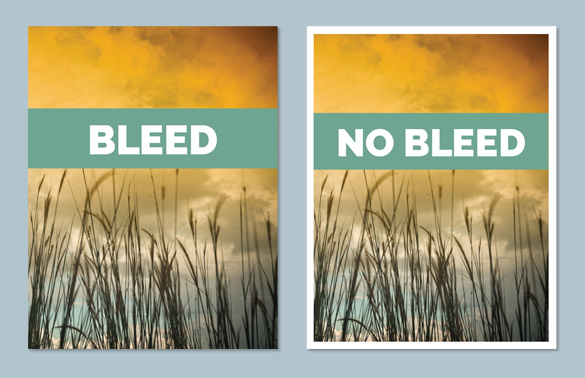
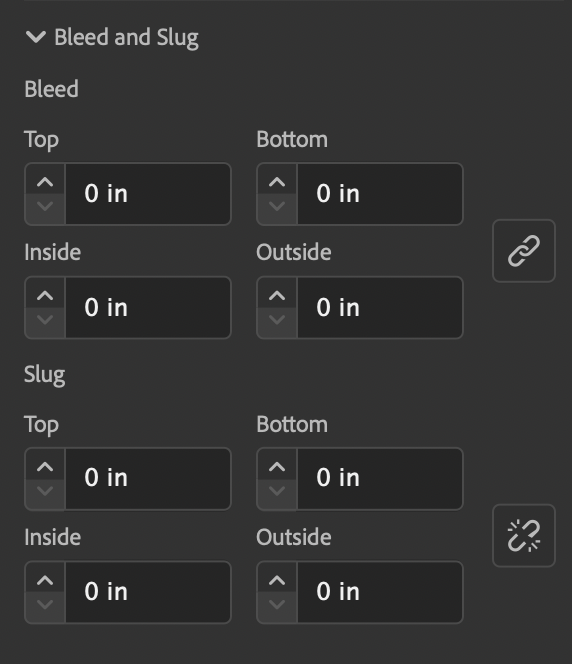
Ever notice how magazines or posters usually have colors extend to the very edge of a page? These projects aren’t just printed like this! Instead, they have to be cut to the correct size! Bleed allows for color to be printed a tiny bit beyond the designated cut line of a project to ensure no white space is kept along the edge of a final project after it is cut to its final size.
InDesign lets you add bleed to your project and is shown by a red line on the InDesign document. Color should extend up to or beyond this line to ensure it is included when printing. If saving your project as a PDF prior to printing, you can easily include Trim Marks to show where your cuts should be made.
Pages
Facing Pages vs Single Pages
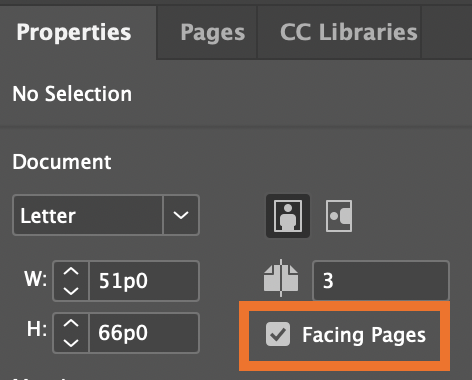
If “Facing Pages” has been checked for an InDesign project, thumbnails within the Pages Panel are aligned along a central bar that indicates the binding or central fold of a spread.
To set up your document for single pages: Go to Properties Panel and uncheck “Facing Pages”.
Adding Pages
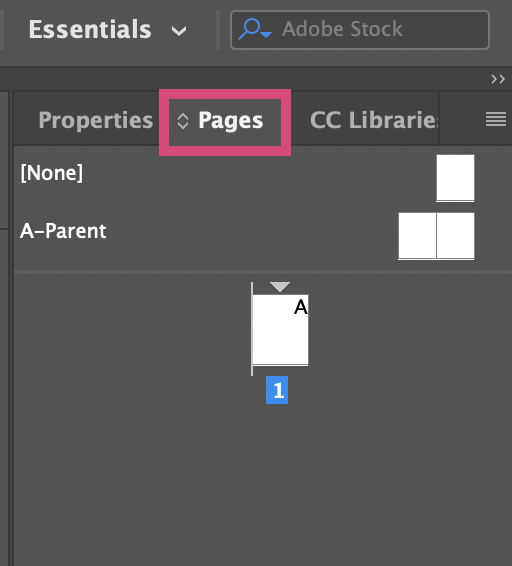
1. To add a page, first click on the Pages Panel on the right-hand side of your workspace (right next to the Properties Panel tab) or you can go to Window > Pages if you do not already see this panel available.
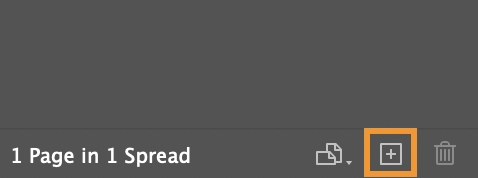
2. From the bottom of the Pages Panel, click the “Create New Page” icon (looks like a square with a plus sign inside) to add as many more pages as you need for your project. For our practice project, we will add 2 pages, so we have a total of 3 pages.
Need to add a lot of pages?
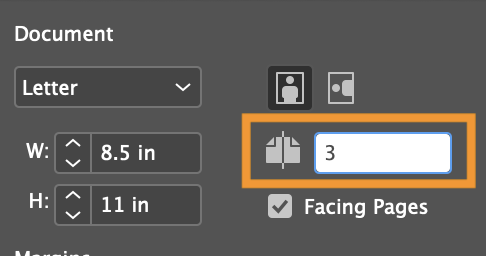
If you need to add more than 10 pages, it may be worth changing the page number from the Properties Panel right above where it says “Facing Pages”. This will save you more time compared to if you add each page manually.
Deleting Pages
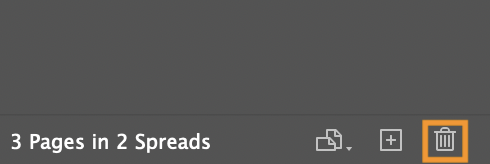
To delete a page, simply click on the thumbnail of the page from the Pages Panel you’d like to remove and click on the icon that looks like a trashbin next to the “Create New Page” icon.Deleting Pages
Moving Pages
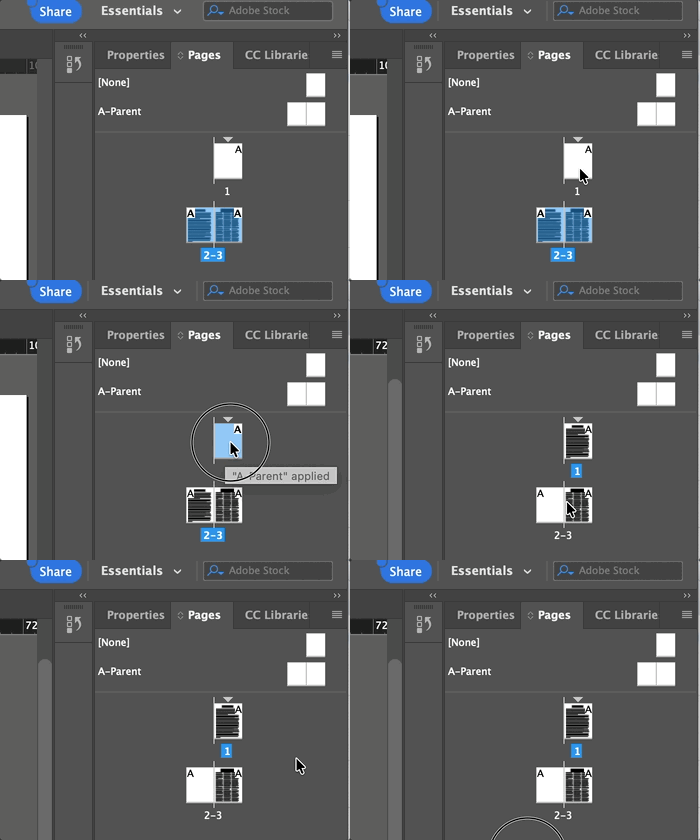
To move a page, simply drag the thumbnail of the page from the Pages Panel to the location you would like it to appear in your project.
What Are Parent Pages?
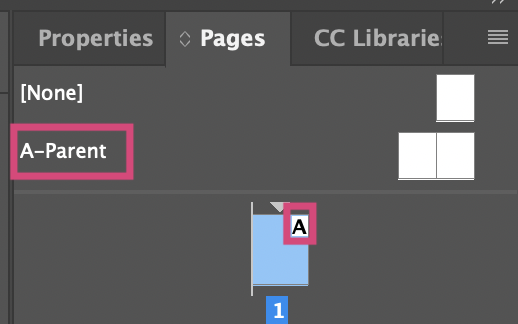
For page-heavy projects, Parent Pages are a crucial tool that saves designers time and energy!
Parent Pages allow you to essentially create a template with specific graphics and text that can be added easily to several pages within your project all at once. An example of these kinds of elements are page numbers, book titles, and chapter titles that appear within pages of many books or magazines.
Parent Pages are found at the top section of the Pages Panel, with a single page named “[None]” and two facing pages named “A-Parent “
Check out the Parent Pages section below for more information and examples!
Organizing Your Project’s Layout: Rulers, Grids, and Guides
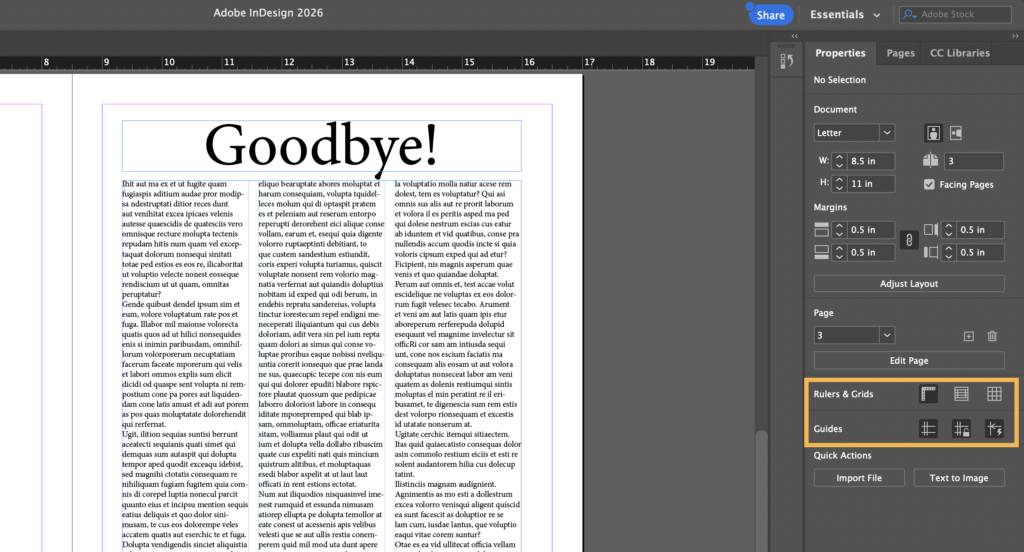
One of the great things InDesign offers is very detailed control over positioning of content. All of these can now be found within the Properties Panel when selected on a page (canvas) in your work area.
Using Rulers
- Click on a page with the Selection Tool (from the work area not the Pages Panel)
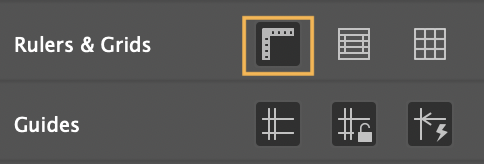
- From the Properties Panel, locate the Rulers Icon
- Click to reveal or hide rulers as needed
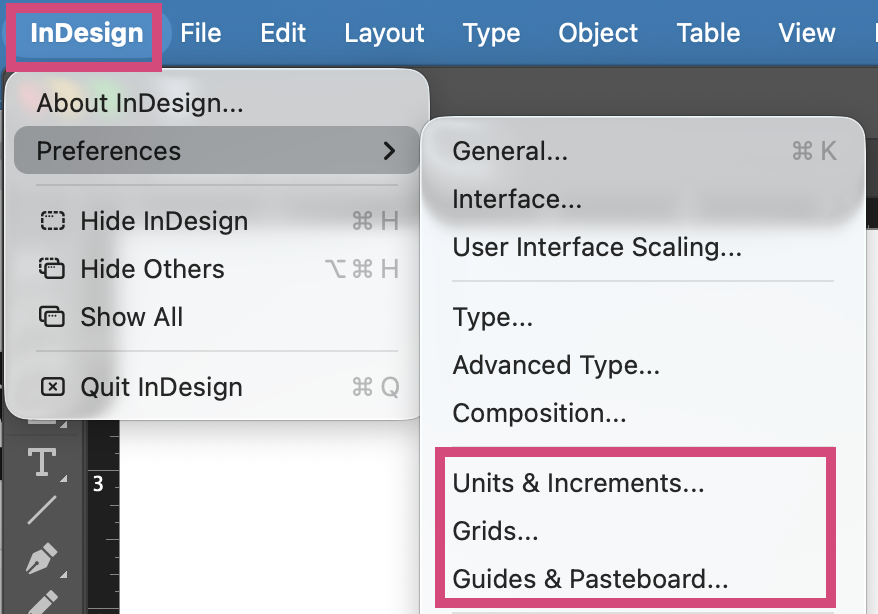
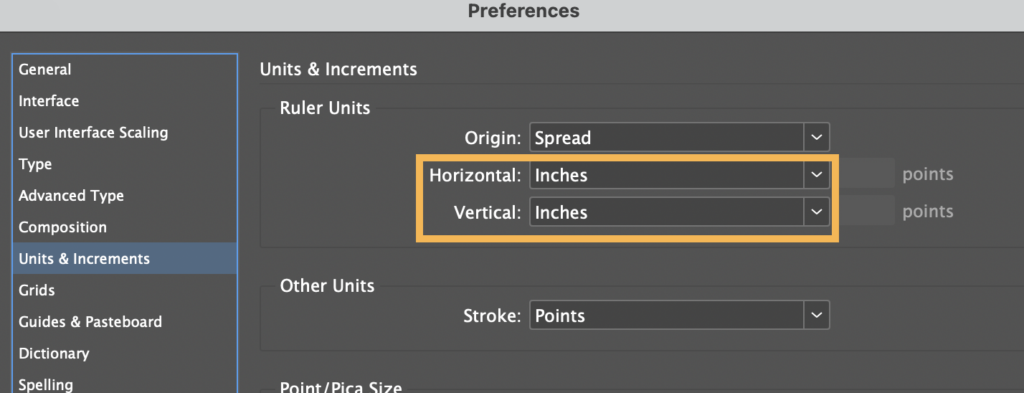
- To change the default units of measurement, go to the Menu Bar and navigate to InDesign > Preferences > Units & Increments
- The Units & Increments Preferences dialog box will appear. Under Ruler Units, change the Horizontal unit of measurement to whatever you’d like from the drop down menu. Do the same for the Vertical unit, and Click OK.
Using the Document Grid
The Document Grid is a tool we can use to locate objects precisely where we want them on the page. It works like traditional graph paper, containing evenly spaced horizontal and vertical lines.
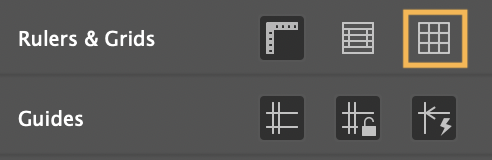
We will use the Grid to place content later, and to create more specific structure using guides. We can also customize our grid. Now we’ll activate and personalize the Grid for our document.
- The Grid is hidden by default. To show the Grid, first click on any page within your project with the Selection Tool
- Navigate to the Properties Panel, and click once on the Document Grid icon (furthest to the right)
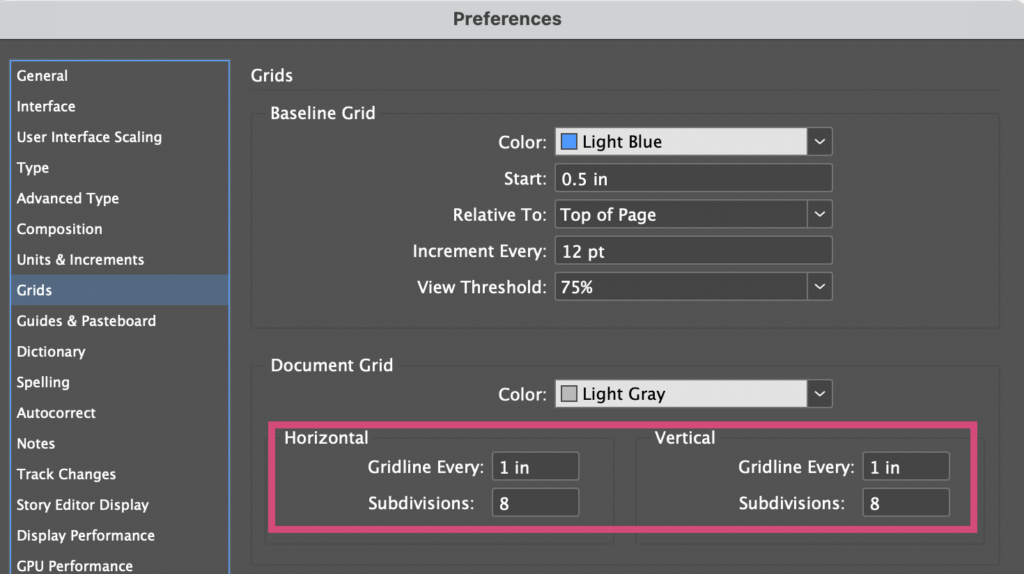
- To change our Grid sectors divisions to inches, navigate to InDesign > Preferences > Grids
- The Grids Preferences dialog box will appear. Under the Document Grid section, change the Horizontal and Vertical grid settings as you see fit.
- Make sure to Check “Grids in Back”.
- Click “OK” and the grid will appear on your document.
Snapping to the Document Grid
When placing objects by eye you can end up with content that looks fine at first glance, but on closer inspection is misaligned. For a clean design we want everything to be aligned correctly on a detailed level. Even slight alignment issues can make your publication look less polished overall.
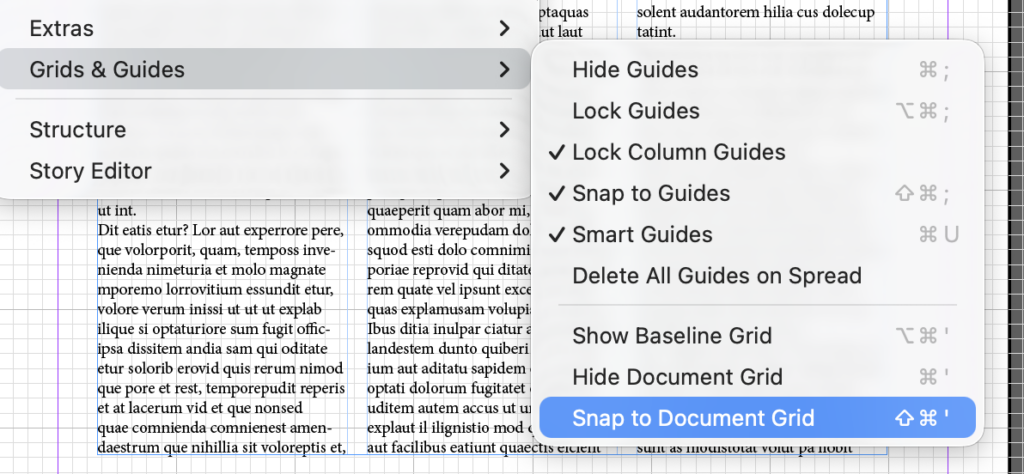
The Grid offers a feature called Snap to Grid which makes it easier to perfectly position objects on the page. When this setting is turned on, you’ll find your content boxes naturally want to align with the closest grid line.
How To: To snap objects to the Grid, go to the Menu Bar and navigate to View > Grids & Guides and select “Snap to Document Grid”.
Working with Guides
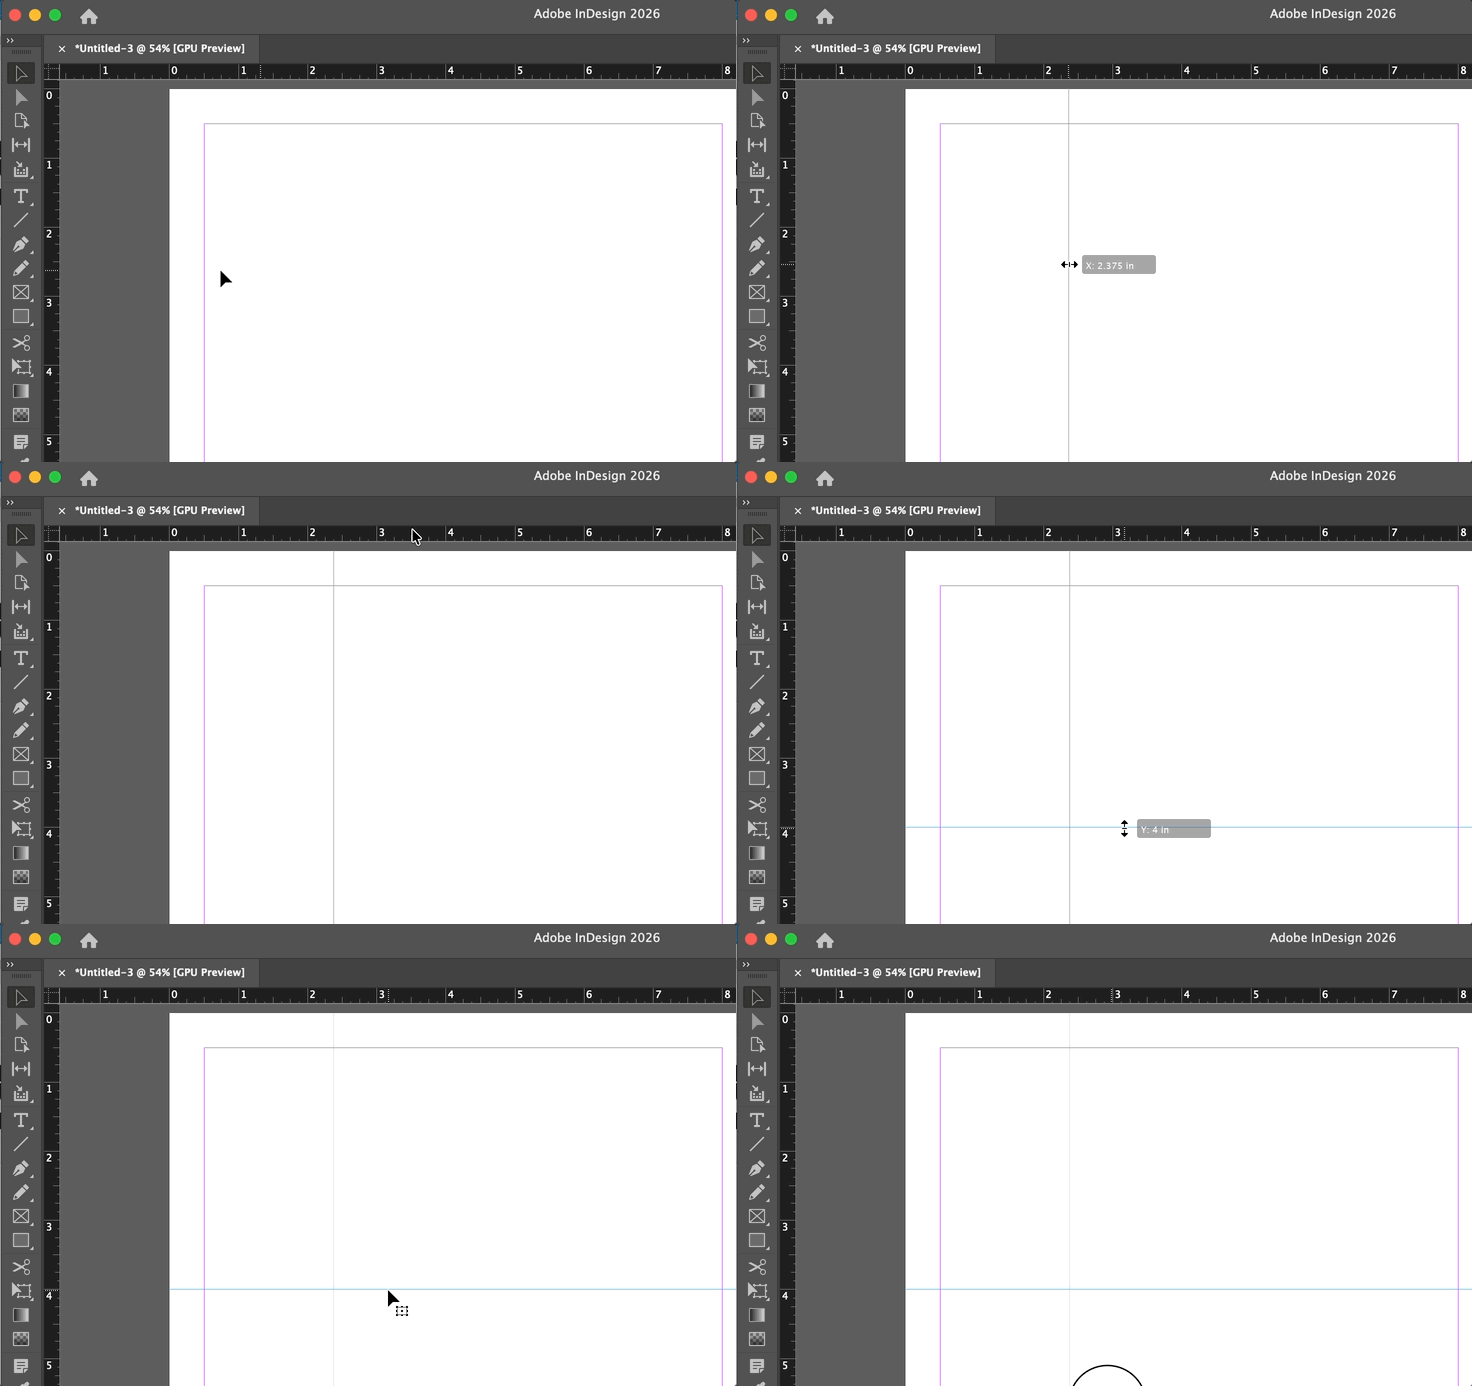
Guides are vertical and horizontal lines that you can create and place individually. These are useful when you want more specific reference lines than those grid provides. We’ll use these to plan the layout for our magazine spread.
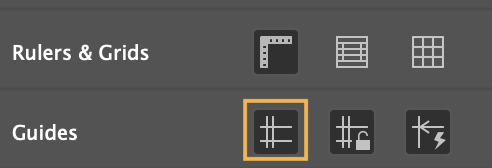
- By default, Guides should be shown. If not, navigate to the Properties Panel and make sure the Guides icon in clicked.
- To create a new Guide, click on the ruler on the top or side of the spread and Drag down into the document. A light-blue guide line will follow your cursor. As you drag, a small gray box to the right of your cursor will display the position of your guideline.
- Guidelines can be moved to specific locations by selecting it first and changing the X or Y position from the Properties Panel
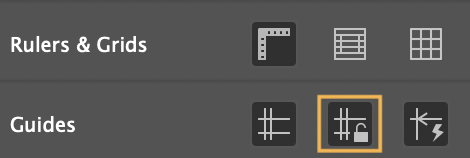
- Once done, lock them to avoid accidentally moving them. To lock your guides, navigate to View > Grids & Guides > Lock Guides or click on the Lock Grids Icon from the Properties Panel
Preview Mode
Preview Mode allows you to see your project without any of the guides. Guides (pink and blue borders) aren’t printed and are there rather to help you align your work within your document. You can go into “preview mode” by simply clicking “W” on your keyboard. Just make sure you aren’t in an active text box!
Adding Images with Frame Tools
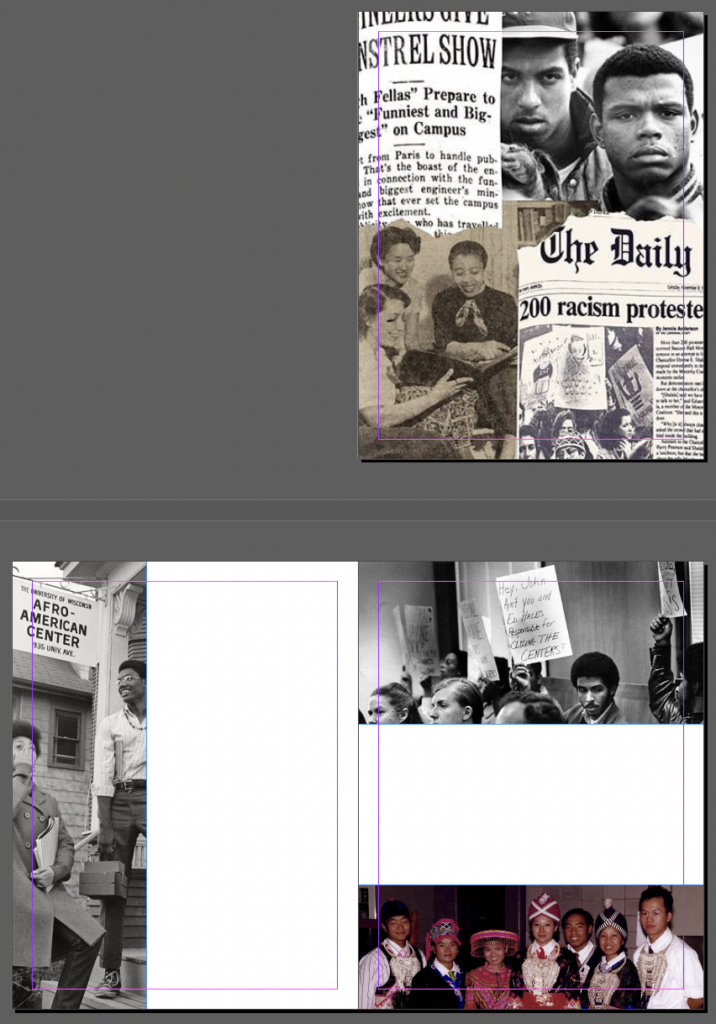
Frame tools allow us to create placeholders for graphics we’d like to eventually add to our InDesign project. While it is not required to use frame tools within a project, it does help organize a layout!
Similar to a picture frame, InDesign frames have specific dimensions within a project. If we import a graphic that is too small or too large for the frame, it will need to be resized within the frame as necessary.
Frames come in a variety of shapes, but we will focus on the Rectangle Frame Tool for our practice project, which appears within the Tools Panel by default. Other shape frames can be revealed by clicking and holding down on the Rectangle Frame Tool icon from the Tools Panel.
Rectangle Frame Tool
The Rectangle Frame tool allows you to create rectangle and square frames to act as placeholders for your project’s images and graphics.

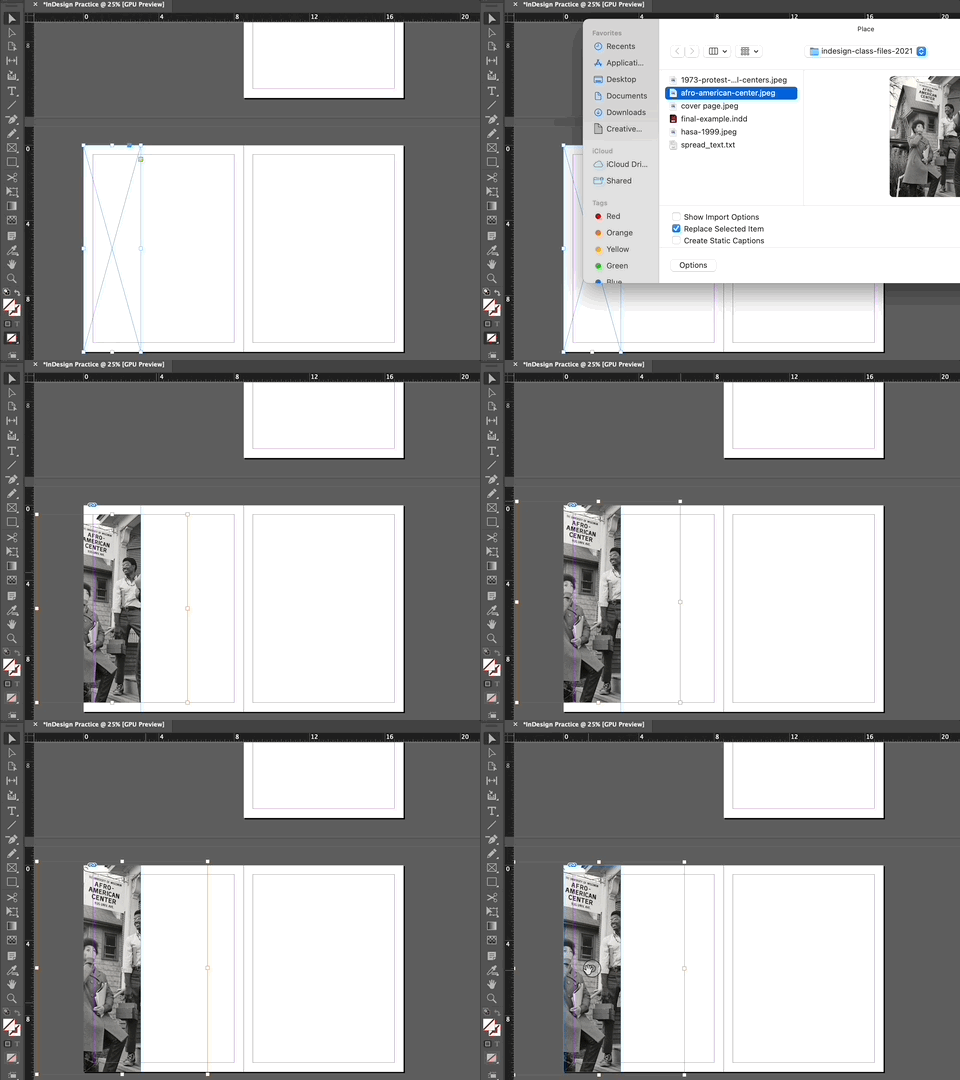
1. Creating a Frame: Click and drag to create a frame of your preferred size. You can rescale by dragging any of the corners as needed while on the Selection Tool.
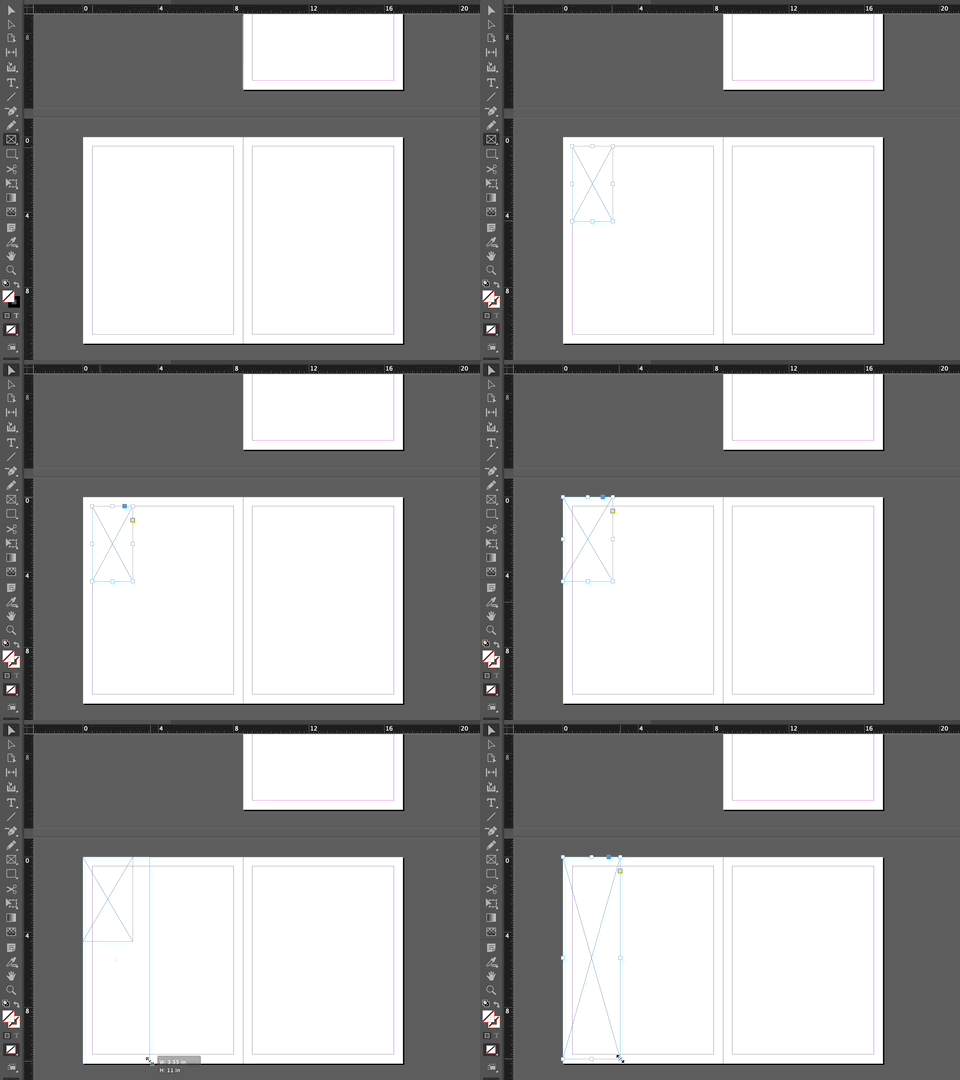
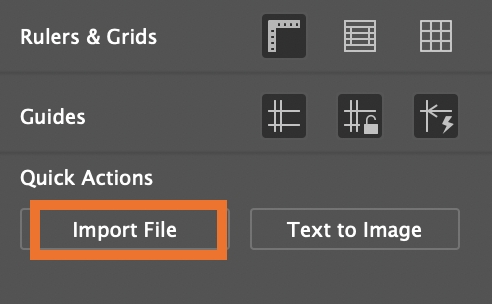
2. Importing an Image: To add an image within an existing frame, first select the frame and then go to the Properties Panel. From here, click on the “Import File” button at the very bottom of the panel. Locate the image you’d like to use.
Files We Import Are References NOT Copies!
It’s very important to know that any time we Import a file to our InDesign Project, we are NOT making a copy of it. Instead, we are creating a reference to the file that lives on the computer we are working on.
This means that if the original file on your computer is deleted, your InDesign project referencing that image will show a red “Missing Link” icon indicating it cannot reference or find the file. If this happens, you will need to save the file to your computer again and relink it.
InDesign may still save a temporary visual of your media if it’s missing, but you will need to relink to ensure saving and exporting works as intended.
3. Resizing & Moving Image: If you need to resize or move the image within the frame, go to the Selection Tool and hover over the center of the frame to reveal a circle. Click once on the circle to reveal the boundaries of the image within the frame. Click and drag the corners of the image as needed to resize. To keep the proportions of the original image, hold down the Shift key while dragging the corners. To move the image within the frame, click and drag the middle donut circle to the desired position.
Changing A Frame’s Appearance
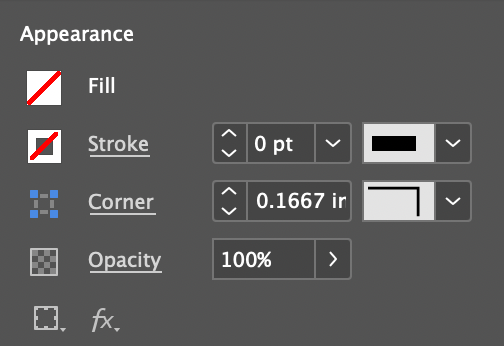
Did you know you can adjust a frame’s fill, stroke, corner, opacity, and even give it some effects (fx)? Just select the frame with the Selection Tool and from the Properties Panel, adjust any of the options under Appearance!
Note that for the Stroke and Corner options, you can change its appearance from the far right drop-down menus.
To apply effects, click on the “fx” word and you’ll see a list of options to choose from.
Working With Text
Learning to work with the various text tools and settings is important for any and all InDesign projects!
Type Tool

Use the Type Tool to create new text frames or to edit text in existing frames.
To create a text frame with the Type Tool, simply click and drag a box anywhere on your project and begin typing. You can adjust the text frame size with the Selection Tool and change the font and size via the Properties Panel.
Shortcut: T
Formatting Type
When highlighted on text within a text frame (double click if on Selection Tool), the Properties Panel reveals tools to format our text beyond the default settings.
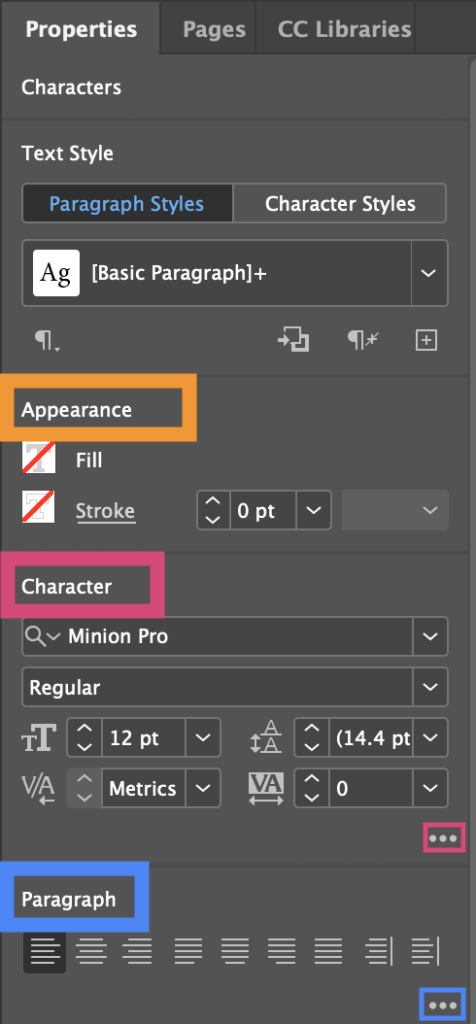
When working in a text frame, the Appearance, Character and Paragraph options allow you to format highlighted text differently within that frame. Note that these options will only appear within the Properties Panel if text is highlighted within a text frame.
Appearance
Appearance controls font color (Fill) and font border color and thickness (Stroke).
Character
Character controls things like font face and size, tracking, leading, and kerning. You can click on the three dots near at the bottom of this section to see more Character options.
Adjusting Text Spacing in InDesign
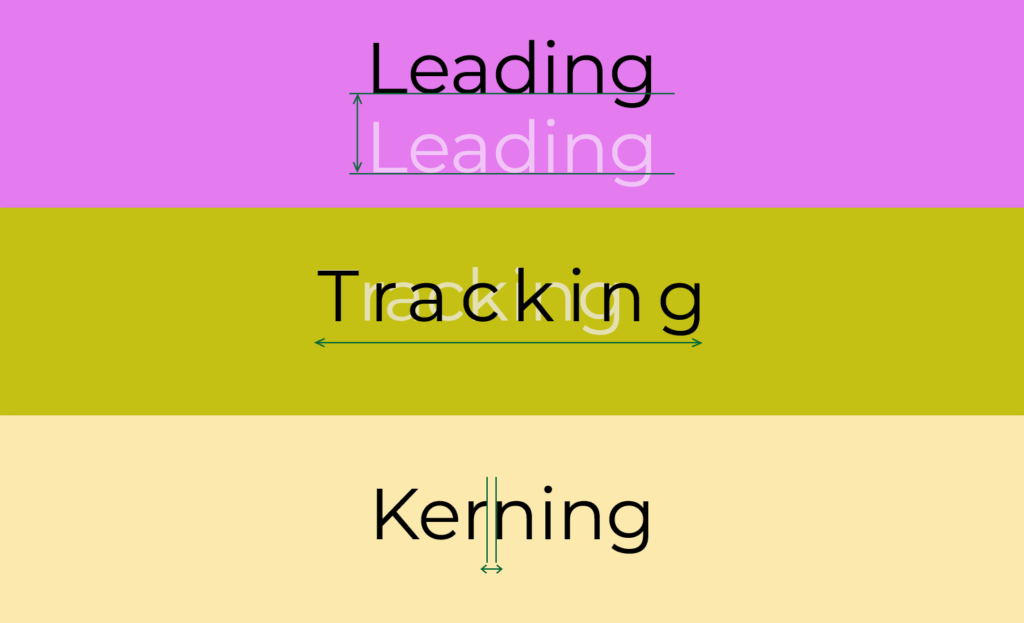
While the default text spacing is usually good enough for most projects, InDesign does provide tools to make further text spacing adjustments within the Character area of the Properties Panel. For each of the adjustments below, you will have to make sure to highlight the exact text you’d like the adjustments to apply to.
Tracking
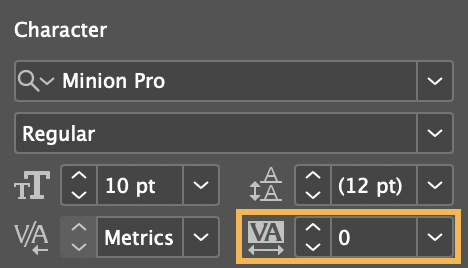
Tracking adjusts the letter-spacing throughout a line or block of text. The default setting for body text is usually fine, but larger display text may need to be adjusted.
Kerning
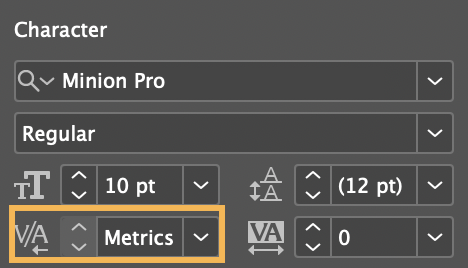
Kerning is the spacing between individual characters. You might use this to remove unnecessary white space between two characters.
Leading
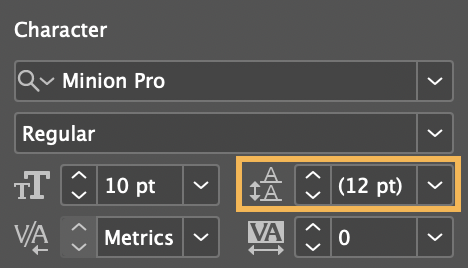
Leading adjusts the space between lines of text. The larger the leading size, the larger the space between lines of text.
Paragraph
Paragraph options include features like alignment, indentation, and spacing between paragraphs. You can click on the three dots near at the bottom of this section to see more Paragraph options.
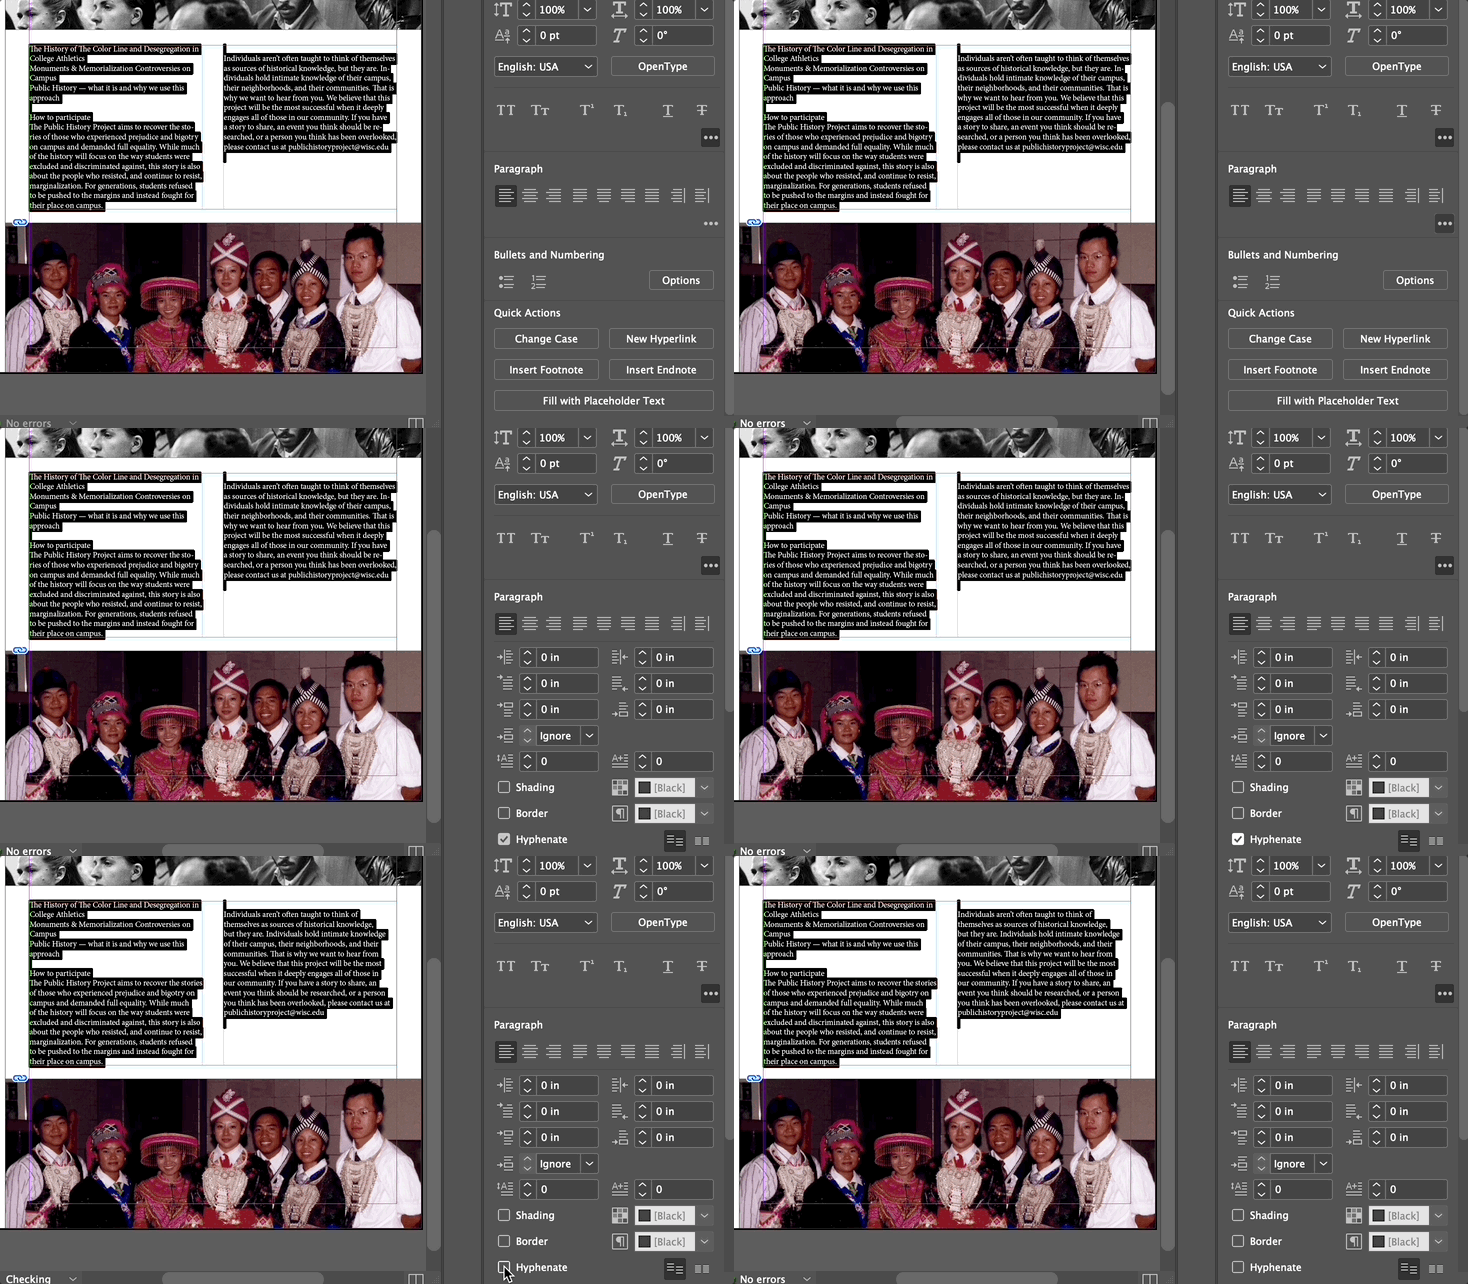
Turning off Hyphenation
By default InDesign hyphenates words that are too long to fit on one line. However, from a design standpoint, it looks better if the word is simply bumped to the next line instead of hyphenating.
- While on the Type Tool, highlight the text you want to remove hyphenation from.
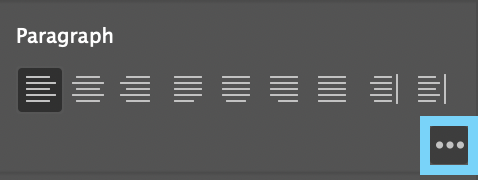
- Go to the Paragraph options within the Properties Panel and click on the three dots at the bottom to reveal more options.
- Navigate to the checked Hyphenate box and uncheck the box to turn off the hyphenation.
Adding First Indents to Paragraphs
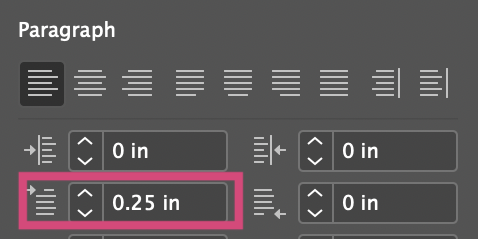
A well-designed body of text includes clear indicators of the beginning and ending of paragraphs, and often some white space between them. The example below shows a paragraph with first indent of .25 inches.

1. With the Type Tool, highlight the paragraph text
2. Go to the Paragraph options within the Properties Panel and click on the three dots at the bottom to expand options so it looks like the image below
3. To add a first indent, you’ll need to change the “First Line Left Indent field” from 0 to something higher, usually .25 in is a good amount but it will depend on the project.
Adding Spacing Between Paragraphs
Good paragraph separation looks less intimidating to the reader, makes your text easier to read, and separates your ideas visually. Below is an example of a paragraph with .125 spacing automatically added at the end.

1. With the Type Tool, highlight the paragraph text
2. Go to the paragraph options within the Properties Panel and click on the three dots at the bottom.
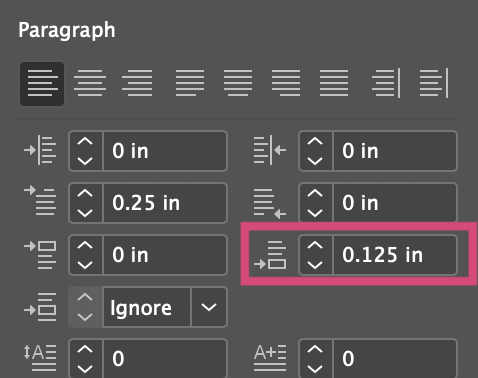
3. To add space after a paragraph, in the “Space After” field of the Paragraph options, change it from 0 to a higher number, usually .125 in is a good amount but it will depend on the project.
Text Frame Columns
In addition to modifying font color, font size, and paragraphs, InDesign allows us to modify the number of columns within a text frame. By default, there will be one column per text frame, but this can be changed from the Properties Panel.
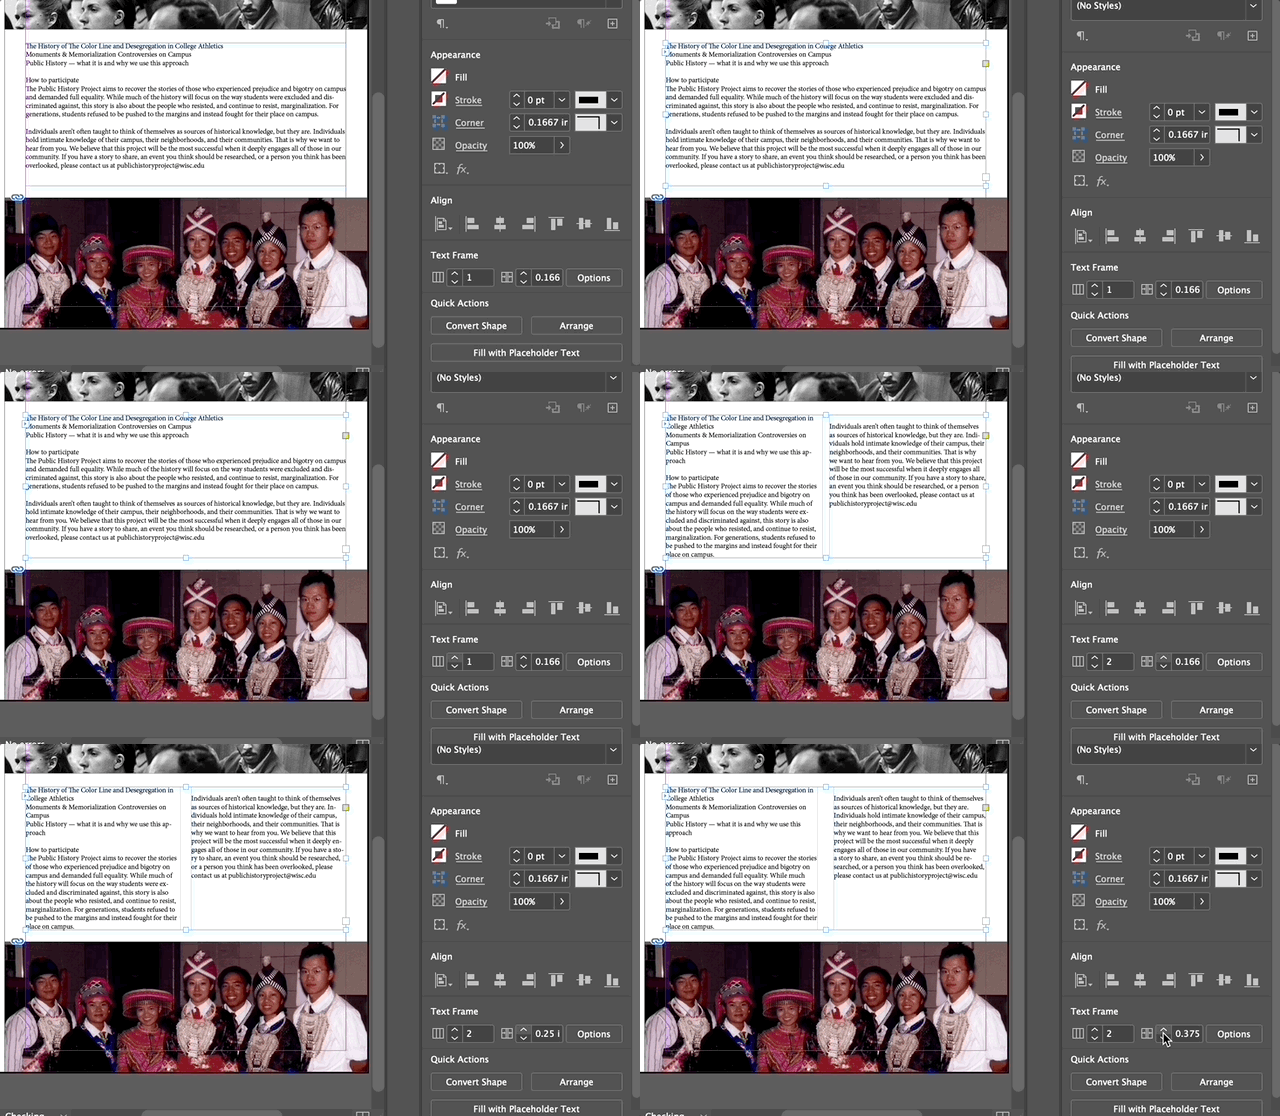
1. With the Selection Tool, select a text frame by clicking on it once (do not highlight any specific text)
2. From the Properties Panel, scroll down until you see Text Frame
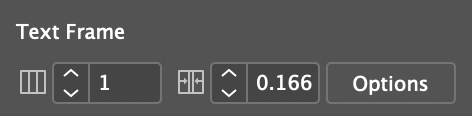
3. In the first box, change the number to update the columns within your text frame
4. You can also change the spacing between columns in the next box
Text Flow (Linking Text Boxes)
Text Flow allows the text in our document to flow from one text frame to another without having to make or adjust each text frame every time you edit the text. You can set-up your text frames on InDesign to be ready to have text flow between frames by “linking” them:
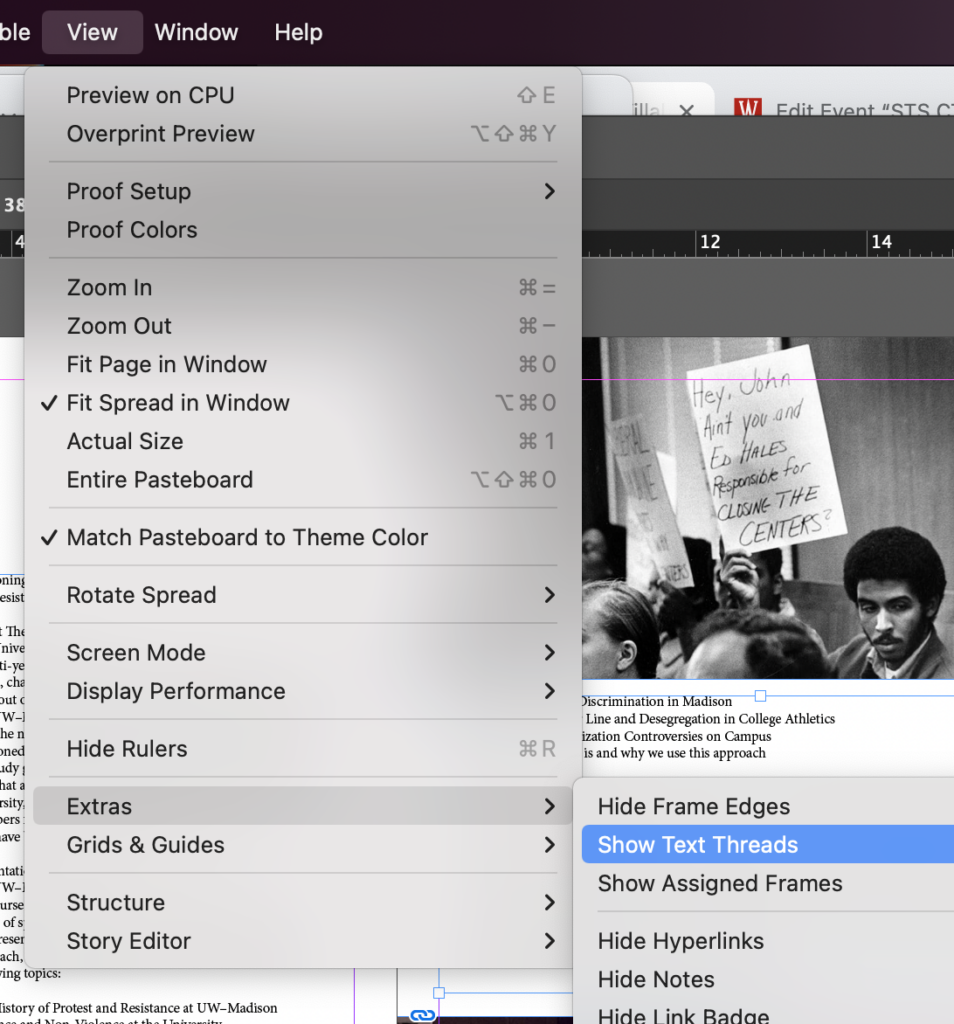
Optional: From the top menu options, go to View > Extras > Show Text Threads. This will give you a visual as to what text frames are linked in what order. You can turn this off at any point you are comfortable.
2. Create as many text frames as you need for your project layout.
3. With the Selection Tool, click once on the white square on the lower-right border area of the text frame.
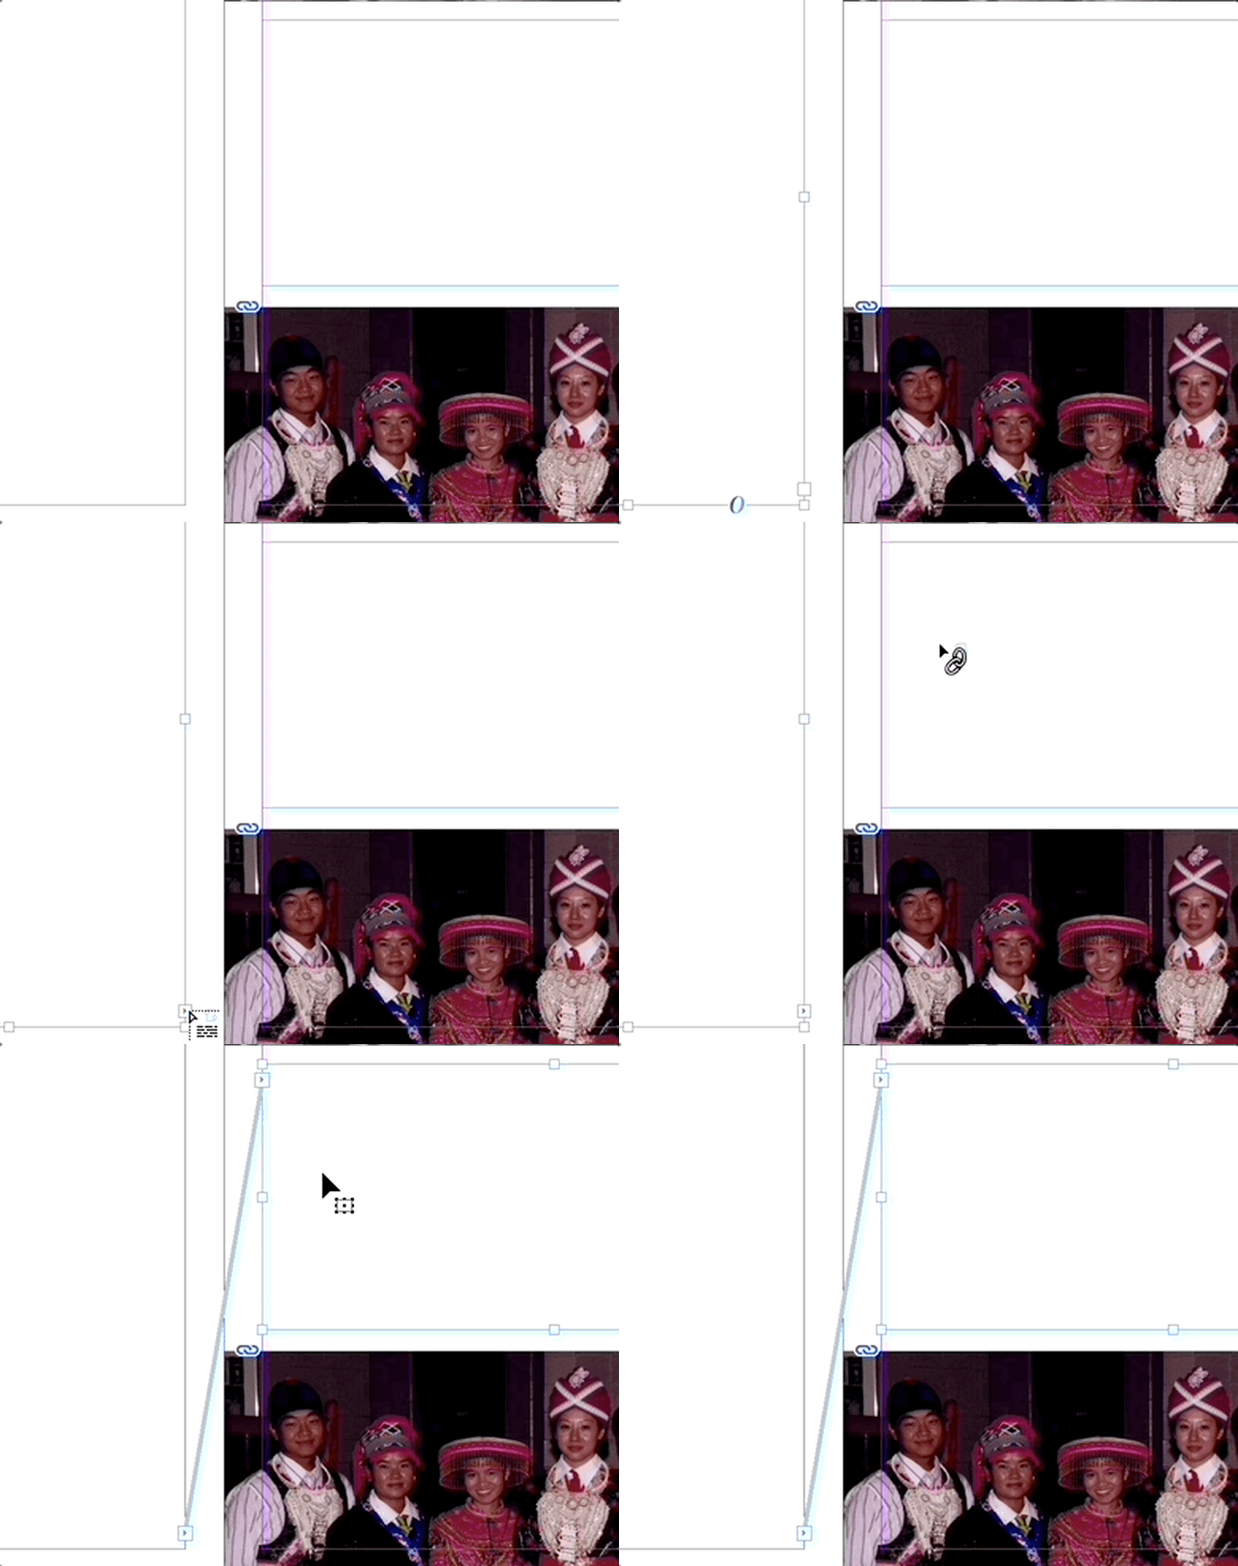
4. After this, click once on the text frame you’d like text to flow to. Repeat this process between all your text frames in the order that makes sense for your project. These text frames are now linked and will allow text to flow between them.
5. To unlink text frames, complete the exact same steps you followed originally to link them – click on the white square and then click on the next text frame.
Overflow Text Warning
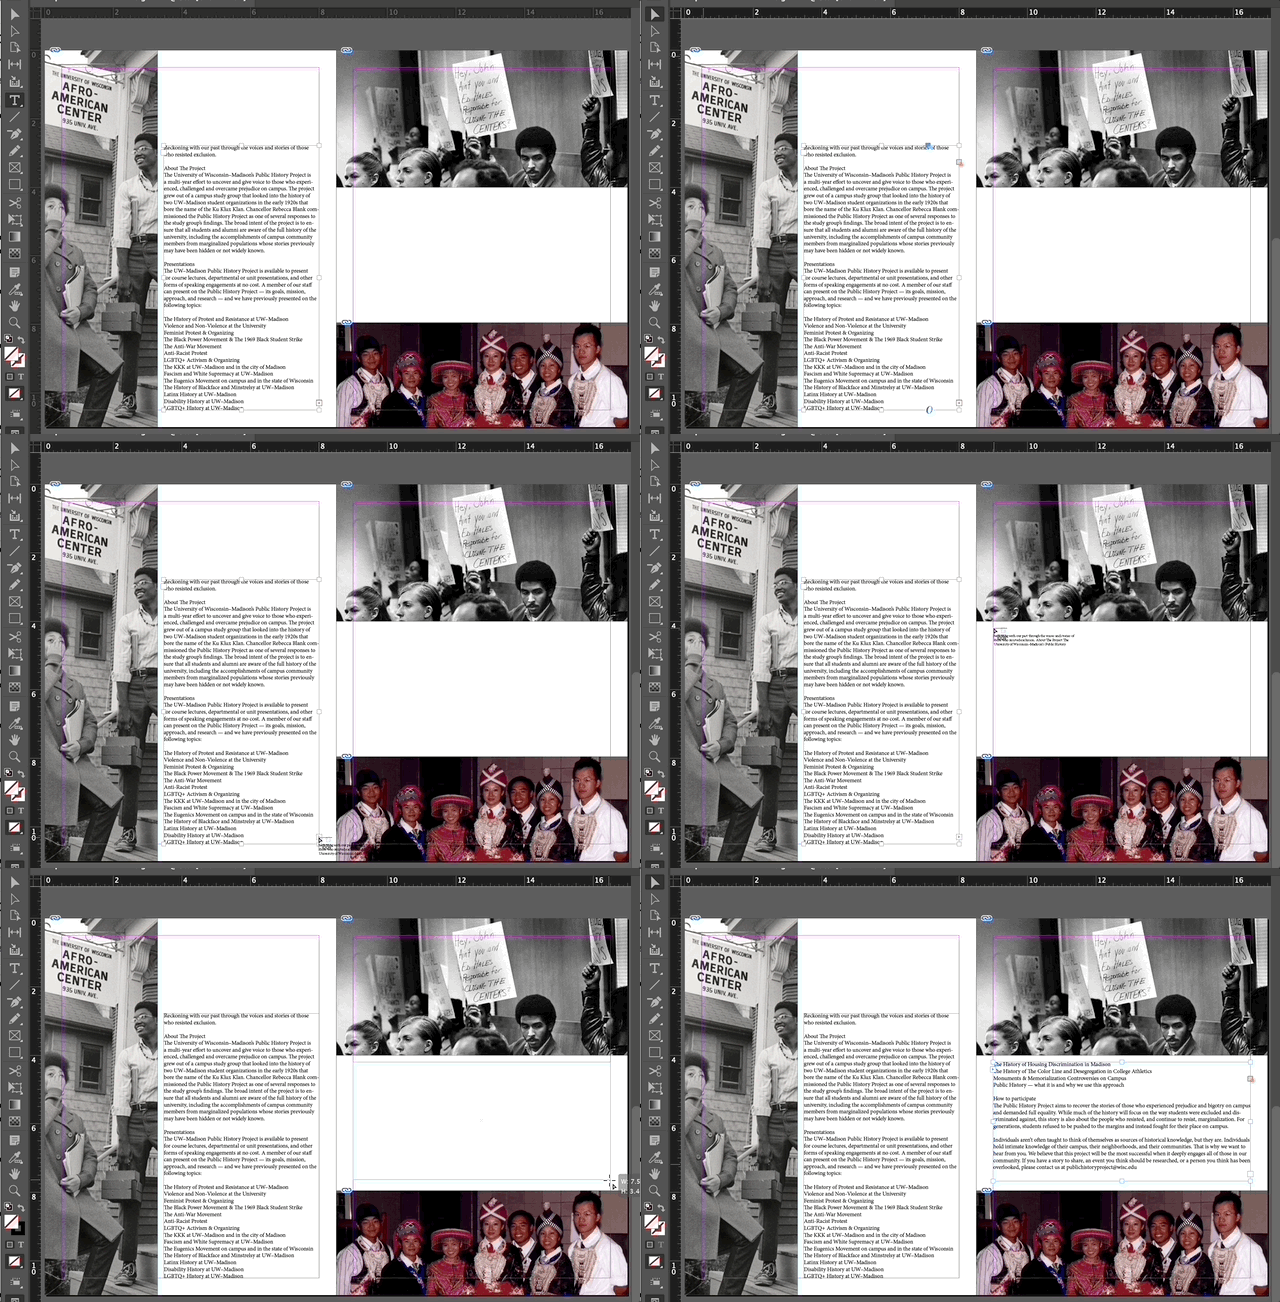
A text overflow warning appears when you add text to a text frame that is too long for the text frame size. This visual tells us “hey there is more text here that is hidden!”. To get rid of this warning and reveal more of our text, either make the font smaller, make the text frame bigger, or have the text flow into a new text frame. To update the text flow after adding too long of text to a text frame:

- With the Selection Tool, click on the small square with the red cross in the bottom right-hand corner of the text frame.
- This will load your cursor with the overflow text. Now when we place a text frame in another location on the spread, this text will flow into it. Create a text frame anywhere on your document layout. These text frames are now linked and will allow text to flow between them.
Create, Apply, & Update Text Styles
Text Styles are collections of settings that can be saved and then applied to future text content. This can save a lot of time and help to keep the design consistent, especially in a very page-heavy projects! Text styles are great if your project will have lots of headings and paragraph text that will need to be consistent in size, color, and font throughout the entirety of the project.
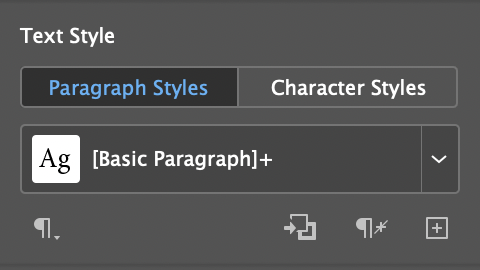
- Paragraph Styles which affect paragraphs of text and include things like indentation and spacing (but can also include fonts, colors, etc.) Paragraph styles affect all text within a given paragraph (aka any text between hard line breaks where you’ve hit Enter/Return)
- Character Styles which affect spans of text within a paragraph and can include things like font face, style, color, etc. A character style affects whatever text is highlighted at the time it is applied.
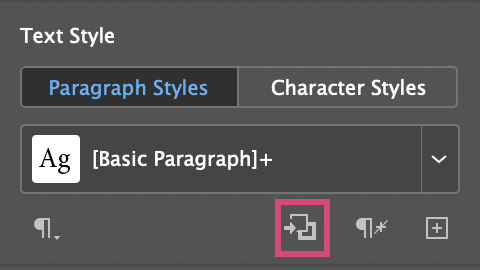
Any time you see a small plus sign + next to a style name, that means that object has the current style applied but at least 1 setting has been changed from the default style.
Working with Paragraph Styles
1. Highlight the text you would like to add a style to and adjust the font, size, color, and spacing as you wish from the Properties Panel to reflect your new paragraph style.
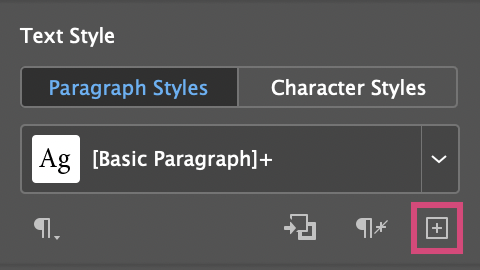
2. Within the Properties Panel, under the ‘Text Style’ options, click on the ‘New Paragraph Style’ Icon (square with a plus sign). InDesign will automatically name the new style “Paragraph Style 1” but you can change the name right away while it is still highlighted.
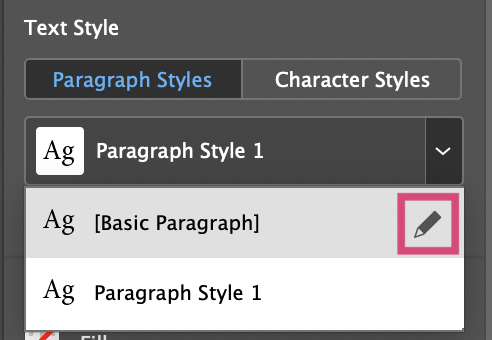
To rename a style after it is no longer highlighted, click on the drop-down menu from the Text Style options and click on the pencil icon next to the Paragraph Style name you want to update. From here, update the name from the dialog box that appears.
3. Applying a Paragraph Style: To apply this new style to other text, with the Type Tool selected, highlight subsequent sections of text and click on your new Paragraph Style from the Properties Panel to apply our new style to it.
4. Updating a Paragraph Style: To make an update to an existing Paragraph Style, simply highlight text that has the style, make your changes, and then click on the first icon at the bottom of the Text Style section that says “Redefine Style” when hovered over it. Notice how all other paragraphs with that applied style change automatically based on the updates made!
Creating Basic Shapes and Lines
Similar to Adobe Photoshop and Illustrator, Adobe InDesign allows us to add shapes and lines to our project.
Adding Shapes (Rectangle Tool Example)

Shape tools such as the Rectangle Tool or Ellipse Tool can also function as frame tools, but it is a better practice to use them for color rather than image containers. To see all the shape tool options hold down your click on the Rectangle Tool.
To create a rectangle with the Rectangle Tool, simply click and drag on your document. Change the Fill and Stroke color/thickness from the Properties Panel to whatever you’d like. Resize using the Selection Tool.
Similar to Frame tools, you can also change the Opacity, Corners, and add an Effect from the Properties Panel to give the shape a different look.
Shortcut: M
Creating New Shapes with the Pen Tool and Pencil Tool
If you need to create a specific shape or line that the available shape tools don’t provide, you can opt to use the Pen Tool or Pencil Tool to do just that!
Pen Tool

To use the Pen Tool, click once to activate it and keep clicking on other points to create straight lines, or drag to create curves.
Pencil Tool

Working with Parent Pages
Parent pages help to create consistent publications without having to recreate all the fixed elements on each page. When working with projects with many pages, like books or magazines, it may be helpful to use Parent Pages to apply recurring page elements, such as headers, footers, and page numbers quickly, instead of manually adding them to each page.
Within the Pages Panel, at the very top there is a section labeled [None] and A-Parent. These are the Parent pages available for every InDesign project and by default, all pages have the A-Parent page applied. A Parent Page is essentially a template that we can edit and apply to multiple pages within a project to ensure certain objects or elements appear consistently. Any changes made to the Parent Page will automatically update any project pages it has been applied to.
Instead of manually adding a page number to each page in our project, we can create a footer in a Parent page with a page number that dynamically updates depending on the page of the document. Footers are simply text frames that are located at the bottom of Parent pages.
Adding Automatic Page Numbers with Parent Pages
We will add page numbers to our document using Parent Pages. Open the Pages Panel in the Panels Dock or navigate to it in the Menu bar: Window > Pages.
- In the Pages Panel, Double Click on the left side of the A-Spread Parent to center and fit the left Parent Page in the document window.
- Open the Layers Panel. Create a new layer called “Parent”. Putting our page numbers on this layer – and putting this layer on top of the others – will ensure that they appear above the elements we have already created.
- Select the Type Tool from the toolbar and Click and Drag out a text frame near the bottom-left corner of the left page.
- To enter a dynamically updating page number, right click inside the text frame and navigate to:
- To format your page numbers, highlight the letter “A” and navigate to the Properties Panel.
- Select the text frame, Copy the frame: Edit > Copy or Command+C To paste the frame: Edit > Paste or Command+V
- With the selection tool selected, click and move the text frame to the bottom-right corner of the right page in the spread.
Double Click on the document spread to see the page numbers on your project!
Saving, Exporting & Packaging
Saving as an InDesign File
It is important to save your project as an InDesign file so you can come back to it at a later time and keep all your updates. Saving as an InDesign file will only allow you to open a project on a computer with InDesign and is not recommended to share your final project to others with.
- From the top menu bar, go to File > Save As…
- From the pop-up that appears, change the file location and project name as needed, and select ‘InDesign [Current Year] document’ as the file format.
- Click Save.
- As you work on your project, keep saving your project via Command + S, Control + S, or File > Save.
Exporting as a PDF
Exporting your InDesign project as a PDF will be the best option for you to share your work with others digitally or print it to share with others in physical form. To do this, simply follow these steps:
- From the top menu bar, go to File > Export…
- From the pop-up that appears, change the file location and project name as needed, and select ‘Adobe PDF (Print)” as the file format.
- Click Save. A PDF settings box will appear – we recommend you leave the default settings unless you are told otherwise by your assignment.
- Click Export
Working from Multiple Computers??
When handing off your InDesign file to a printer or to a project collaborator, they will also need all fonts and linked graphics used in the document. InDesign can do this for you by Packaging the file. When you package a file, InDesign creates a folder that contains the InDesign document, any necessary fonts, linked graphics, text files, and a customized report.
Before packaging you’ll want to make sure that all of your links are correct. We’ll learn how to fix broken links, and to use InDesign’s preflight tool to check for any issues.
- To package your document, go to Menu bar File > Package
- A dialog box will appear showing the details of the document. Click “Package..”. Click “save” to save the file if prompted.
- Select a folder you’d like as the location for the packaged folder.
- Keep all default checked settings as is
- Click the “Package” button. You have now created a single folder with all your images, links, and project files!
Additional Tools and Resources
Downloading Fonts
Choosing the right font can transform your design, whether it’s for titles, bold text, or clean body copy. Although Adobe provides a wide range of fonts, sometimes it can be helpful to download other fonts! Below are great websites and videos to get you started.
Free Font Websites:
- Google Fonts →https://fonts.google.com/
- DaFont –> https://dafont.com/
- Velvetyne → http://velvetyne.fr/
- Fontshare → https://www.fontshare.com/
- TypeType → https://typetype.org/freefonts/
- Open Foundry → https://open-foundry.com/fonts
- Use & Modify → https://usemodify.com/
- Behance (some are free) → https://www.behance.net/search/projects?search=free+font
How To Install Fonts:
Watch the videos below to learn how to download and install fonts on either Mac or Windows. After a font is installed, it should automatically appear as a option from the drop-down menu from the Character are of the Properties Panel when text is highlighted.
Working with Layers in InDesign
Similar to Illustrator and Photoshop, Layers in InDesign provides a way to organize the various elements added to a project. By default, all projects have one Layer per spread (either 1 non-facing page or 2 facing pages) to which sublayers are created for every element you add.
You can think of layers as a stack of transparent sheets. You can add as many layers as you need to stack your content. You can reorder and rename layers, hide them, and lock them. Layers is especially helpful when you are working on a very long InDesign project where it will be helpful to lock certain layers or hide elements. If you are working on a project with few pages, Layers may not be super necessary to work with.
Compared to Illustrator or Photoshop, however, Layers in InDesign appear a little differently depending on what page or spread you are selected on. If you add a New Layer to one page/spread, it will appear as a new empty layer for all pages/spreads. However, all sublayers (created when objects are added to a page) are specific to whatever page/spread you are selected on.
Using the Layers Panel
First, locate the Layers panel in the Panels Dock on the right, or find it in the Menu bar: Window > Layers .
The Layers panel displays each layer, along with sub-layers showing the content on that layer. To show the sub-layers, simply click the small arrow to the left of the layer name. Both sub-layers and layers can be reordered the same way pages can. Simply click and drag to change the order or to move a sub-layer to a different layer.
To rename a layer, simply double-click on the current name. Labeling layers clearly will make them easy to navigate as your document gets more complex.
Layer Properties
Each layer has two boxes to the left of it that control the visibility and locking of the layer. We will use these features a lot in our workflow.
Visibility: The box on the far left indicates the layer’s visibility. By default this box has an eye symbol. Try clicking into this box to turn the visibility on and off. You’ll see the content on the layer disappear from your work area. This is useful when you want to zero in on one specific part of your document.
Locking: The next box indicates whether or not the layer is locked. By default layers are unlocked and this box will appear empty. Try clicking into this box. When the padlock symbol appears, you won’t be able to edit any of the content on this layer. It is important to lock layers that you want to leave unadjusted while you work on the rest of your document.
Whenever you are adding content, text, images or design elements, get yourself in the habit of checking which layer you are working in, and lock other layers.
Working with the Dynamic Spelling Checker
InDesign offers spell-checking and correcting in its features. There are three options you can use to check spelling:
- Check Spelling uses a dialog box that finds all misspelled words and allows you to correct them.
- Autocorrect corrects spelling as you type.
- Dynamic Spelling visually indicates which words are suspect in your document.
- To use Dynamic Spelling, navigate to Edit > Spelling > Dynamic Spelling from the Menu bar.
- To correct the spelling errors, make sure the Type tool is selected, then Left-Click on the word and choose the correct replacement.