Hands-On Activity:
Illustrator 1
Creating an E-card
Now that we have a better idea of how Illustrator works, we will practice using these tools by creating an e-card!
Document Setup
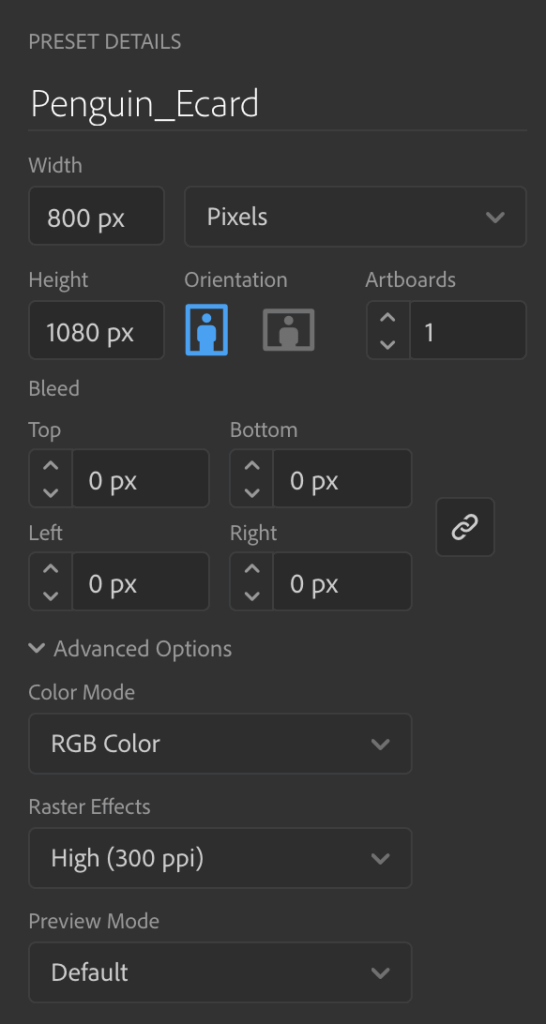
Use the blank document you created at the beginning of the workshop. Refer to these document settings if you need to recreate it:
Modifying Shape Paths for the Body
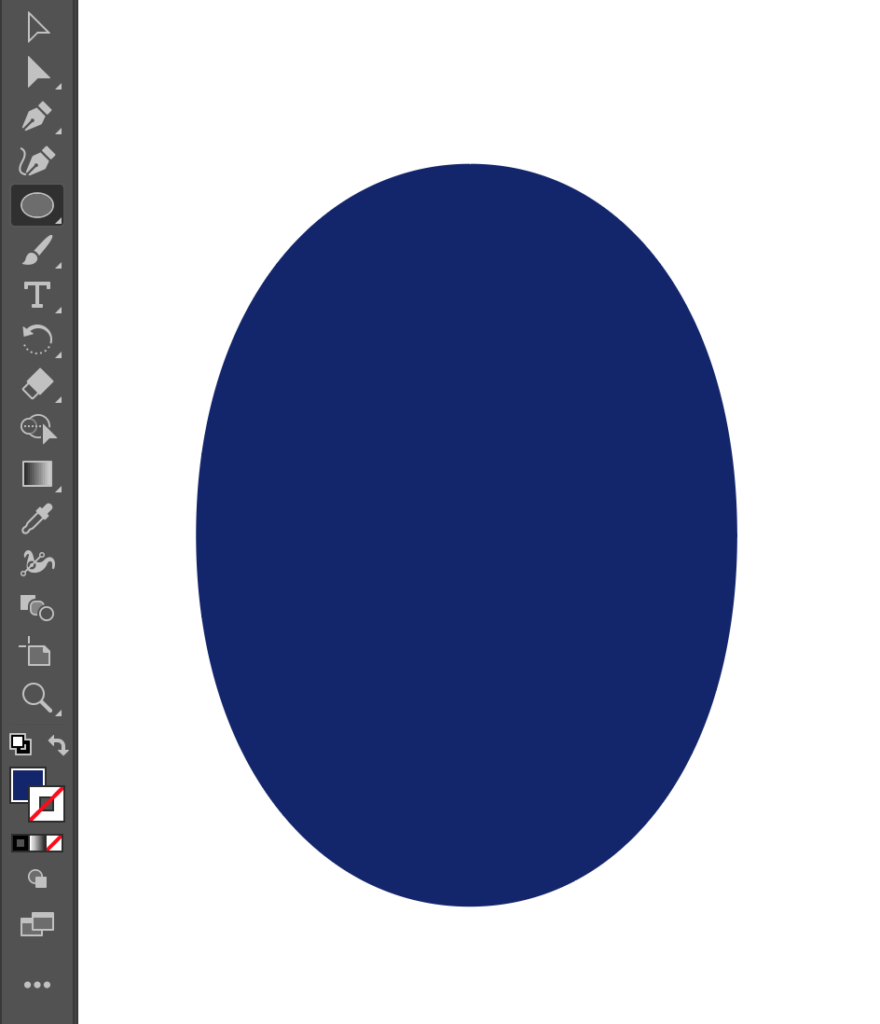
1. In the Tools Panel, Click the Ellipse Tool.
2. Create a vertical ellipse.
3. With the ellipse selected, go to the Tools Panel and locate the Fill. Change the Fill Color of the ellipse to dark blue. Since we do not want a stroke, click on the stroke swatch and select the white square with the red slash through it, which means no color.
4. In the Tools Panel, select the Direct Selection Tool then click on the right-most anchor point of the body. Hold the Shift Key and click on the left-must anchor point. Now that both points are selected, drag one of the anchor points downwards. You should see both anchor points moving at once.

5. In order to finish the body, we will flatten the top of the shape. With the Direct Selection Tool, click and drag the top-most anchor point downwards.
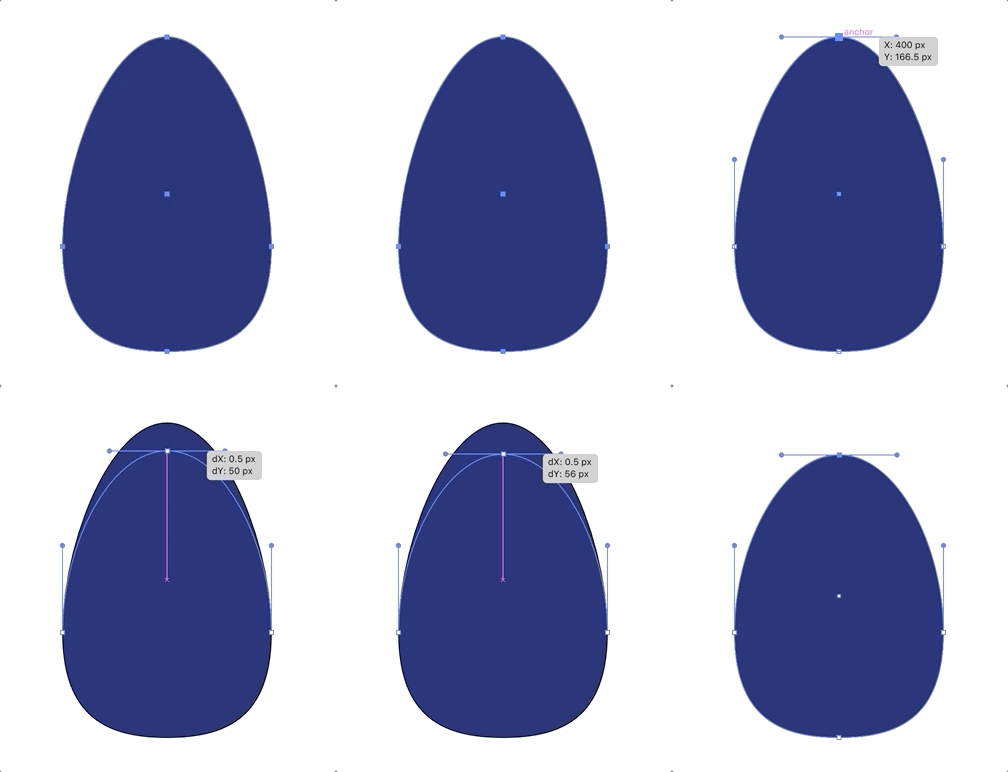
The finished shape should look something similar to this:

6. We want to recreate the shape for the belly so use the Selection Tool to select the blue body. While holding the Alt/Option key, click and drag the body to create a copy.
7. In the Tools Panel, change the Fill Color to white.
8. While holding down Shift, downsize the shape using the Selection Tool. Position the shape on the lower half of the body.

Creating the Beak
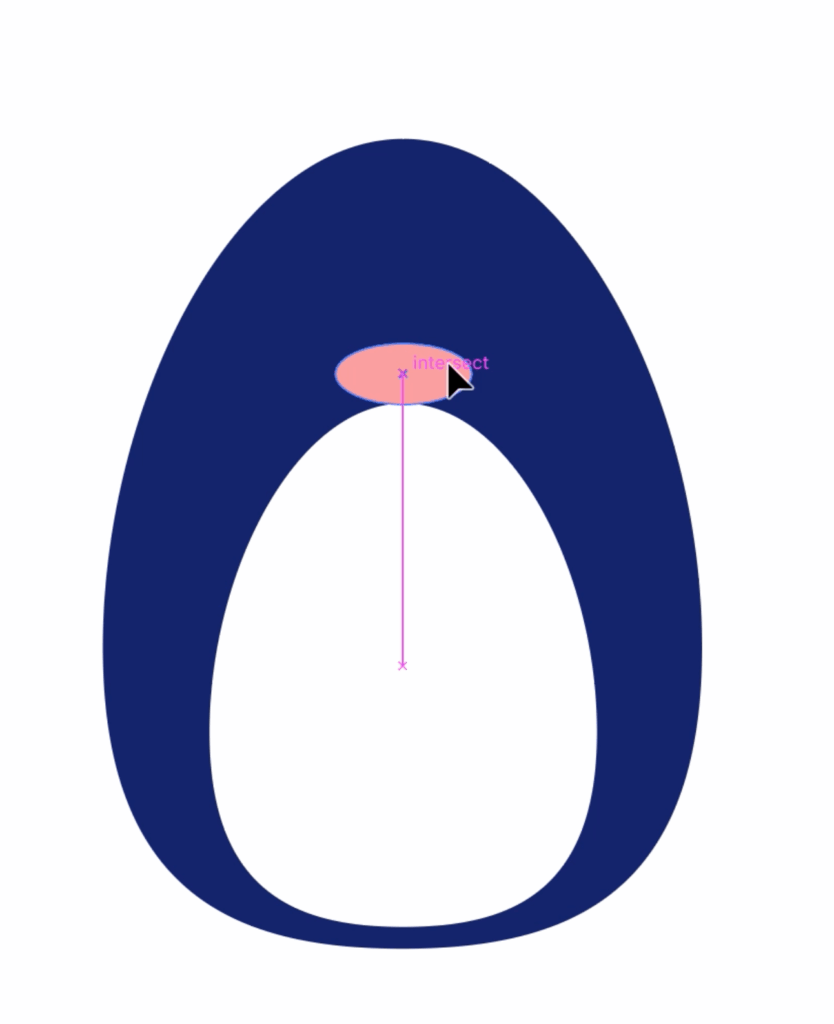
1. Next, add a beak to the penguin by creating a small horizontal ellipse. Change the Fill to coral and position the beak above the belly.
Using Pathfinder for the Eyes and Wings
1. For the next two body parts, we will be using the Pathfinder Tool. First, we will create the crescent shaped eyes.
2. Click on the Ellipse Tool and create a horizontal ellipse that is slightly circular.
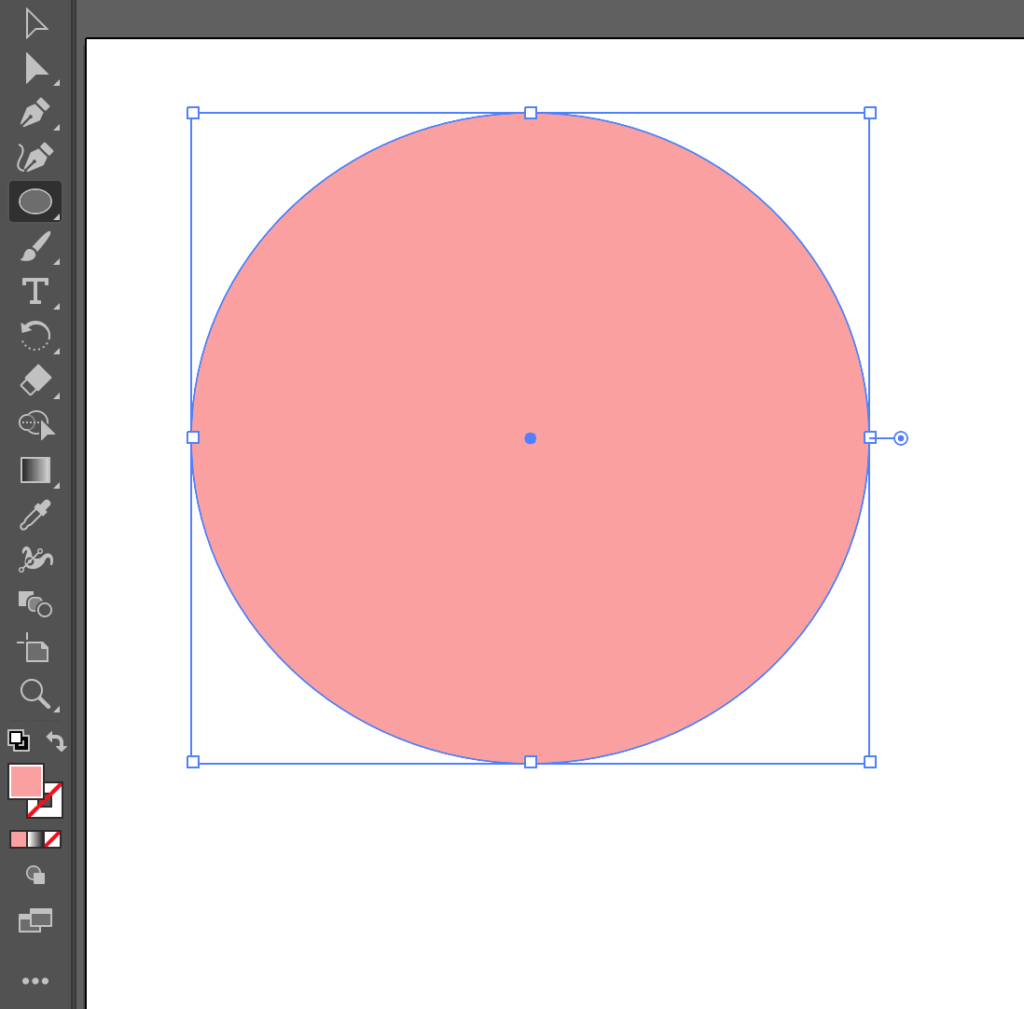
3. Create a horizontal ellipse then position it on the lower half of the circle. Select both shapes with the Selection Tool.
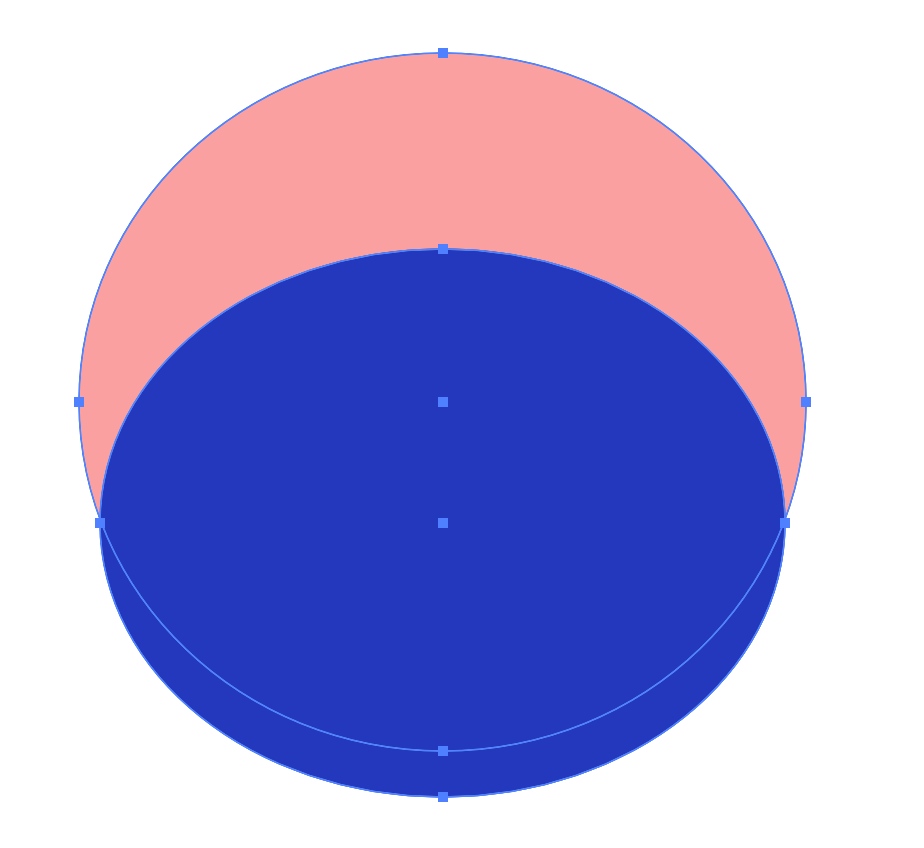
4. In the Application Bar, go to Windows > Pathfinder. From the Shape Modes, select Minus Front to create the crescent shaped eyes.
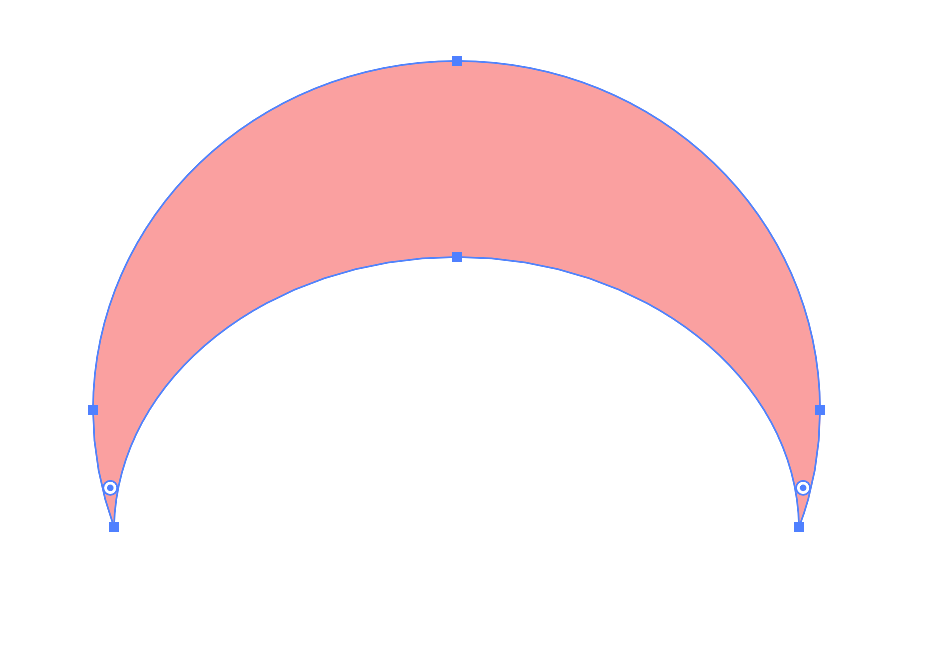
5. While holding Shift, resize the eye using the Selection Tool. Now position the eye on the body and change the Fill to white.
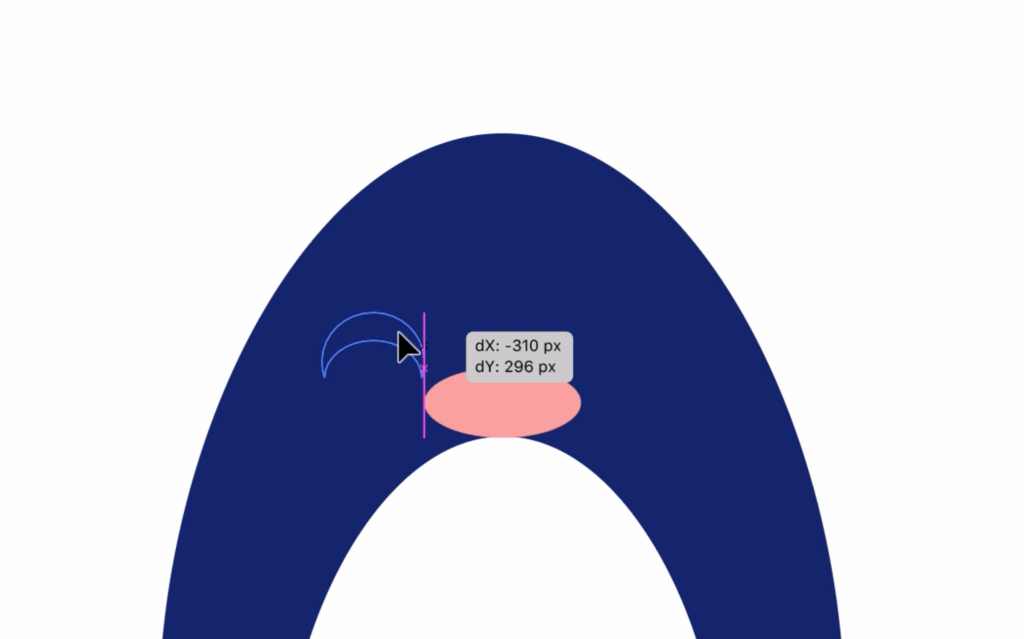
6. Create a copy of the eye then position the second eye on the body.
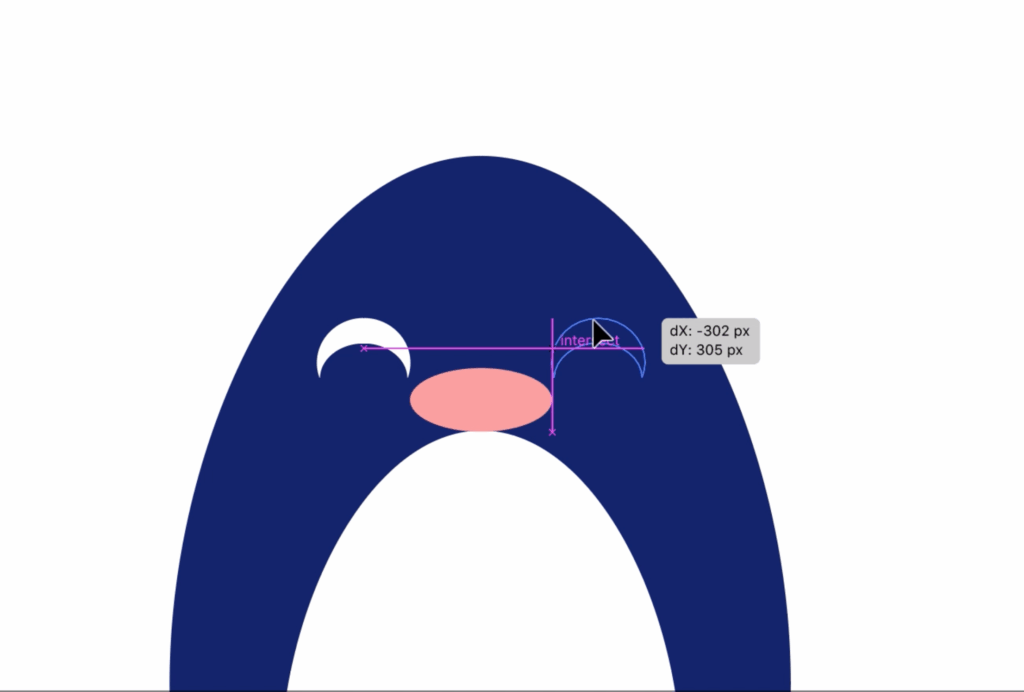
The last body part we will be using Pathfinder for are the wings.
Eyedropper Tool
Eyedropper Tool

Use this tool to select color from another area of your artboard and replicate the color for an object.
Shortcut: I
7. Use the Ellipse Tool to create a long horizontal ellipse. We want the wings to be the same shade of blue as the body, so select the ellipse then go to the Tools Panel and click on the Eyedropper Tool. Click on the body to replicate the color.

8. Using the Rectangle Tool, drag a rectangle up to the halfway point of the ellipse.
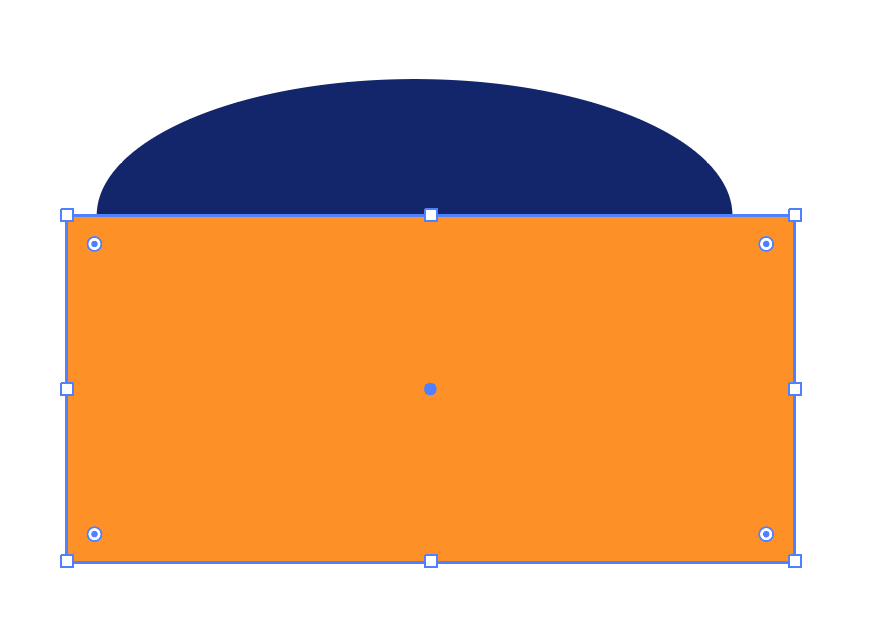
9. With both the rectangle and ellipse selected, click on Minus Front from the Pathfinder options to create a half ellipse. Resize and rotate the wing then position it on the body.

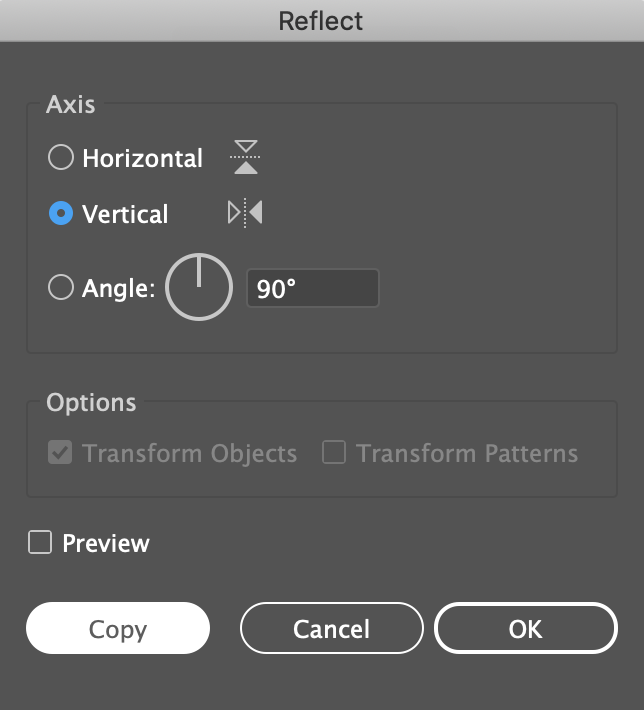
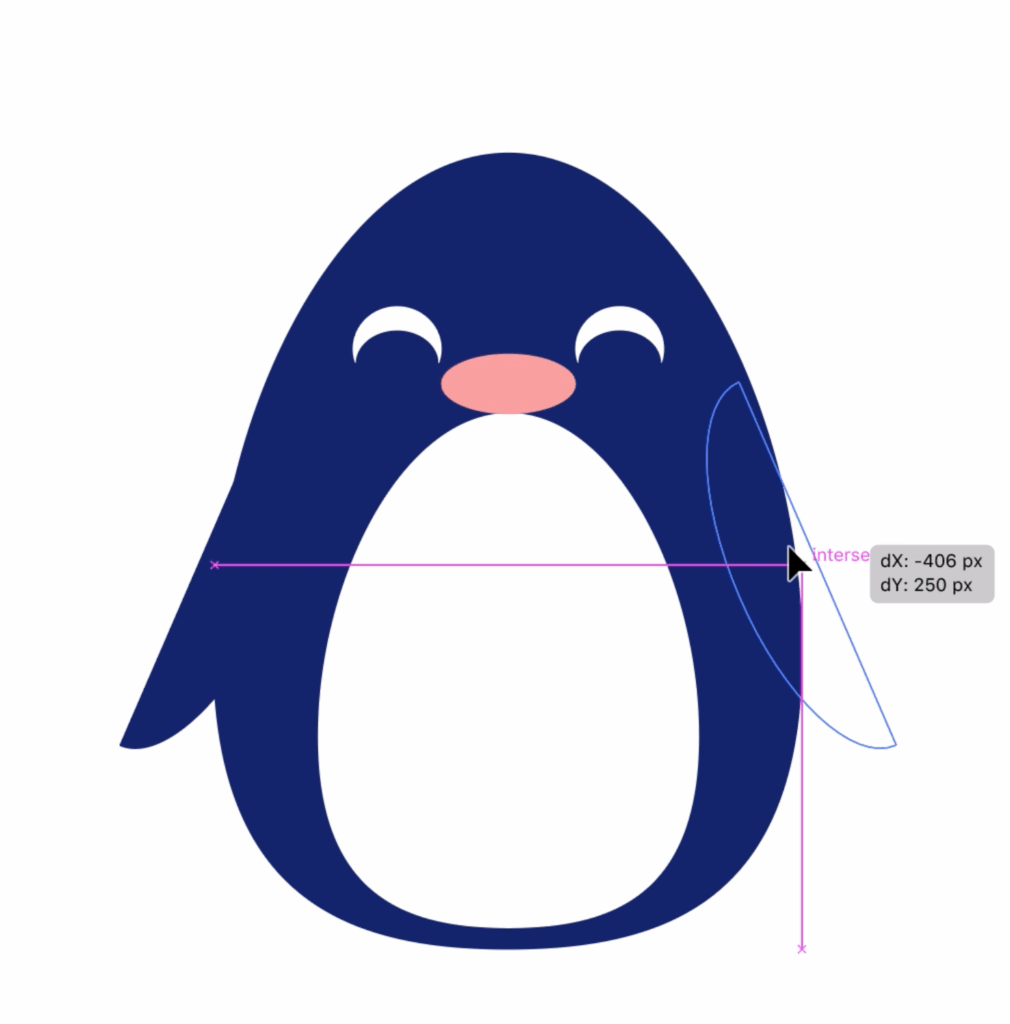
10. For the second wing, use the Selection Tool to select the first wing and right-click. Select Transform > Reflect. From the panel, choose Vertical axis then click Copy. Move the wing to the right side of the body.
Combining Shapes with the Shape Builder Tool
11. Draw a circle with the Ellipse Tool by holding Shift while dragging out. Select the Eyedropper Tool and Click on the beak to replicate the shade of coral for the feet.
12. Select the Rounded Rectangle Tool. Begin moving your cursor to the upper right area above the circle until the Smart Guides indicate that your cursor is above the “intersection” point of the circle. From that area, drag a rounded rectangle to the point where the Smart Guides indicate the location of the “anchor” point.
Rounded Rectangle Tool Not Appearing?
As of Illustrator 2020, the Rounded Rectangle Tool is hidden from the Tool Panel.
To enable this tool, go to bottom of the Tools Panel and click on the icon with three dots. From the expanded panel, select the Rounded Rectangle Tool.
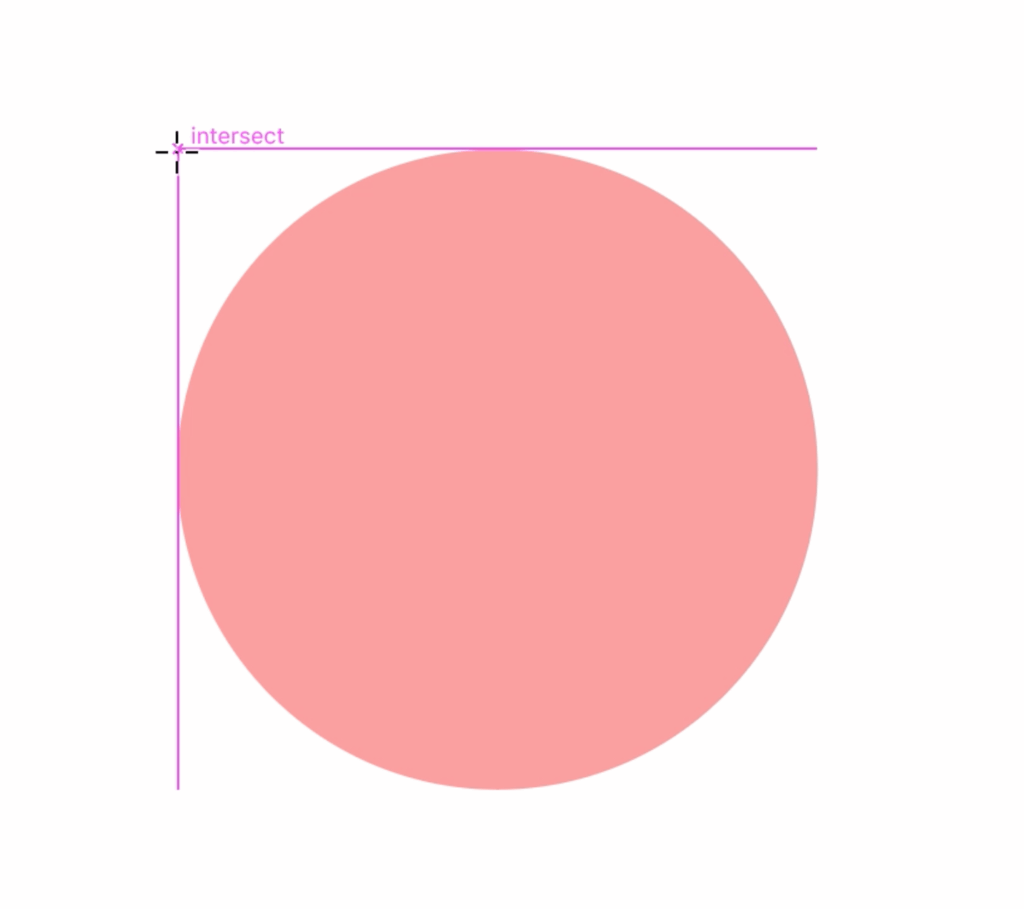
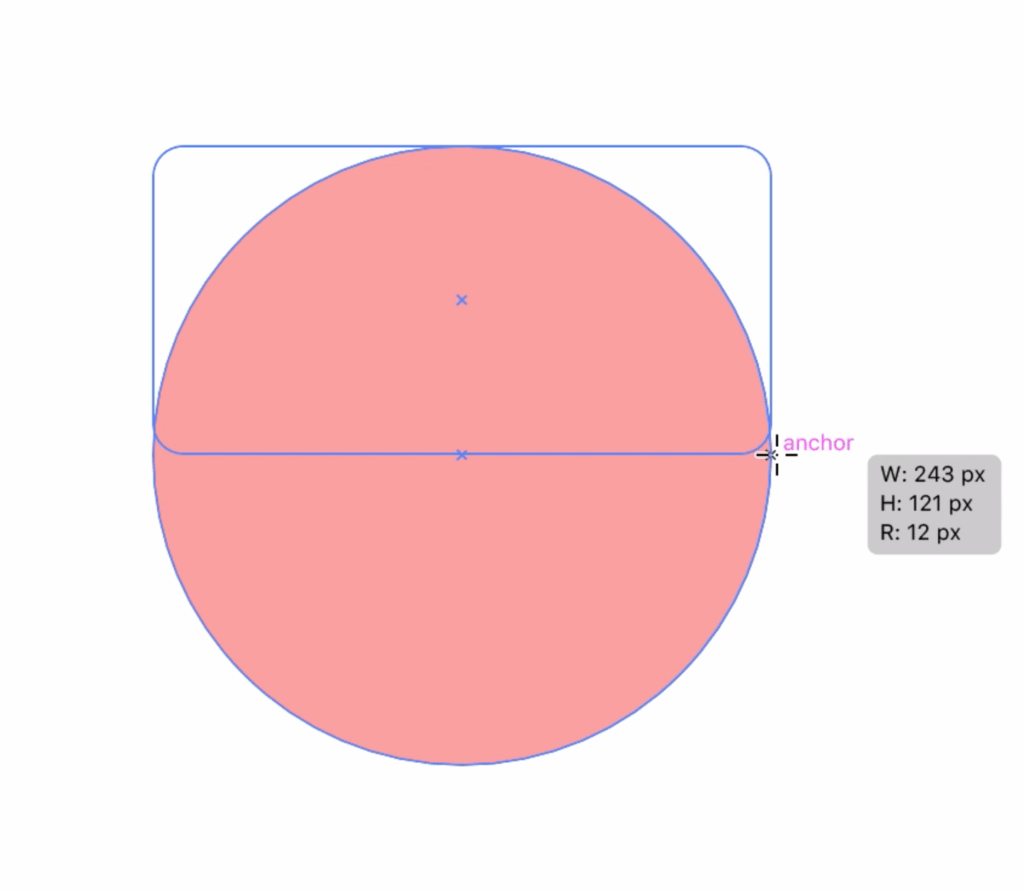
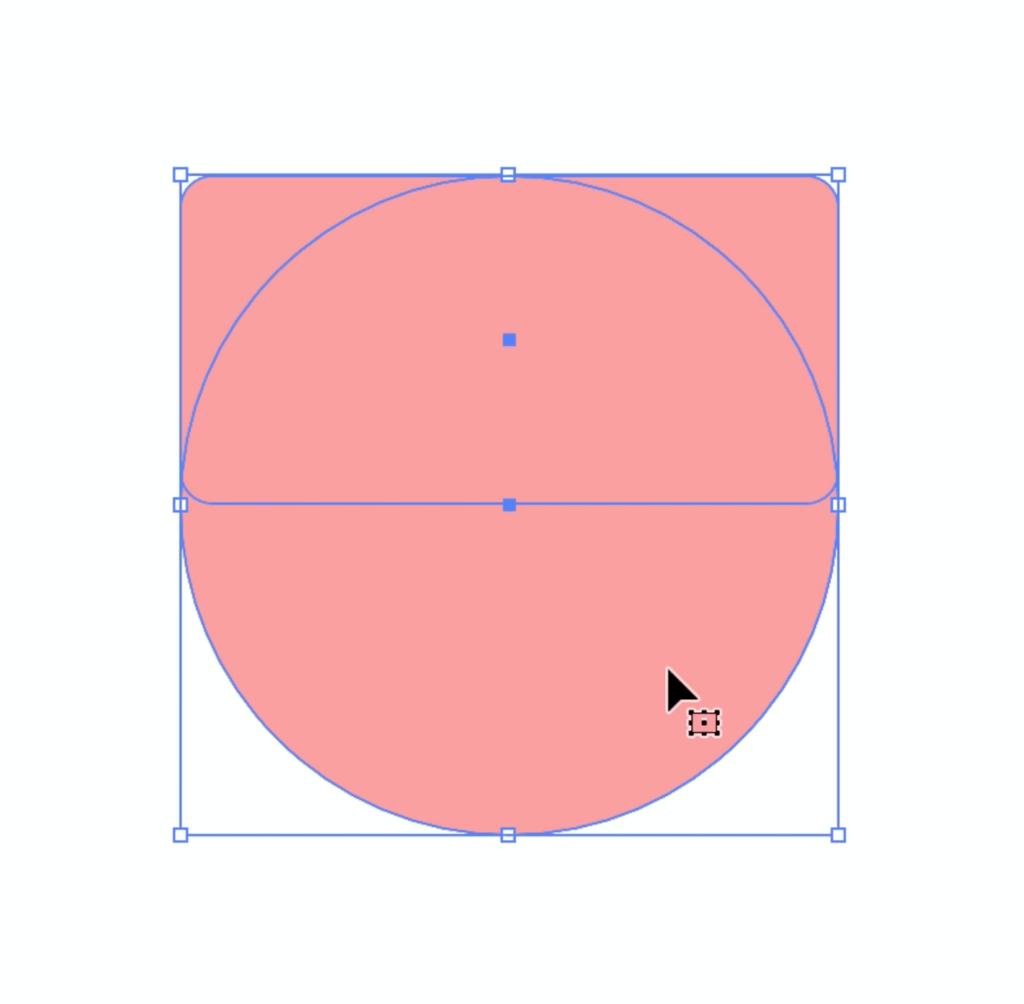
13. Right now, the circle and the rounded rectangle are separate shapes, but we can combine both shapes using the Shape Builder Tool. First, select both shapes then click on the Shape Builder Tool. Click and hold while dragging a line through all the pieces. Resize the shape and align the foot with the halfway point of the eye.

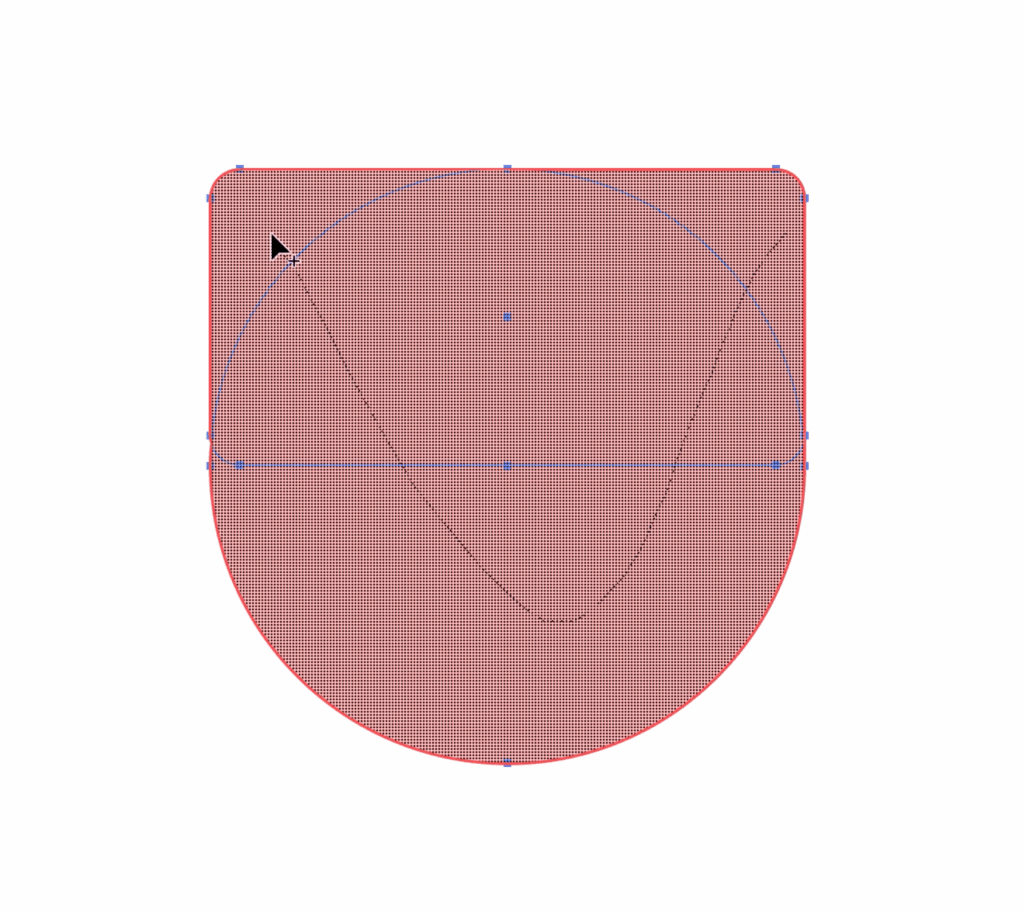
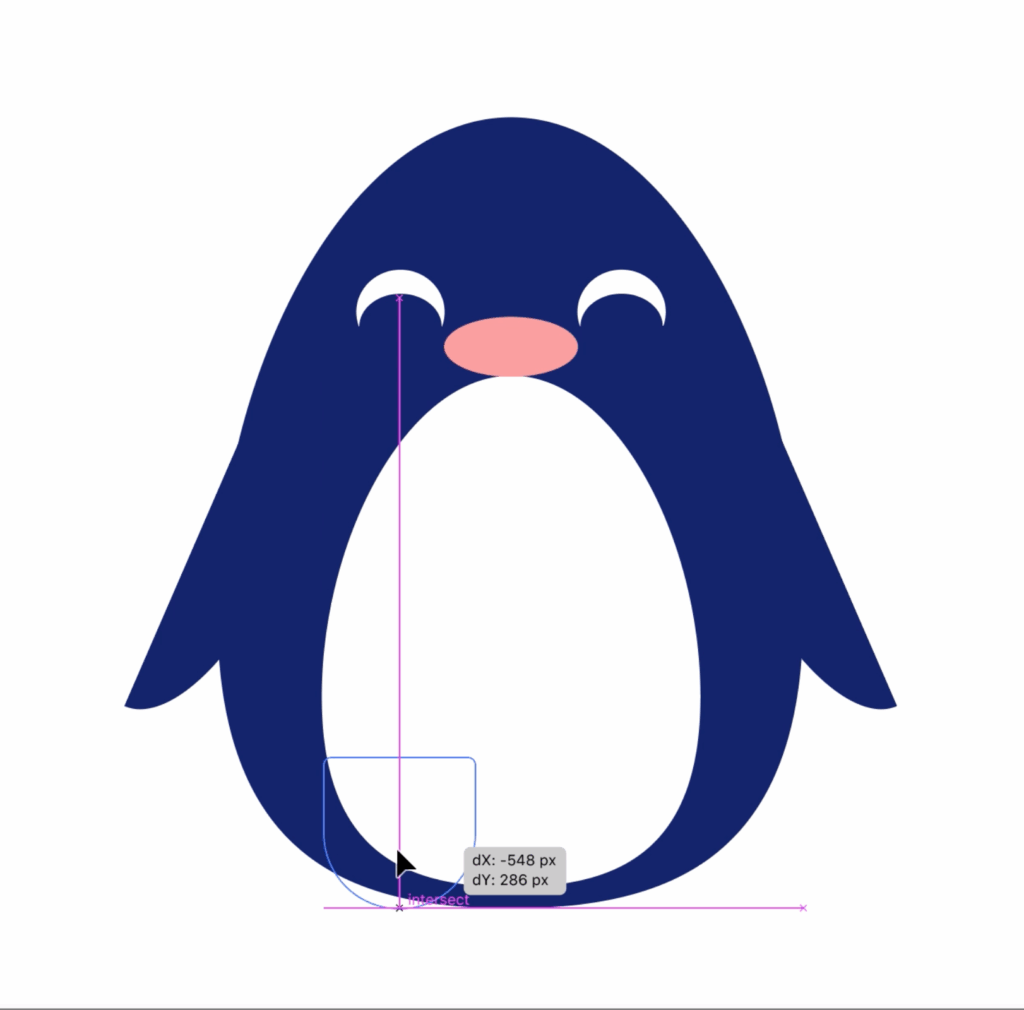
14. Make a copy of the foot and position it the same manner.
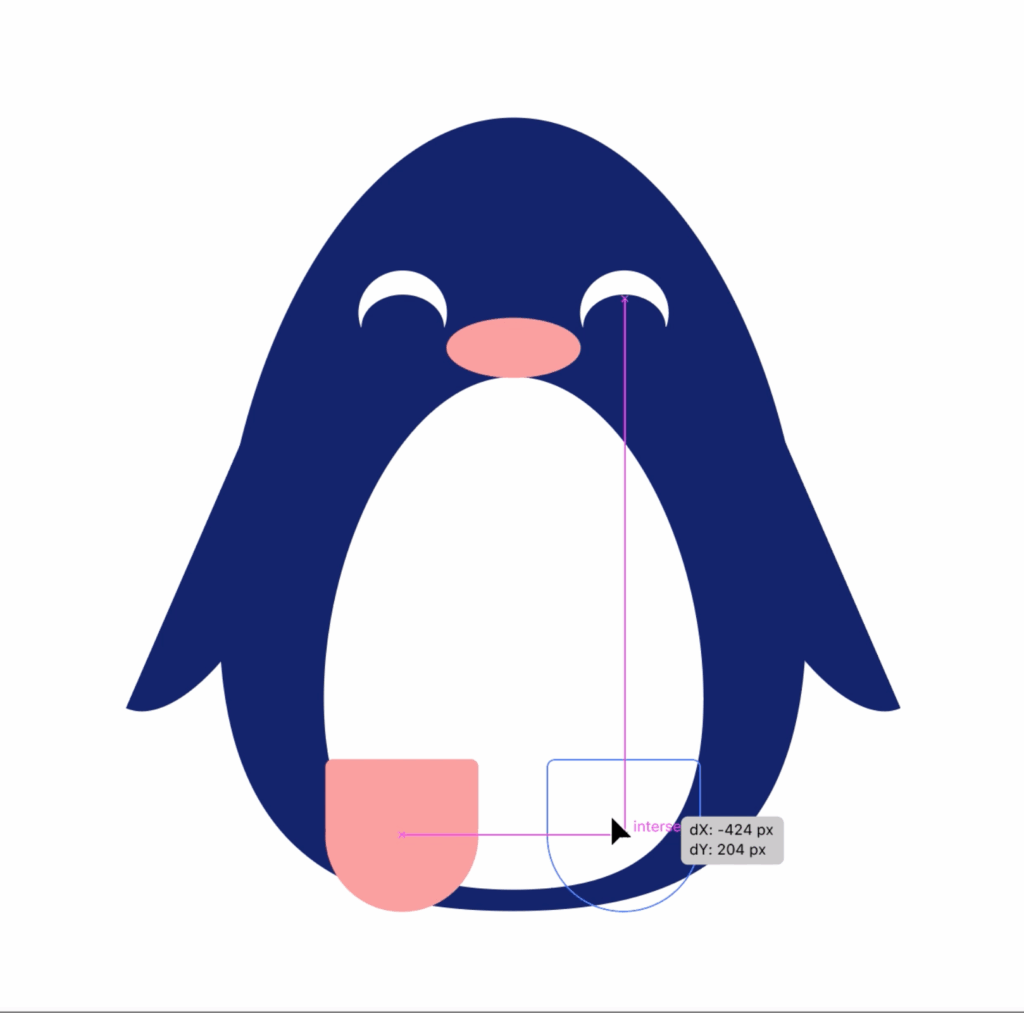
Moving Objects to Another Document
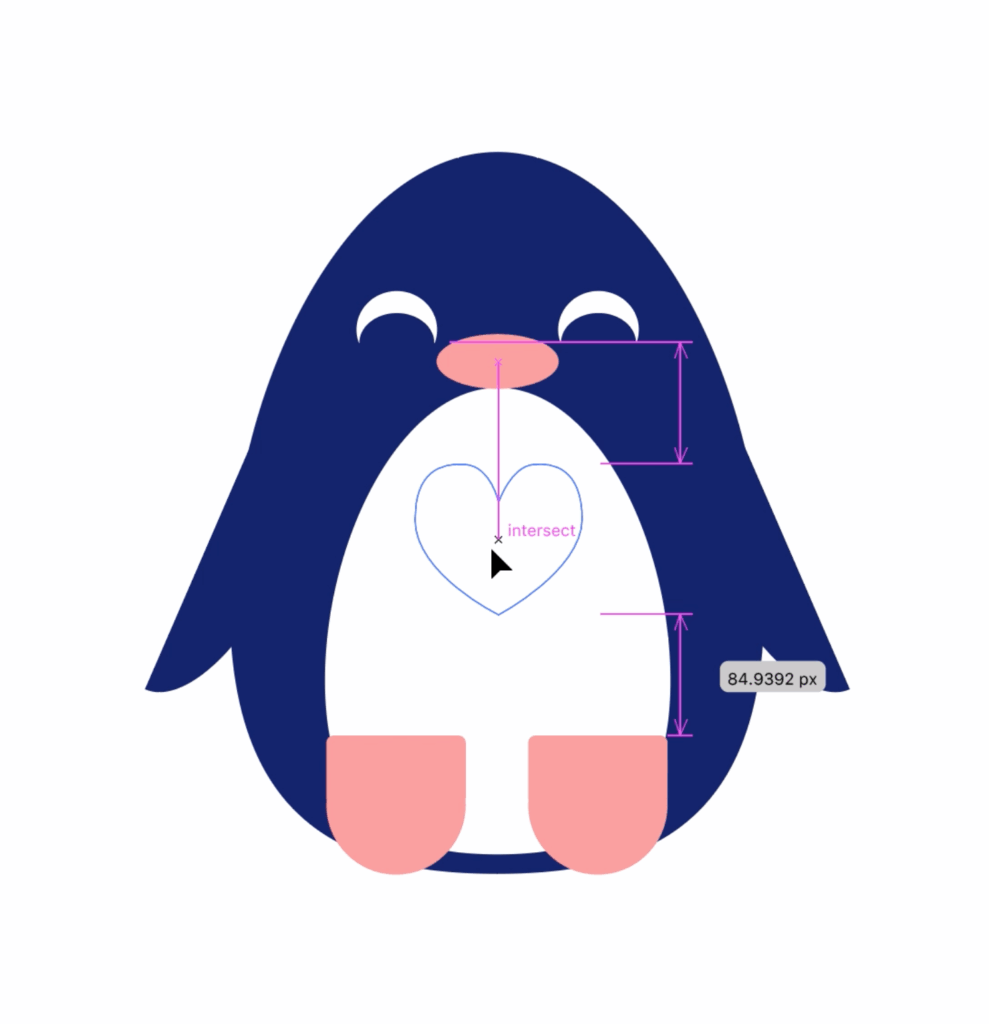
15. We will now drag the heart we created from the practice files. Click on the Illustrator Practice Files tab, and within the Pen Tool Exercise, find the heart we created earlier. With the Selection Tool, click and hold while dragging the heart to the other tab. Release once a green plus sign appears on the Penguin E-Card document. Finally, position the heart on the belly.
Removing Shapes with the Shape Builder Tool
For this part of the tutorial, we will add dimension to the penguin by creating shadows with the Shape Builder Tool.
16. First, we will add a shadow to the beak. Drag a rectangle to the halfway point of the ellipse then change the fill to black.
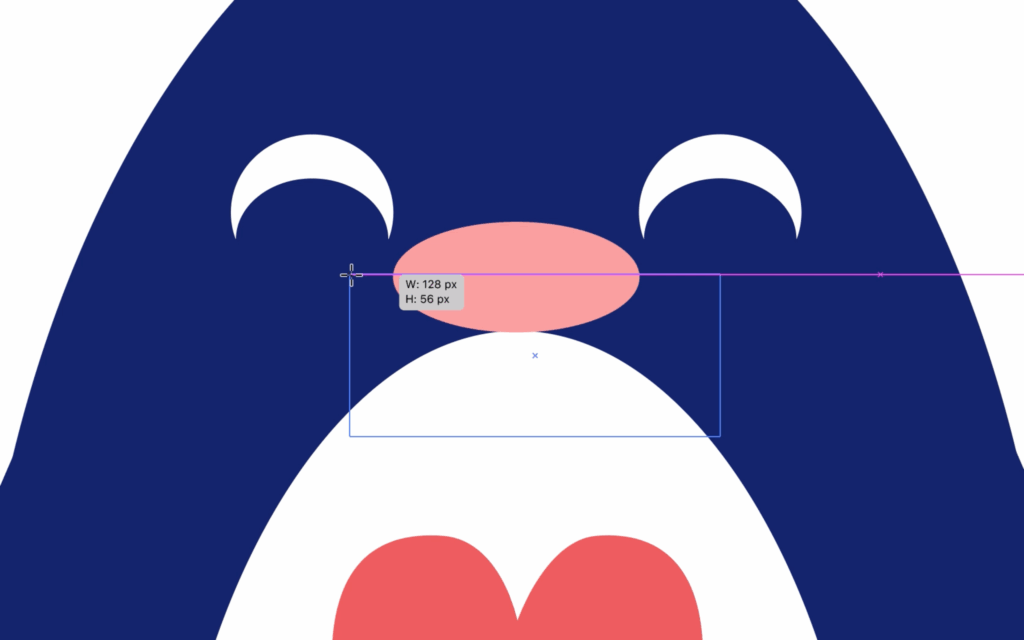
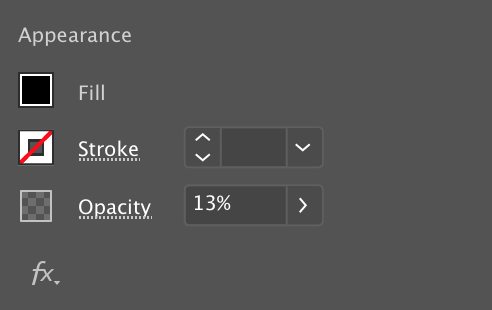
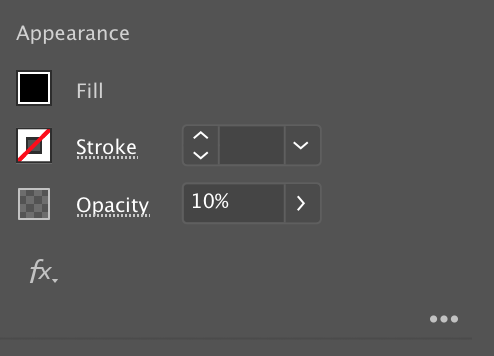
17. In order to have a more shadow-like effect, go to the Properties Panel and lower the Opacity to a somewhere between 10-15%.
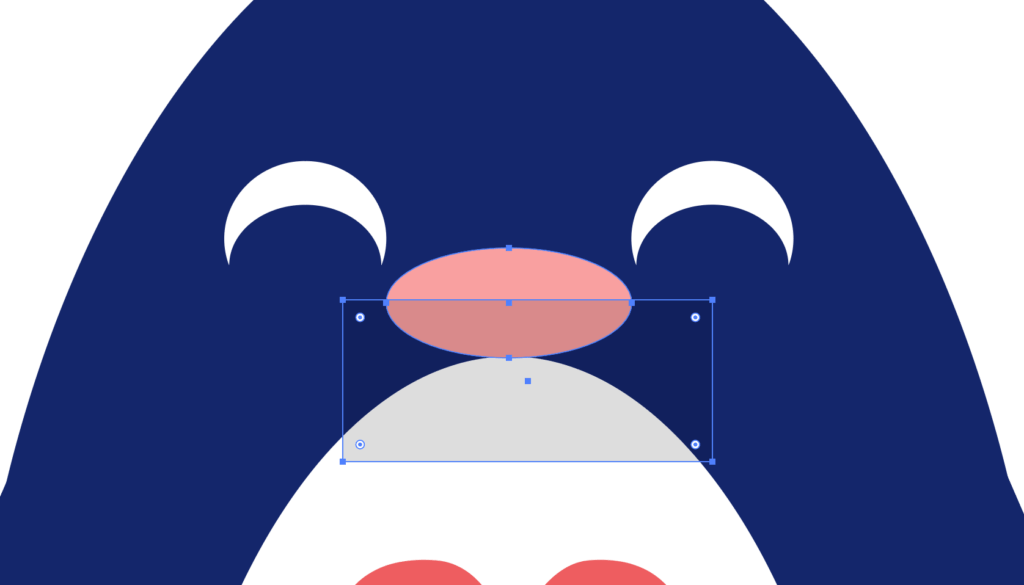
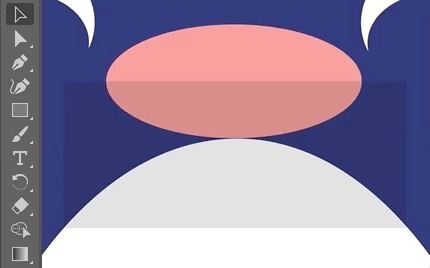
18. In this case, we do not want to use the rubberband method to select the beak and the rectangle because it will also select the shapes behind it, so we will have to use a different method. Using the Selection Tool select the gray rectangle then hold Shift while clicking on the beak. Next, click on the Shape Builder Tool in the Tools Panel. Hold down the Alt/Option key and click the gray area outside of the beak.

19. In a similar fashion, we will add a shadow that covers half of the penguin. Drag a rectangle to the vertical halfway point of the penguin and change the Fill to black.
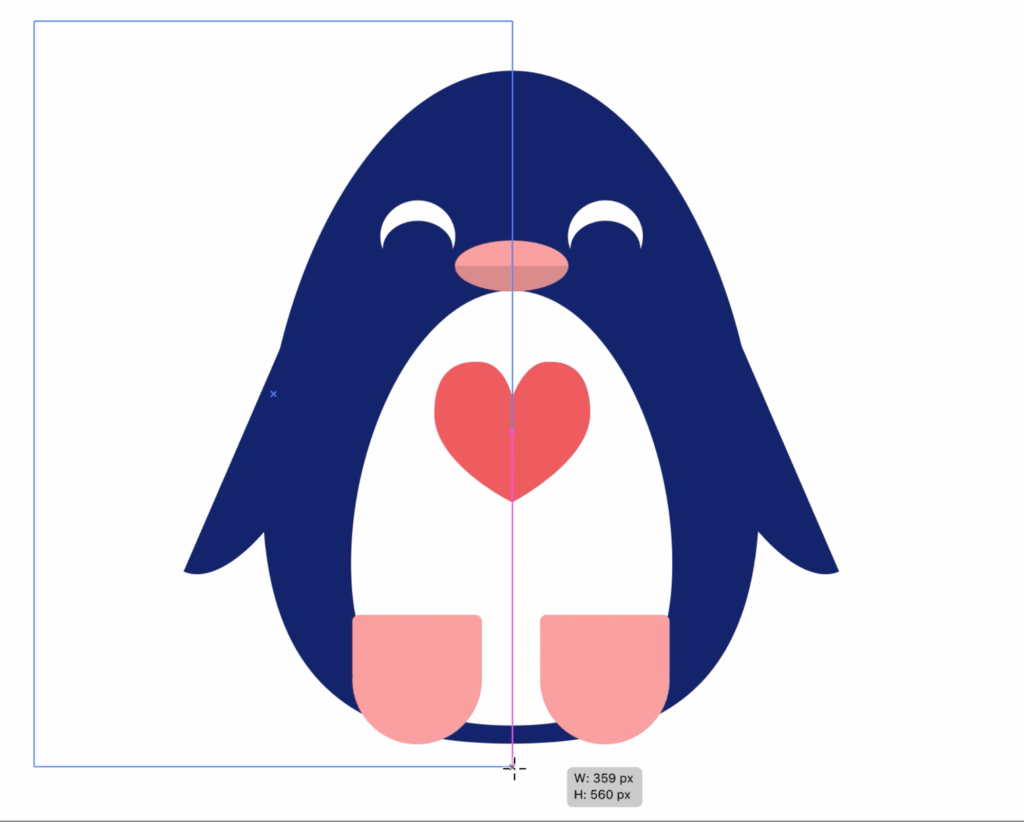
20. Go to the Properties Panel and lower the Opacity to a somewhere between 10-15%.
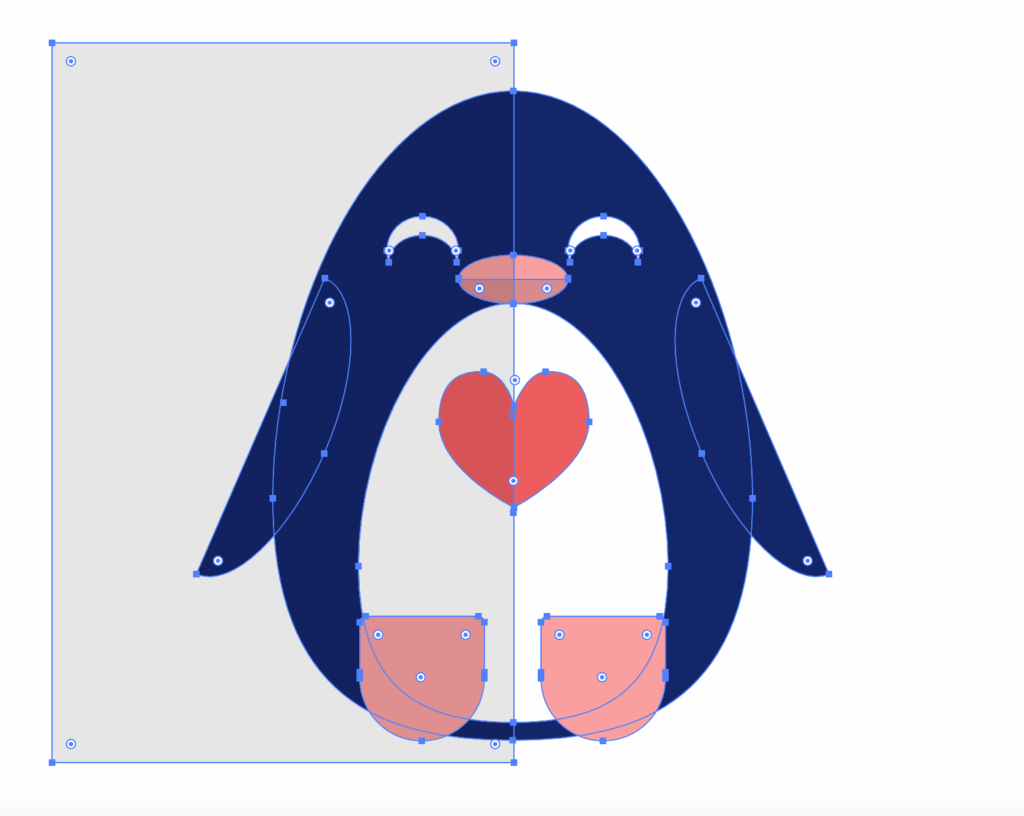
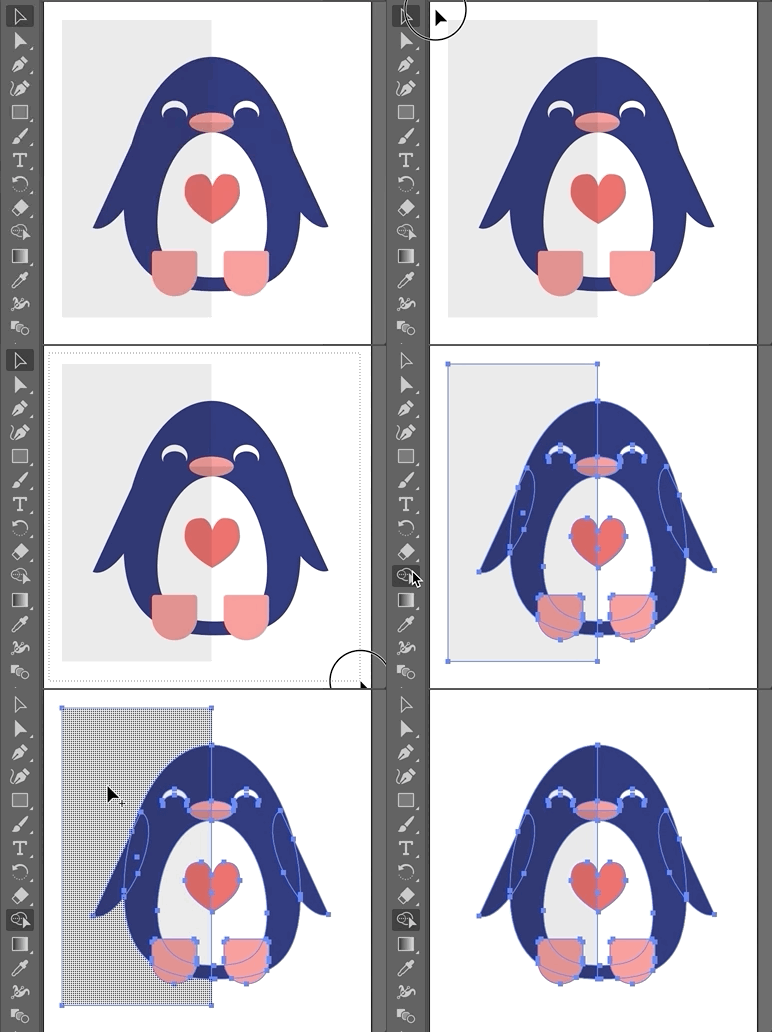
21. In order to get rid of the unnecessary gray area, first use the rubberband method to select all the shapes. Click on the Shape Builder Tool then hold the Alt/Option key and click the gray area outside of the penguin.

Grouping Objects
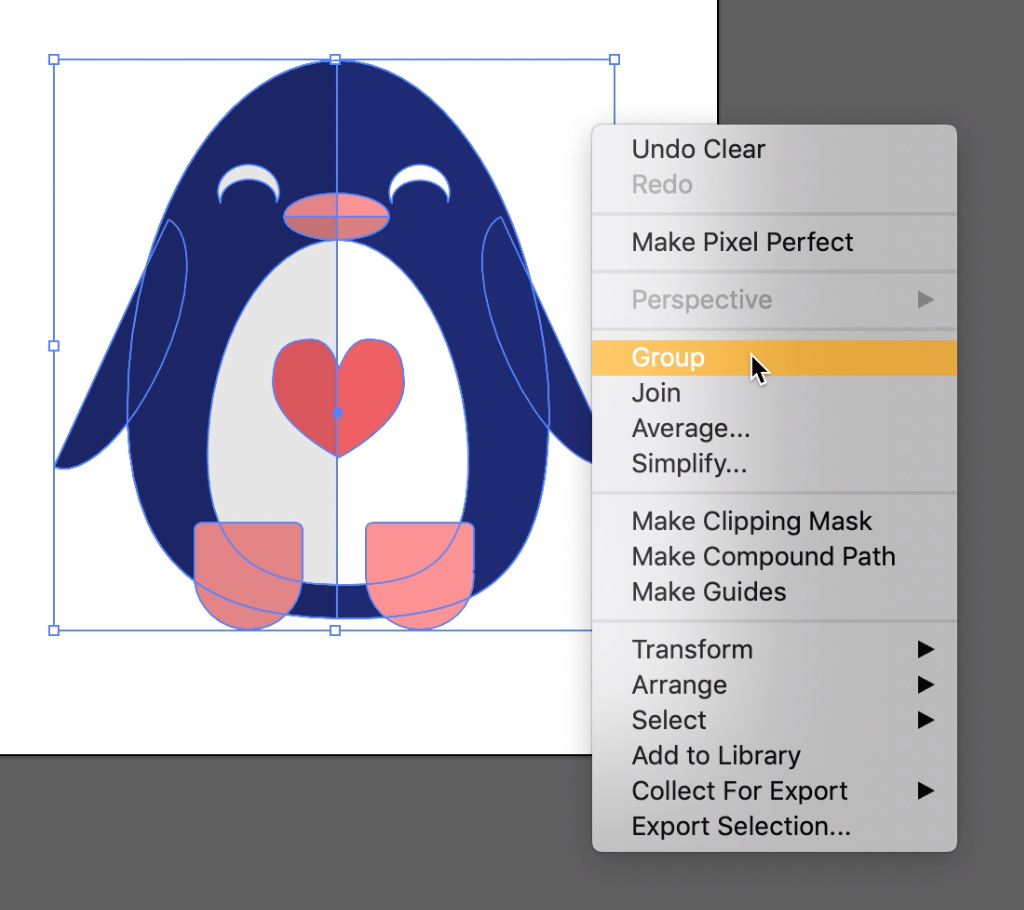
22. Right now, all the parts of the penguin are individual pieces, but you can group these shapes together. This allows you to easily move and resize the penguin without having to use the rubberband method each time. First, select the penguin using the rubberband method then go to Object > Group. To ungroup the shapes, go to Object > Ungroup.
Creating A Background
23. With the completed penguin, it is time to place a background. To start, select the Rectangle Tool and place your cursor at the corner of the document where the Smart Guides indicate the “Intersect” point. Drag a rectangle to the opposite corner.
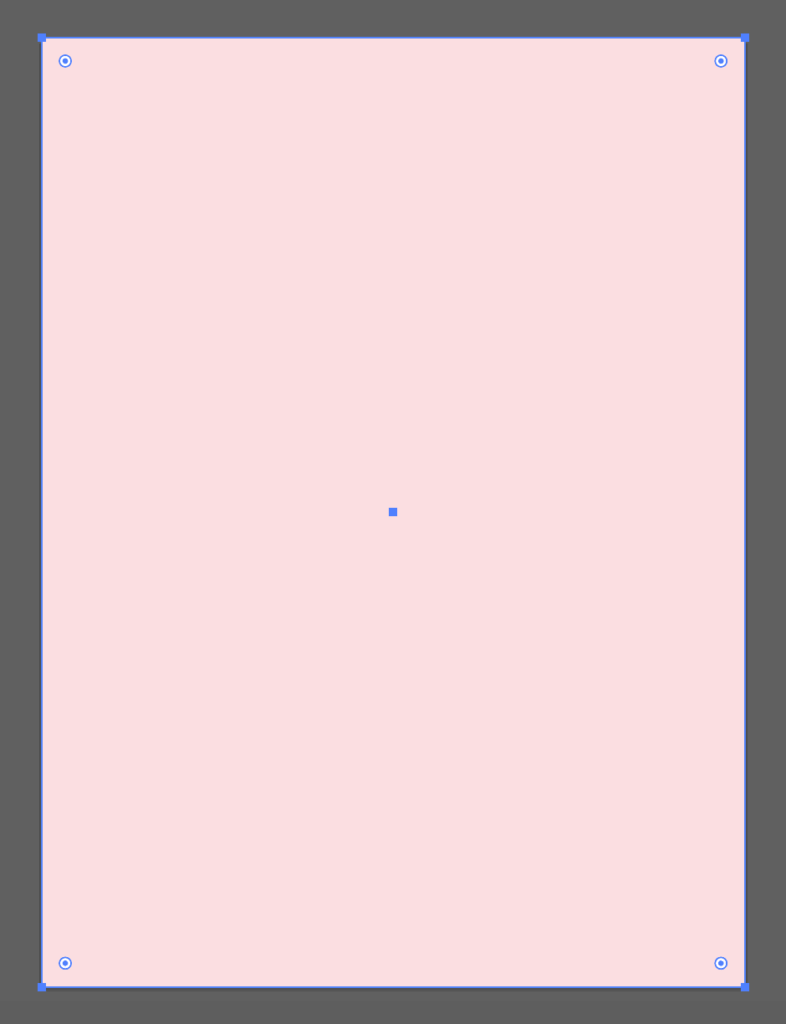
24. In this tutorial we end up choosing a solid background, but you can choose between a solid and a gradient background. With the background shape selected, click the Gradient Fill (highlighted in green in the picture) from the Tools Panel under Fill/Stroke Color.
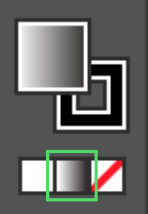
25. Make sure the the solid color swatch square in on top of the hollow square (since we want to change the Fill not the Stroke), then choose a type of gradient.
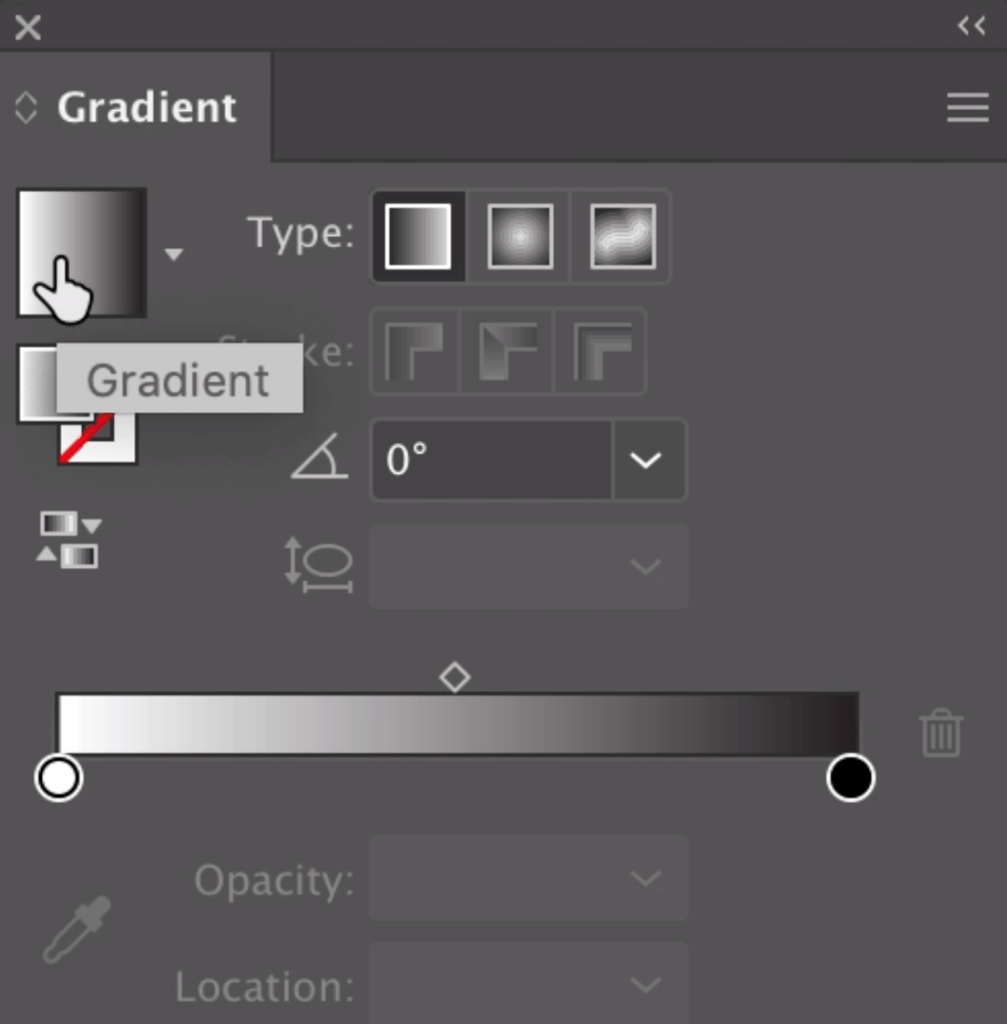
26. Double-click the solid color swatch in the gradient slider bar to change the color.
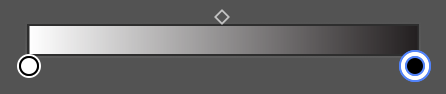
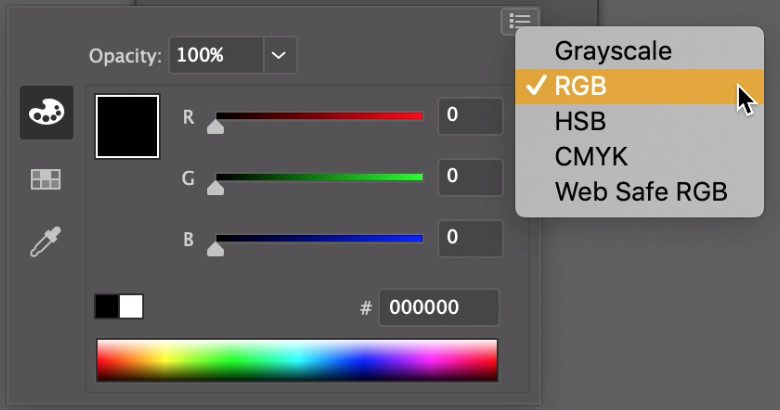
27. In order to change the color mode, click the icon in the upper right corner of the panel and select RGB. From there, choose any color that you like.
28. By moving the gray diamond shapes above the Gradient slider, it allows us to adjust the color transitions in the gradient. Play around with it until you end up with a product that you like.
29. In order to add more colors to the gradient, hold down the Alt/Option key while clicking and dragging a swatch on the gradient slider. Change the color in the same way as mentioned in steps 2 and 3.
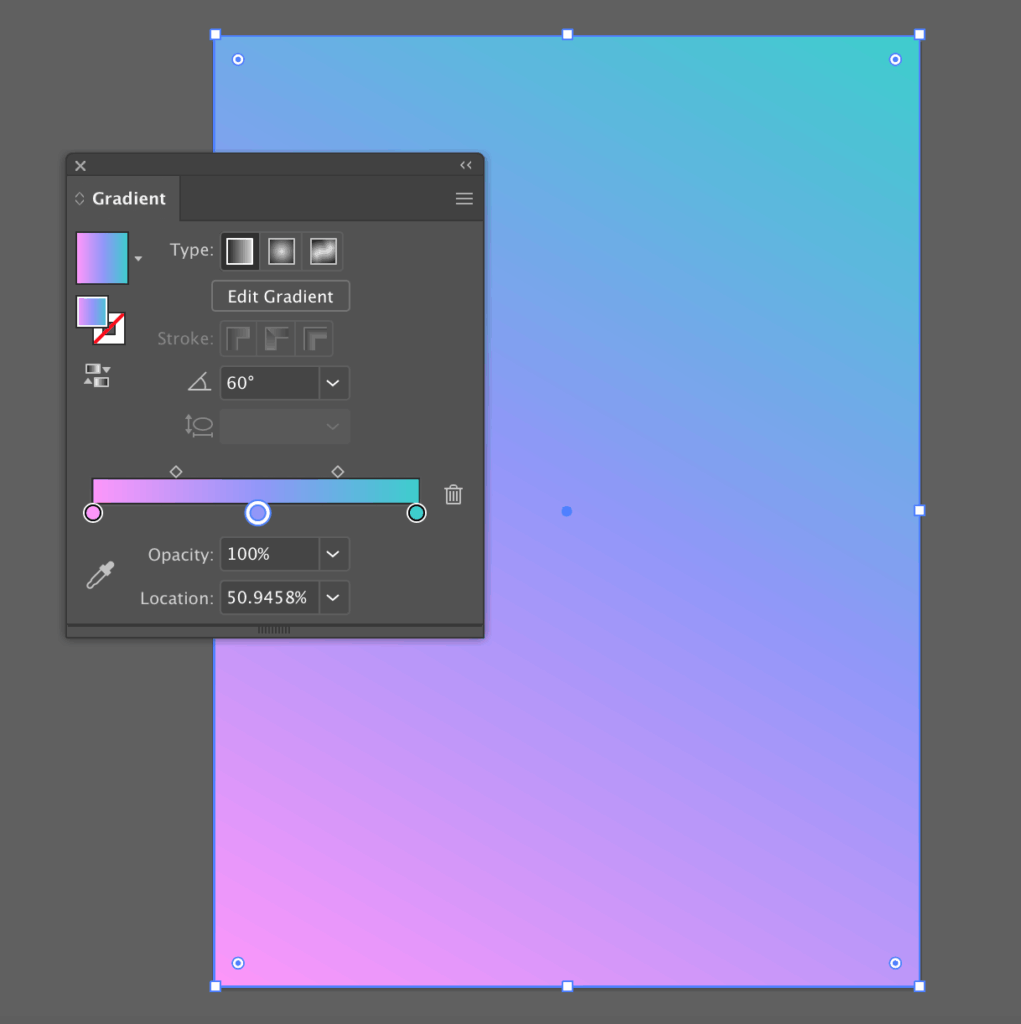
30. Once you are pleased with your gradient, you can either leave it as your background or change the fill of the rectangle to a pale pink color.
31. Our rectangle is currently above the penguin, but we can change the order of the layers. Right-click the rectangle then go to Arrange > “Send to Back”.

32. We are almost down with our e-card! The final part is adding text. In the Tools Panel, select the Type Tool. Drag out a text box and add a message.
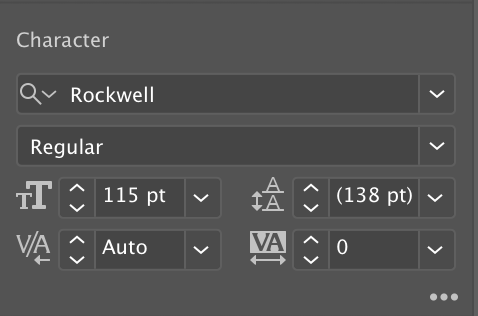
Change the size of the text by going to the Properties Panel and increasing the font size to 115 pt.
In this tutorial we use the font Rockwell, but you can play with the style of fonts in the dropdown bar to find the font that you like.
29. With the text box selected, use the Eyedropper Tool and click on the body of the penguin to replicate the shade of blue for the text.
We are done assembling the ecard! Next, let’s finish the project by exporting and saving our work.

Saving/Exporting Final Artwork
When saving or exporting from Illustrator, it is important to choose file formats and settings that are appropriate for the intended use of your artwork. In this section, we’ll first save and export our e-card then we will learn more about how we can save artwork properly for print and web applications.
Saving/Exporting the Ecard
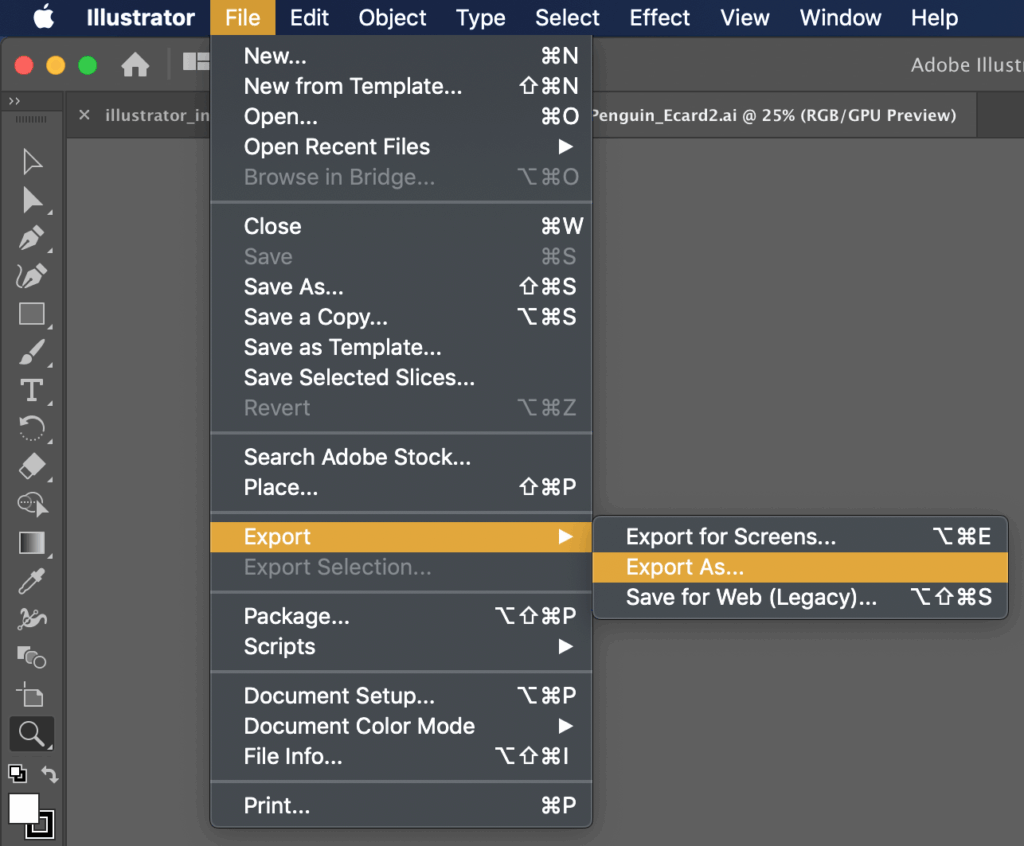
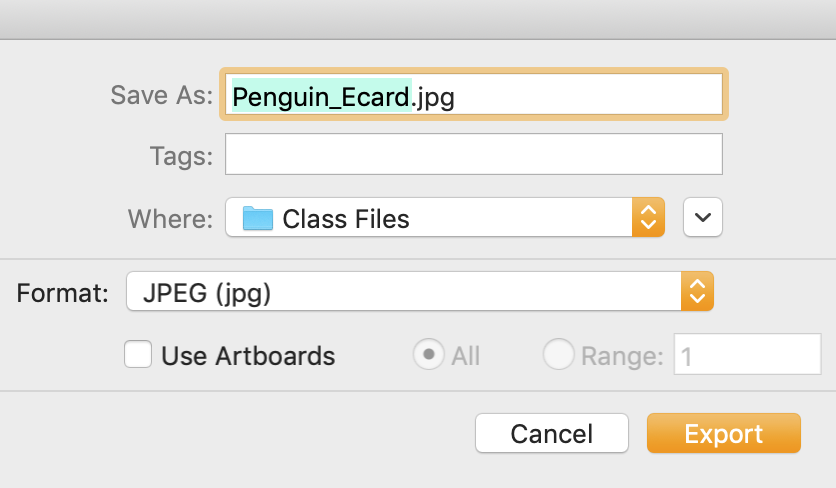
1. Go to File > Export > Export As…
2. Change the file format to JPEG because it allows us to display millions of colors. Choose your desired folder and click Export.
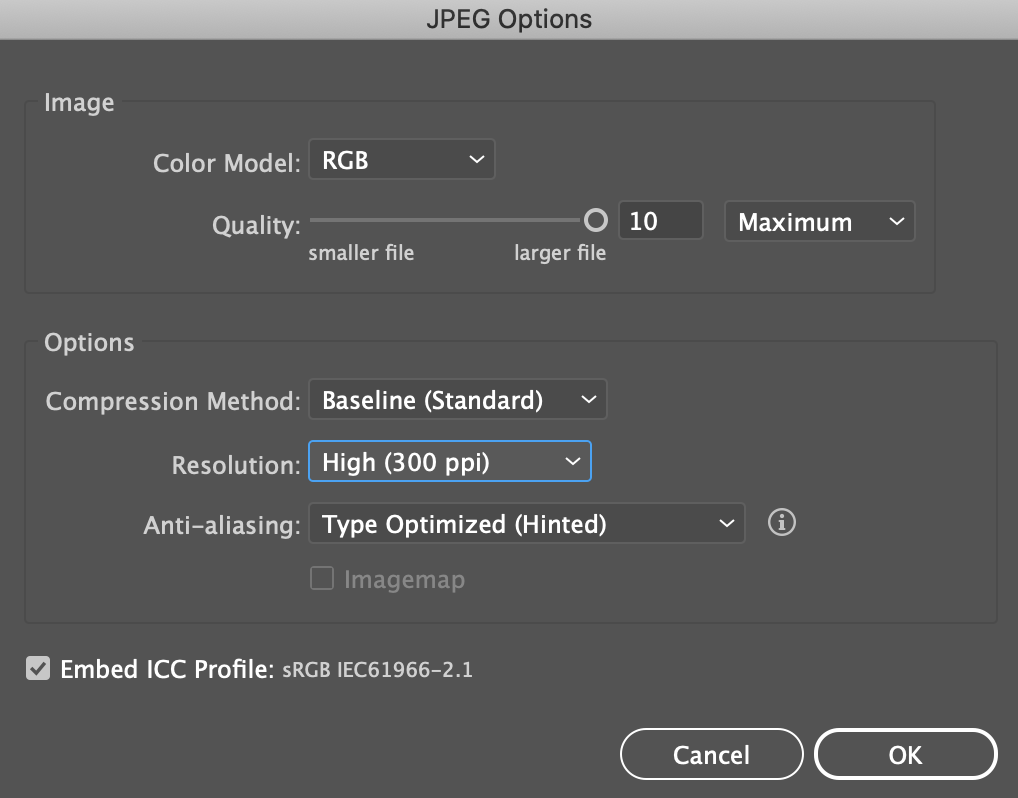
3. From the JPEG menu, various options appear. You might notice that the color mode is set to RGB. The RGB color mode is suitable for artwork that will be viewed on screens because the colors will be vibrant on computer and phone screens. To preserve the quality of the image, set the quality to 10 and the select 300 ppi for the resolution. Keep the rest of the settings the same and click OK.
Congratulations on completing the penguin ecard! You can send it to your friends, family, or whoever you wish to send it to. The following section will explain how you can save other projects.
Saving for the Web
Images used on the Web must meet specific file format and size requirements. For example, in order to use a banner graphic on a website, we’ll need to convert it to a different file format. This process is called image optimization.
Image Size/Resolution
Since image file sizes affect the amount of time it takes to load a web page into a browser, it’s important to keep file sizes as small as possible, while still maintaining reasonable quality.
- Always set image resolutions to 72ppi (pixels per inch) – this is the default resolution of most device screens.
- Always scale images to the exact size needed – if the space on your web page is 960px x 180px, your image should be 960px x 180px. While browsers can scale images to fit a particular space, this results in distortion and/or image files that are larger than necessary.
Web Image Formats
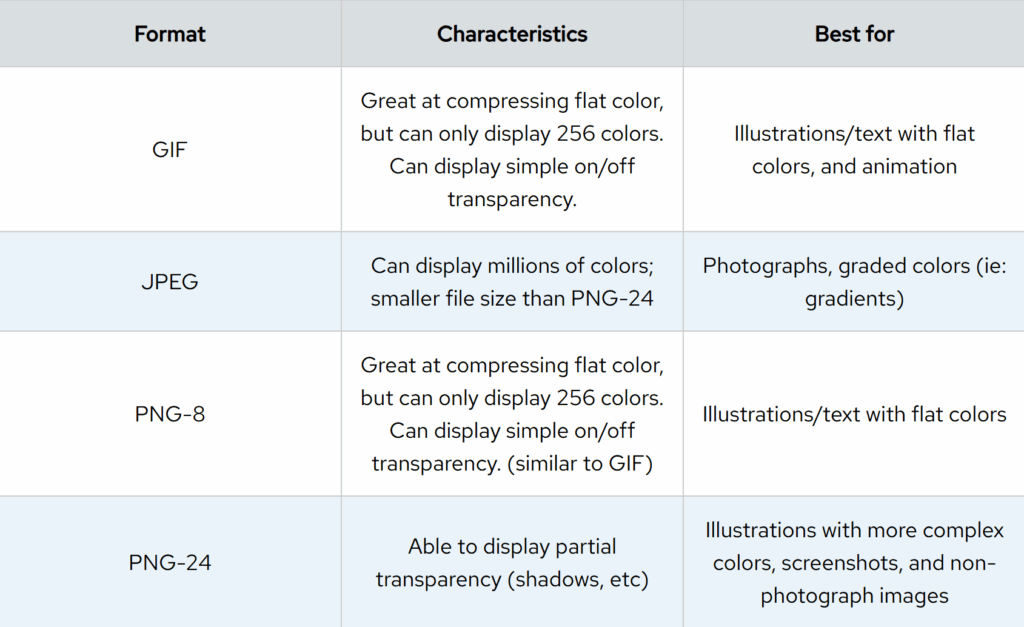
Web browsers are only able to display a few types of images, therefore, we often need to convert original images into a web-friendly format. Different formats are used for different types of images:
Optimizing Images
Fortunately, Illustrator includes features that make it easy to optimize web graphics.
1. In the top menu bar, Choose File > Export > Save for Web.
2. Illustrator attempts to choose the file format and settings that are best for the artwork in your document. As noted in the table above, GIF and PNG files are generally best for illustrative art.
3. In the Save window that opens, Change the file name and save it to your desired folder.
4. Click Save
Saving for Print
You can print Illustrator files from the computer that you created them on without issue, however, if you are printing files from another computer or sending them to a print shop, there are a few points to note:
Color Space
For printing, Illustrator files should be in CMYK color mode. Using the Print Preset when creating a new document sets the color mode to CMYK. To verify that your document is in CMYK mode:
1. In the top menu bar, Choose File > Document Color Mode.
2. Make sure that CMYK is selected.
Fonts
Fonts are stored on individual computers – there’s no guarantee that another computer or a print shop will have the font(s) you used in your document. To ensure that your type shows up as planned, it’s a good idea to convert your type to outlines. This means changing your type from live, editable type to shapes that Illustrator treats just like any other shape object. To convert type to outlines:
1. Before outlining type, always Save a Copy of the file (File > Save a Copy).
2. Make sure that all objects and layers are unlocked, then select everything in your document (Edit > Select All or Ctrl/Command + A).
3. In the top menu bar, Choose Type > Create Outlines.
4. DO NOT save outlined type in your original document – you won’t be able to edit it!
Links
Though we did not cover placing images into Illustrator files, you’ll likely encounter this feature as you work further in Illustrator. When images are placed into Illustrator documents, they are not embedded into the file; instead, a reference (link) to an external file is created. In order to print files with linked images, the external image files must be available. To avoid missing images, do one of the following:
1. Place all of your linked files into one folder and supply this to your printer, along with your document file.
2. Embed your linked files into the document:
3. In the top menu bar, Choose Window > Links to open the Links Panel
4. Select all of the files in the Links Panel, then Click the Menu Icon and Click Embed Image.
5. Save your document as a PDF (see instructions below); linked files will automatically be embedded into the PDF.
File Format
Most print shapes use Adobe Creative Suite software, but they may not have the same version that you used to create your document. To avoid file format problems, it’s a good idea to save your final document in a universal format, such as PDF. To save a PDF from Illustrator:
1. Outline your fonts first, following the directions above – fonts are not embedded in PDF documents.
2. In the top menu bar, Choose File > Save As
3. In the Save As window that opens, Choose Adobe PDF, then Click Save.
4. In the Save Adobe PDF window that opens, Set the Adobe PDF Present field to High Quality Print.
5. Click Save PDF.