Audacity: Editing Audio with Audacity


Introduction
Audacity is an open source, free and easy to use audio editor and recorder. It includes powerful audio post-production tools to help create professional podcasts and music.
This class introduces the basic and essential concepts and interface of Audacity. By the end of the class, you will gather basic knowledge of how to import, record, edit and export your audio project with Audacity. Some more advanced editing tools will also be mentioned such as loudness normalization and noise reduction. You will also have the opportunity to record or use our excercise file to create your own podcast. We encourage you explore Audacity’s other advanced features that are briefly mentioned at the end of this class.
Download Audacity
Go to https://www.audacityteam.org/download/windows/ and download the newest version of Audacity for Windows – your file will automatically download in 5 seconds! Then install Audacity by following the basic procedure of your computer operating system.
Go to https://www.audacityteam.org/download/mac/ and download the newest version of Audacity for Mac – your file will automatically download in 5 seconds!. Then install Audacity by following the basic procedure of your computer operating system.
Download the FFmpeg Library
Working with M4A (iPhone recording) files or MP4 (video) files? You’ll need to download this additional library before you can work with your audio files that aren’t WAV.
- Go to https://support.audacityteam.org/basics/installing-ffmpeg
- Scroll down to watch the instructional video or written instructions. Just make sure you download the correct file for either Mac, Windows, or Linux depending on the computer you are using.
- Once all steps are completed, restart Audacity and the FFmpeg library should be installed.
- If for any reason the library still doesn’t install correctly, repeat the above steps one more time. Make sure to not put any downloads in the trash after they’ve completed.
Download the Class Files
From the top of this Canvas page, download the Class Files for Audacity – this is the blue link titled audacity-class-files. These will help you complete the exercise below!
Unzipping a Folder
The class files will download as a zipped folder. To be able to use the files within this folder in your Audacity project, you will need to unzip your folder first. Otherwise you may see an error when trying to import these files.
On a Windows computer:
- Right-click on your downloaded class files
- Choose Extract All… (an extraction wizard will begin)
- Click [Next >]. Click [Browse…] and navigate to where you would like to save the files.(We suggest you select the Desktop to make it easier to find later)
- Use these extracted (unzipped) files when completing the in-class activities
For Mac computers: double-click on the unzipped folder
Tool References
Opening a New Project
When you open Audacity, it will automatically create a new project for you. If you want to create an additional new project, go to File > New
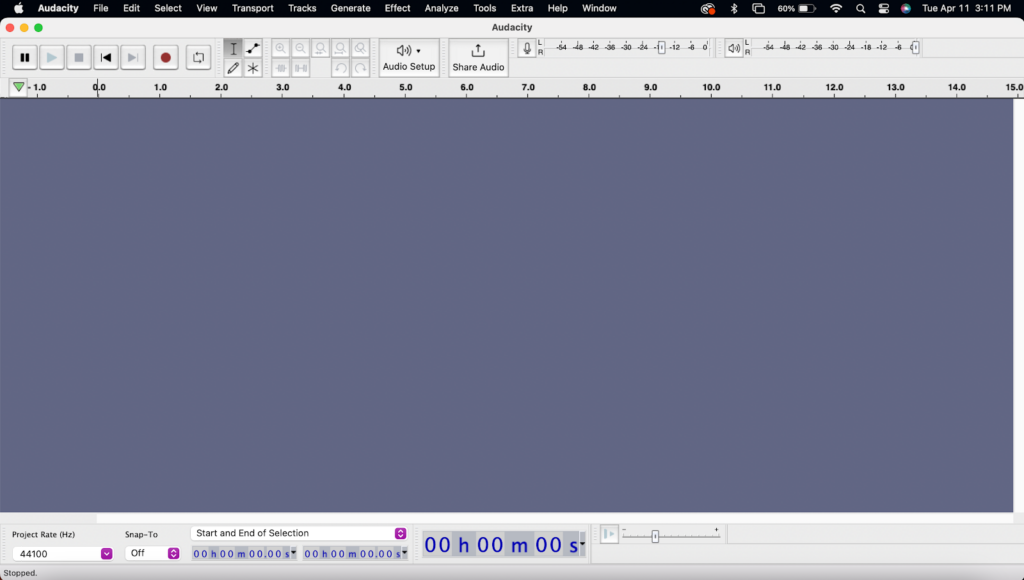
Play/Pause
The easiest way to play and pause your audio file(s) is to use your Spacebar. You can also use the buttons found within the top-left area of your Audacity interface. Use Pause (P) to stop a track. Use the black square (Stop) to stop a running or paused track and return to the beginning of the track.
Basic Tools
Selection Tool (F1)

To play specific parts of your project, use the Selection Tool to click on any part of a clip you’d like to begin playing OR click and drag to highlight a section of any clip to play back.
The default tool of Audacity. Use it to select, or highlight, any part of the audio to edit it.
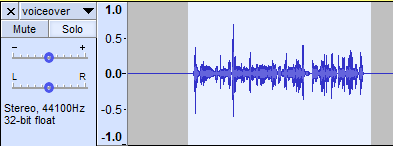
The light blue area shows that this audio has been selected with the Selection Tool. You can hit spacebar or click the Play Button to play the highlighted section.
To select an entire clip, double click on the clip with the Selection Tool.
To select all clips within a single track, click the blue “Select” button from the left side of the track.
Magnification Tools
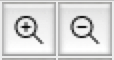
Use to zoom in and out on wave forms. To zoom in, click on the waveform. Repeat procedure to zoom out.
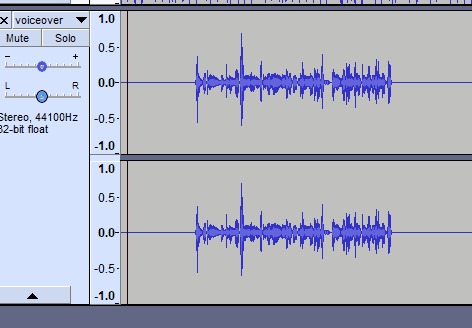
View Fit Tool

Did you accidentally zoom in or out too much? Press the View Fit Tool icon and Audacity will automatically rescale your entire audio file(s) to fit your project window.
Fade In/Out
It’s often a good idea to fade in and fade out audio (such as background music) rather than just have it start or end abruptly within a project.
Envelope Tool

Use the Envelope Tool to adjust the sound level of your audio at different parts. Click anywhere once on the audio to reveal four dots on the waveform. Click once more elsewhere to create more dots and drag the points to adjust the sound level as shown by the wavelength. Make as many points as you need.
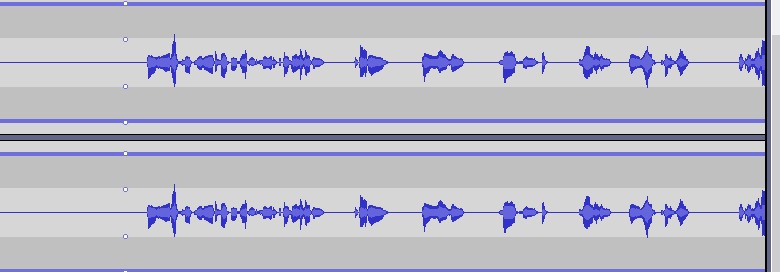
To adjust the sound of your entire clip, either only make one click and drag downwards as needed OR use the Amplify effect explained further down this manual.
To undo any point, either press Command Z or Control Z, or manually drag each point outside the track to reset.
Basic Edits
Moving Clips
To move a clip, simply click on the most top part of a clip (where the name appears) and drag it where you need to. No specific tool has to be selected to be able to move a clip.
Know that you can move clips between tracks! Not sure what a track is? Read further below to learn more about how to add and remove them.
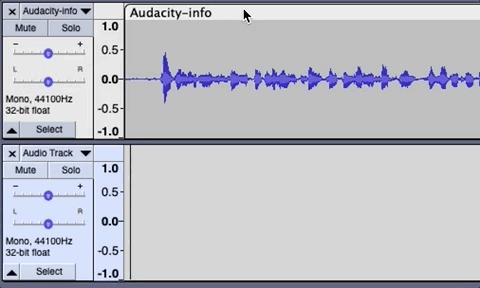
Is your clip not moving?
Clips will only move if they are not being “blocked” by other clips. Either move surrounding clips or zoom out enough to reveal the open spaces to move your clip to.
Trimming a Clip
Sometimes we need to shorten (trim) the length of an audio clip.
- Select the Selection Tool
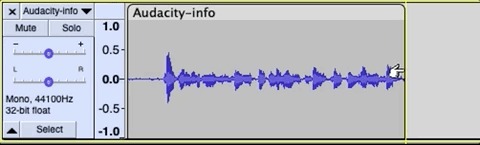
- Hover over an end of a clip until you see a double arrow
- Click and drag to shorten a clip to your liking
- If you trimmed your clip too much, drag the opposite way to reveal the parts you removed
Duplicate
This option allows a selected audio to be copied onto a new track within a project.
- Select the audio clip or highlight the section you want to duplicate
- Go to Edit > Duplicate
- Move your duplicated clip as needed
Splitting Clips (Making Cuts)
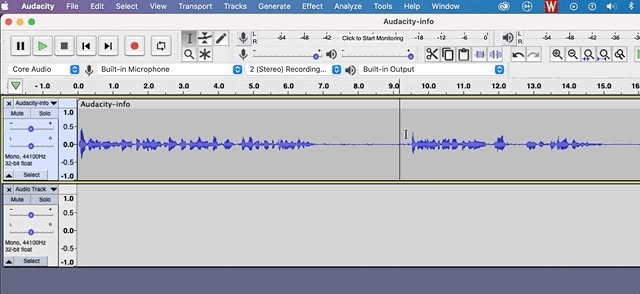
We mentioned already that you can use the Selection Tool to play specific parts of a clip. You can also use the same selection method to make cuts and split your clip. Splitting clips is helpful as it allows you to create new sections of audio that you can move around or make copies of as needed.
Joining Clips
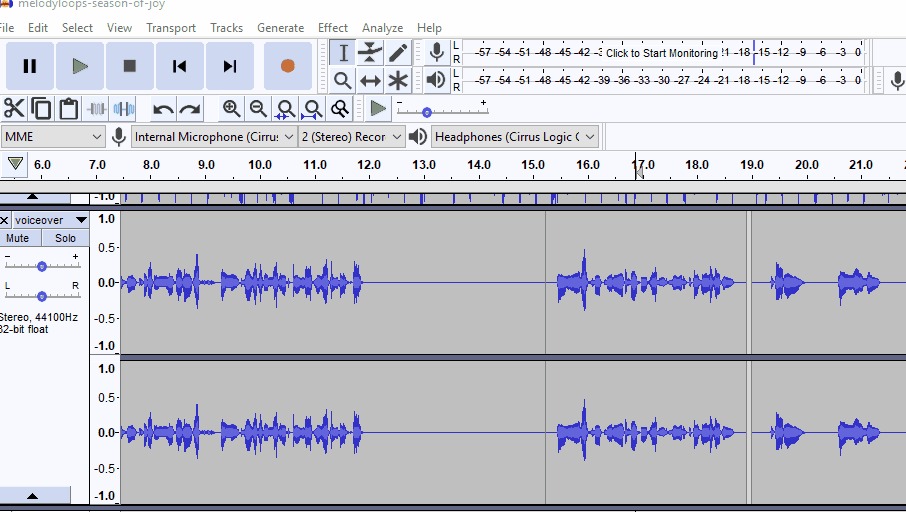
Edit > Audio Clips > Join: Groups separate audio clips on the same track into one continuous clip. Use the Selection Tool to highlight multiple clips and then click Join. Notice that Audacity will connect the two clips by adding a duration of complete silence.
You can drag the audio clips to join each other to avoid any complete silence.
The shortcut for joining clips together once they are highlighted is (Ctrl/Cmd + j)
Deleting Parts of a Clip
There are two ways to delete parts of a clip. The first method is best practice with a couple of steps, and the second method is a bit faster.
The best practice method to delete a part of a clip is to first split the section you want to remove. Doing this first will ensure you are doing non-destructive editing which means you can bring back your deleted section in the future if you need it by dragging the edges of the remaining clips!
- Highlight the section you want to remove and split it (refer to the steps above on how to split a clip)
- Click on the most top part of the splitted clip (where the clip name is located) to select the entire clip
- Hit the Delete or Backspace key
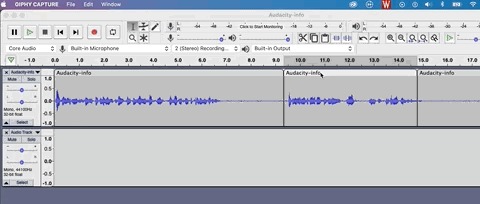
A faster way to delete parts of a clip is by using the Selection Tool to highlight the area of the part you want to erase and click on the Delete or Backspace key
This method of deleting, while very efficient in the moment, is considered to be destructive editing. This means that whatever you delete using this method is permanently deleted and cannot be brought back later on.
Looping

After selecting a highlighted part of the track, looping allows us to play that highlighted region over and over again. By Right clicking the time bar above the track, you can
- Clear loop
- Enable looping
- Or Set Loop to Selection.
Setting a loop to selection will make two black triangles appear on the time bar. You can drag these triangles to set the range for the loop.
To undo at any point, either press Command Z or Control Z.
Add/Remove Tracks
Tracks allow for us to essentially “layer” different audio files. For example, tracks can be helpful to layer a voiceover with some background music and occasional sound effects.
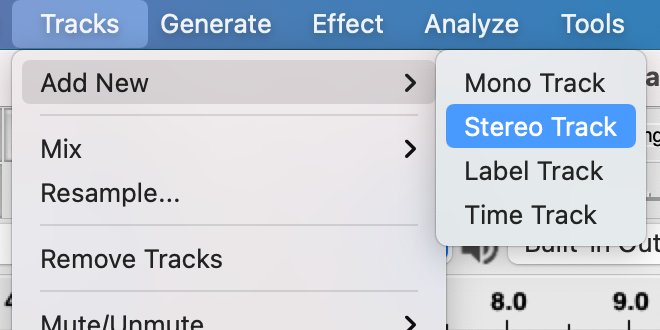
By default, a new track will be created every time you import a new audio file. But if you need to add another track manually, you can go to Tracks > Add New > Mono Track. You can choose a Stereo track, but Mono is Audacity’s preferred type.
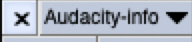
To remove a track, simply click on the small “x” on the most top-left corner of the track
Need to Rename a Track?
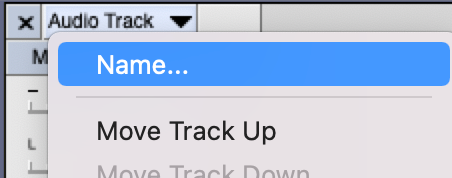
Renaming a track can be helpful to organize your project a bit more. By default, your track will be named after the first imported audio. To rename, click on the down arrow next to the current name and select “Name…”.
Mute/Solo Tracks
Sometimes it’s helpful to only listen to one track within a project at a time while making edits. Click on “Mute” to silence that selected track or “Solo” to silence all other tracks.
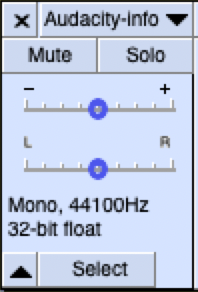
Notice how tracks that become greyed out are tracks that have been silenced.
Recording Audio
Another way to gather audio is to record it yourself directly in Audacity. To do this, make sure you have access to a computer with an internal microphone (most laptops have one) or an external microphone.
Test your microphone level
Find the microphone icon at the top right of the interface, and click Start Monitoring.
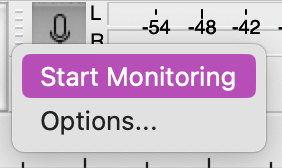
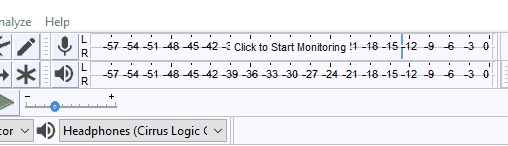
- Speak in your normal speaking voice to test the level, make sure your sound level locates at about -6 dB. This level helps prevent audio to go over 0 dB which often results in audio distortion, something that cannot be fixed in post production
- If your mic level is too low or too high, or cannot see the shifting green bar, you can change your voice volume, or adjust the microphone sensibility on the top left.

Start Recording
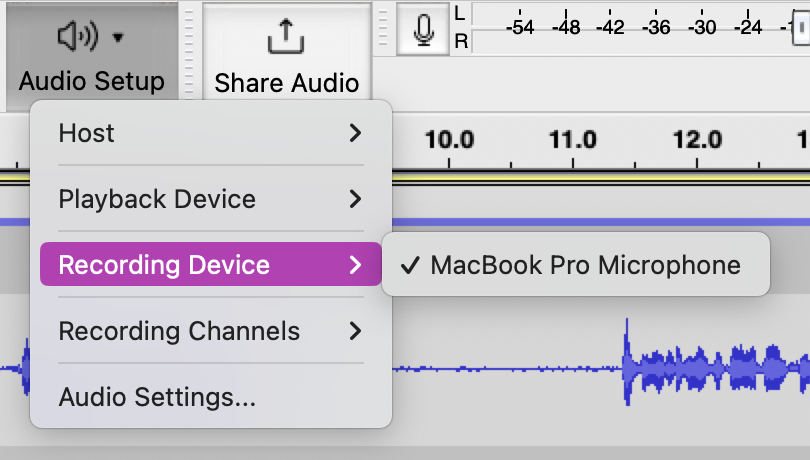
Choose the type of the microphone you want to use for recording. In this case, I am using the internal microphone directly from my laptop.
Record Tool

Click on the Record Tool to start recording in a new track. Press the Pause Tool to take a break while recording, or Stop Tool once you finish recording.
Saving and Exporting
When you finish working with your audio files, you have several options for saving and exporting your files.
Save as Audacity Project
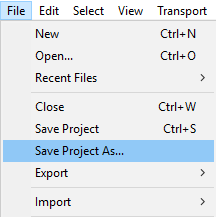
Saving as an Audacity project allows you to open the project later and add further changes to your audio. The information of your multiple tracks will be saved into the project. This is the best option if you want to continue editing in Audacity. Note that this project is only compatible with Audacity, meaning you won’t be able to share your creation with people who don’t have Audacity downloaded onto the computer they want to open your project from.
- Go to File > Save Project…
- Choose a folder to save your project in. The default folder is named Audacity and is usually placed under Documents.
- Give your project an appropriate File Name so that it is easier to locate later in case you forget the folder it’s saved in.
- Click Save to save your project as a .aup file
Export as MP3 File
If you want your audio files to have relatively good quality and smaller file size, export your audio as a .mp3 file. This is often the most popular kind of file to export as!
- Go to File > Export > Export as MP3
- Choose a folder to save your project in. The default folder is named Audacity and is usually placed under Documents.
- Give your project an appropriate File Name so that it is easier to locate later in case you forget the folder it’s saved in.
- For the Format Options, usually the default will do the job
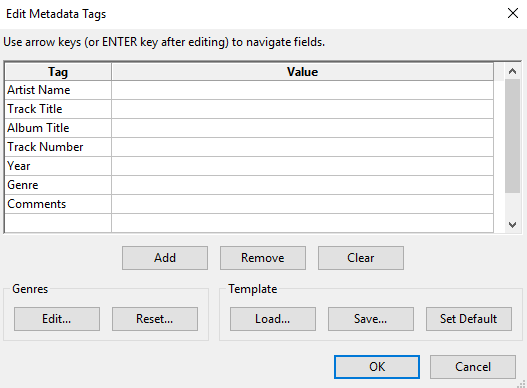
- Audacity will prompt you to enter metadata for the audio. Complete the form to the best of your ability and click OK.
Export as WAV File
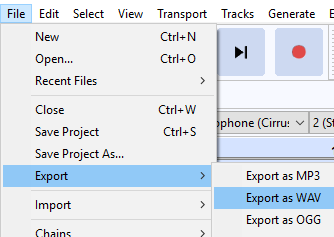
If you want to export your file to a compatible format, and you want to keep the best quality of your audio, export your audio as .wav (Waveform Audio File Format) file format. This file format is commonly used for uncompressed audio files and is compatible with most media players. It is also a larger file size compared to other formats.
- Go to File > Export > Export as WAV
- Choose a folder to save your project in. The default folder is named Audacity and is usually placed under Documents.
- Give your project an appropriate File Name so that it is easier to locate later in case you forget the folder it’s saved in.
- Choose Save as type as either WAV (Microsoft) signed 16-bit PCM or WAV (Microsoft) signed 32-bit Float PCM and click Save.
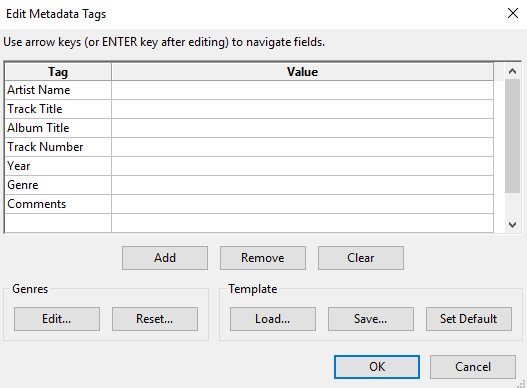
- Audacity will prompt you to enter metadata for the audio. Complete the form to the best of your ability and click OK.
Essential Audio Effects
Amplify
While the Envelope Tool is helpful to fade audio in and out, it’s often easier to adjust the volume of an entire clip with the Amplify effect. This effect also allows you to increase or decrease the volume of a clip at greater levels.
- Highlight the clip or select the area you want to apply the Amplify effect to
- Go to Effect > Volume and Compression > Amplify
- Select an amount (in decibals) to decrease or increase the volume of the clip.
- Use the “Preview” button to hear the volume levels. Note that both the Preview and OK buttons will be greyed out if the levels are too high unless you check the “Allow clipping” box. We do not recommend this, however, as parts of your audio will become distorted after it’s reached its clipping limits.
- Once satisfied with the volume levels, click “OK”.
- (In the broadcast world, most channels recommend a max volume of -12 dB)
Limiter:
The Limiter tool is fairly similar to the amplify tool. The difference is that the Limiter will focus more on lowering the highest peaks of the audio while keeping other volume levels relatively the same. The limiter allows you to set a limit for how loud the audio can be, and anything over that limit will be lowered.
Highlight the clip or select the area you want to apply the Limiter effect to
- Go to Effect > Volume and Compression > Limiter
- Under the “Limit to (db)” section, choose a negative number between 1 and 10. This will cap the volume at that level.
- Use the “Preview” button to hear the volume levels.
- Once satisfied with the volume levels, click “OK”.
- (Remember, in the broadcast world, most channels recommend a max volume of -12 dB)
Loudness Normalization
Sometimes our audio clips are all at different volumes and we need to match their loudness to one another. For instance, during an interview with multiple people, we may have one interviewee speak at a volume that is a bit too loud, while another interviewee is a bit more soft spoken. For a podcast, this kind of variation in volumes between speakers can be distracting. It would be best to match the loudness with the Loudness Normalization effect.
Normalize Loudness Right Away
Before doing any other kind of edits, it’s a good idea to normalize (match) the loudness between all the audio clips that need it at the very beginning of your project. This will ensure that other edits go smoothly.
- Select the entire tracks that have the audio clips that need to be “normalized” by using the “Select” button on the bottom-left corner of each track. Remember to use Command or Control to select more than one track
- Go to Effect > Volume and Compression > “Loudness Normalization…”
- From the pop-up menu, use the default settings (recommended) or adjust the LUFS to a number of your liking.
- Click OK
- Notice how your volumes between clips are now the same!
- Optional: Use the Amplify effect as needed after you normalize the loudness.
Noise Reduction
While it depends on the kind of project, it is often best practice to record in a quiet indoor space away from audible distractions. However, it’s not always possible to get a studio-level recording space for every project. More often than not, there will be a constant hum in the background (think refrigerator, ambient noise, random neighbors laughing at a distance). The Noise Reduction Effect will do it’s best to remove as much of that background noise to make your project sound more professional.
Silence Tool:
The silence tool allows you to added a specified time of no audio or 0db level audio. This allows you to add space between clips, or transitions, and can be useful in a podcast or presentation format audio clip.
- Generate > Silence
- The default is 30 seconds of silence, but you can change this by clicking on the 3 and 0 and typing the desired amount of time.
- You can also use the up and down arrow keys to change the values by 1. (Note that under the Generate tab you can also generate white noise in the same way)

When It’s Best to Just Re-Record
While it would be lovely if the Noise Reduction effect could remove all loud background interruptions (traffic, wind, talking), this effect still has some limitations.
If too much of this effect is added to try to remove some background noise, your main audio will become distorted and much more distracting.
If at all possible, sometimes it’s best to just re-record your audio in a less chaotic environment.
- Record your own audio, or import the noise-reduction.wav file from the downloaded Class Files into your project
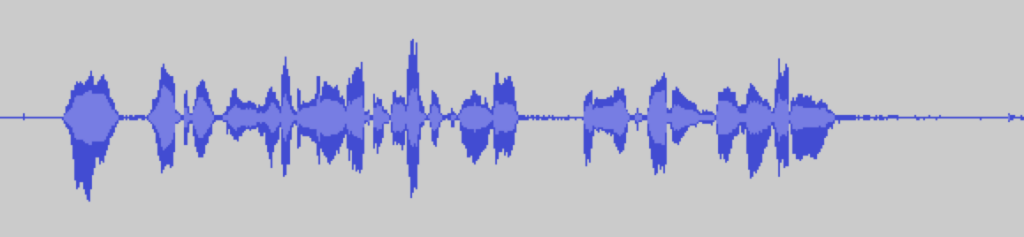
- Use the Selection Tool to highlight some “empty” space between words within the recorded speech. This selection will be the reference point for Audacity to know what noise to filter out once we apply the effect.

- Go to Effect > Noise Removal and Repair > Noise Reduction… and click Get Noise Profile
- Using the Selection Tool, highlight all of the audio you want to reduce background noise from, and go to Effect > Noise Removal and Repair Noise Reduction again
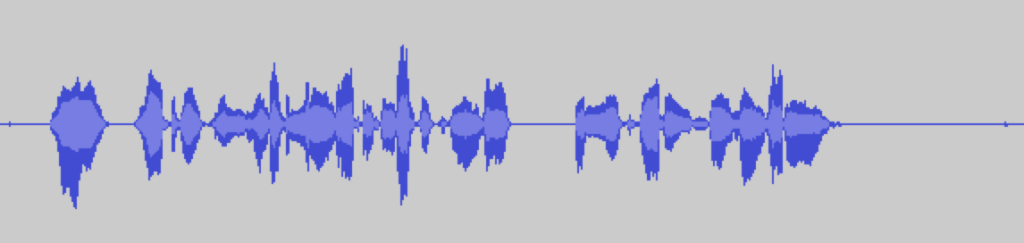
- Increase the Noise reduction (dB) to filter out more background noise. Keep in mind that if you choose to filter out too much noise, the audio might become distorted. Always make sure to Preview your effect before hitting OK
Before Noise Reduction:
After Noise Reduction:
Optional Audio Effects
Auto Duck
Auto Duck is an especially useful effect for podcasting. The effect reduces (ducks) the volume of one or more selected tracks automatically whenever the volume of a single unselected “control track ” placed underneath reaches a particular threshold level. For example, you can have the volume of the track with background music reduce once the track with a voiceover is introduced at a certain volume.
- Import the music file melodyloops-season-of-joy.mp3 and voiceover.wav file. Make sure the music file is on the track above the track of the voiceover file. If not, click on the small triangle next to the audio name, and choose Move Track Down
- Using the Selection Tool, highlight the entire music file and go to Effect > Volume and Compression > Auto Duck
- Adjust the Duck amount and outer and inner fade up/fade down length. The lower the dB of the Duck amount, the lower the volume of the music will be once the voiceover appears. The Outer fade down/up length is the amount of time it takes to gradually fade the music out or in before the voice audio enters. The inner fade down/up length is the amount of time given to continue the fade after the voice audio enters. Remeber to always Preview your edits before clicking OK.

- Press OK once you’re done. Below is an example of a music file before and after the Auto Duck Effect:
BEFORE AUTO DUCK:
AFTER AUTO DUCK:
Audacity includes many audio effects for more advanced audio editing. To apply an effect, first use the Selection Tool to highlight the area of the audio you want to modify. Then, from the Effect menu, select an effect option to add to the selected audio.
- Effect > Fading > Fade In/Fade Out… : In addition to the Fade Tool, you can also use this effect to automatically fade the audio
- Effect > Pitch and Tempo > Change Speed… : Increases or decreases the speed of the selected audio , affecting the pitch in the process
- Effect > Pitch and Tempo > Change Pitch… : Changes the degree of highness or lowness of the tone in the selected audio
- Effect > Pitch and Tempo > Change Tempo… : Changes the speed at which the selected audio is played without affecting the pitch