Trainer Guide: DS120: Project 1 (Balance Illustrator)
FORMAT: Workshop + Help Session
For these sessions, STS trainers:
- Deliver a small Illustrator demo (template) to get students familiar with the basic tools necessary for the first DS120 project
- Help students properly set-up their first Illustrator project
- Serve as onsite helpers the rest of the class time
About DS120 and the Balance Project
Partnership Context
Every Fall, STS is requested to attend nine DS120 sections twice a semester to act as onsite support while students complete individual projects using Illustrator or Photoshop. Trainers first deliver a regular workshop at the beginning of each session and use the rest of the time to help students 1-on-1. As students are working on their projects, STS trainers are expected to go around the room to answer any questions and to check-in with students even when no questions are apparent.
Project 1: Balance (Illustrator)
The first project DS120 students are expected to create is a two-part process, however STS only assists with the digital component. Students will come to the STS Help Session having created a symmetrical piece consisting of hand-cut and pasted shapes. During the Help Session, they will import a scanned image of their design into Illustrator and use the shape tools, pen tool, and move tool to recreate their shapes in order to create a new asymmetrical piece that is digital and meant to be printed.
Note: The full Project Description for Balance can be found within the DS120 Class Files folder on the STS Drive!
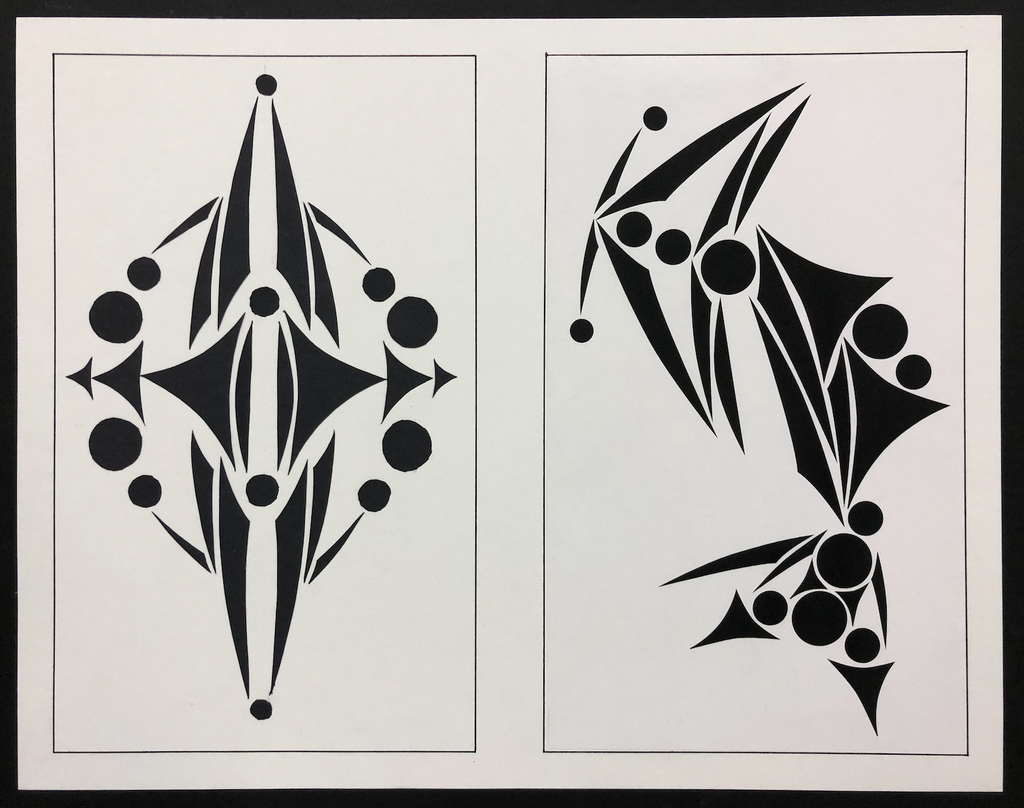
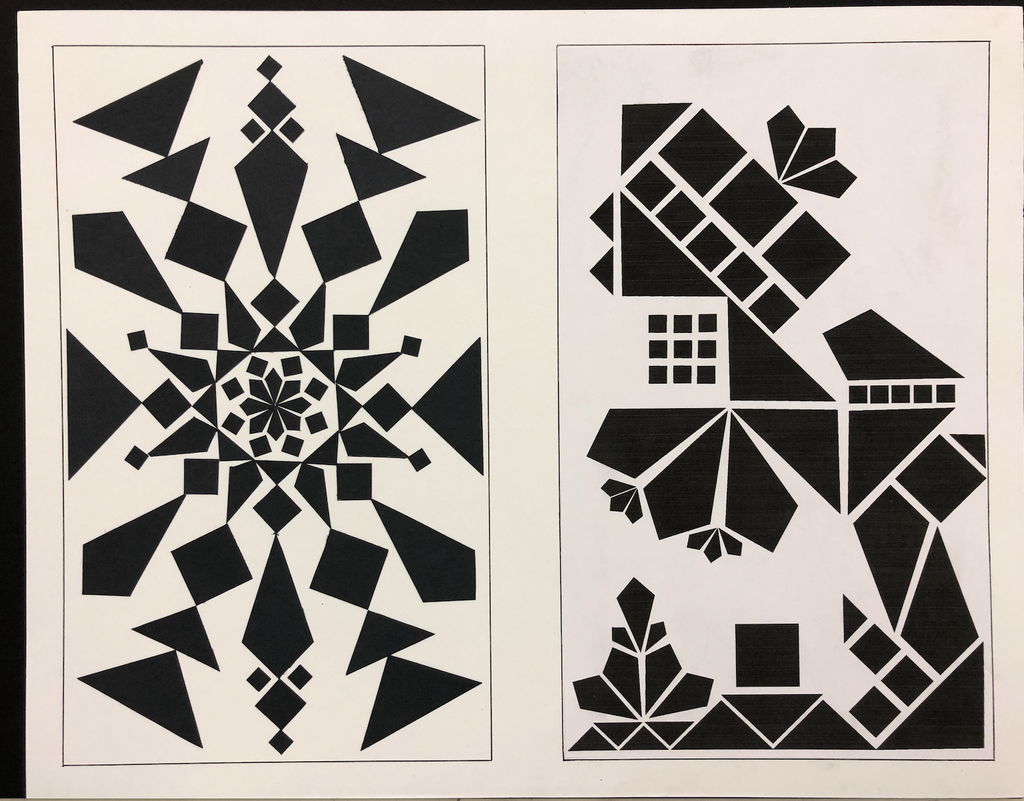
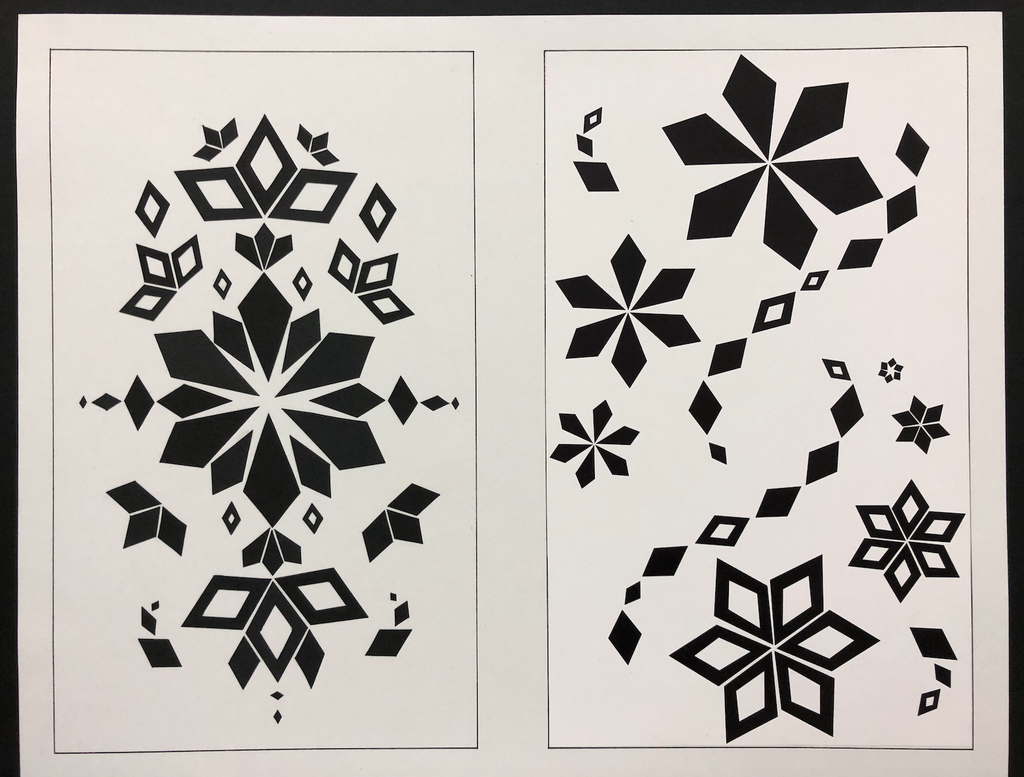
Below are examples of final versions of this project submitted in previous semesters:
Before Your Session:
Review Your Resources!
Review these prior to the sessions you will be teaching or assisting with to get a better idea of what tools and topics you should be comfortable helping out with!
- Adobe CC Access For Eligible Students
- DS120 Balance Tutorial & Practice (2024 version)
- Project 1 Set-Up in Illustrator (2024 version)
Double Check Your Software!
- You have the latest version of Adobe Illustrator installed on your computer
- Your Illustrator workspace is the default “Getting Started” workspace. To be sure all panels are consistent with what the learners will see, reset your workspace.
Session Expectations
Below is an outline of how trainers should generally approach each session. Make sure to practice this flow at least once in its entirety before your scheduled workshop to ensure the flow of the workshop the day of goes smoothly.
Adobe updates their softwares REGULARLY. Because of this, it is especially important to go through this workshop in its entirety (practice as if you are delivering to an audience) to ensure all tools are in the same location you are used to and to learn if there are more efficient ways to do a task with the new updates.
STS Intro
- Introduce yourself to the TA to let them know you are the STS trainer ready to assist with software questions
- Make sure students have Illustrator installed!
- If not, take the first 10-15 minutes of class to go over 1-on-1 with students how to install: Adobe CC Access For Eligible Students
- Go through the STS Workshop Slideshow for DS120: Project 1 (Balance Illustrator):
- Give the STS Intro
- Have students Sign-In
- Have students download class file (Illustrator template)
- Go over the Land Acknowledgement
- Recall to students their lecture on Illustrator that focused more on the mental model of how to use the program
- Provide an overview of the topics to be covered today and what students will be working on (example of the Balance project): Recreating all the cut-up shapes in Illustrator!
- Mention: if anyone ALREADY knows illustrator, that they can begin on their project right away and do NOT have to follow along
Open The DS120 Illustrator Practice Template
- Double click on the downloaded DS120 Illustrator Practice Template
- Explain: this is a template created to practice some of the tools necessary for the Asymmetrical (digital) part of the Balance project
- Mention: if students prefer to go through the template on their own, they can follow written instructions. Otherwise, we will go over each section in real time.
- Overview of Illustrator Interface
- Mention: the default workplace is “Getting Started”
- Explain what workplaces are
- Show how to reset workspace in case things move around
- Introduce the various panels we see right away as a recap from the earlier lecture
- Artboards
- Explain that this is where all of our work lives!
- Tools Panel
- We will only be using the 4 most common tools for this workshop
- A white triangle means there are more tools if you hold down your click
- Properties Panel (the most helpful panel!)
- Mention that contents within this panel changes depending on what you are selected on
- If selected on the document itself, this is where you can add Rulers, Grids, Guidelines
- Layers
- This is a reference of how graphics are stacked within our project!
- Notice there are layers and sublayers. A sublayer is automatically created when you make something on the artboard. A layer needs to be manually added from the Layers Panel
- Show how to hide and lock layers
- Artboards
- Explain the Windows menu item in case students don’t see an existing panel or need to bring up another panel/window
- Mention: the default workplace is “Getting Started”
Go Through the Different Artboards
- This part is fun! Just go through each of the artboards and follow along with the written instructions
- Remind students who prefer to read on their own can go at their own pace! Otherwise, students can follow along with you
- As much as possible, relate what students practice making to their Balance project (i.e. maybe your Balance project has a crescent shape — to make this, we can use the Shape Builder Tool)
- After going through each artboard, make sure to offer time for questions!
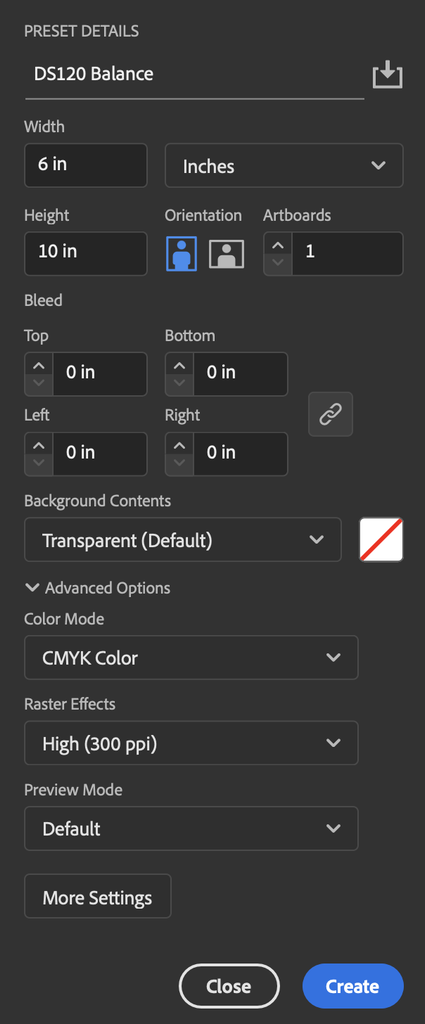
Set-Up New Illustrator Project
- Let students know they will create a new project based on the class assignment guidelines. Emphasize students should ALWAYS refer to their project guidelines to properly set up their projects.
- Go to File > New
- Name Project: DS120: Balance
- Width: 6 in
- Height: 10 in
- Units: Inches
- Artboards: 1
- Color Mode: CMYK
- Click “Create”
- Add another Artboard
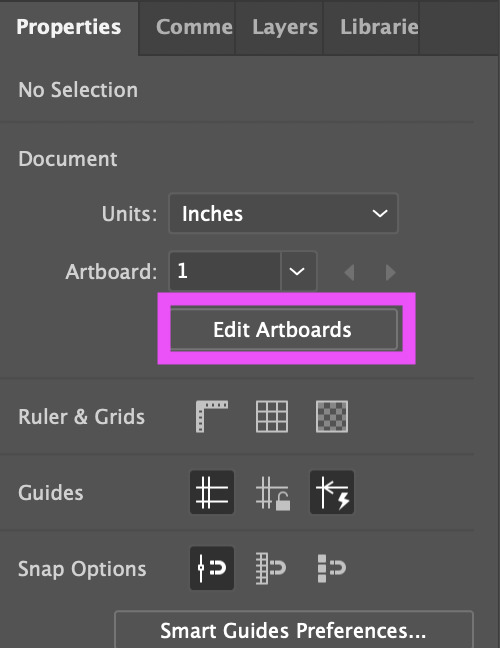
- From the Properties Panel, click on “Edit Artboards”
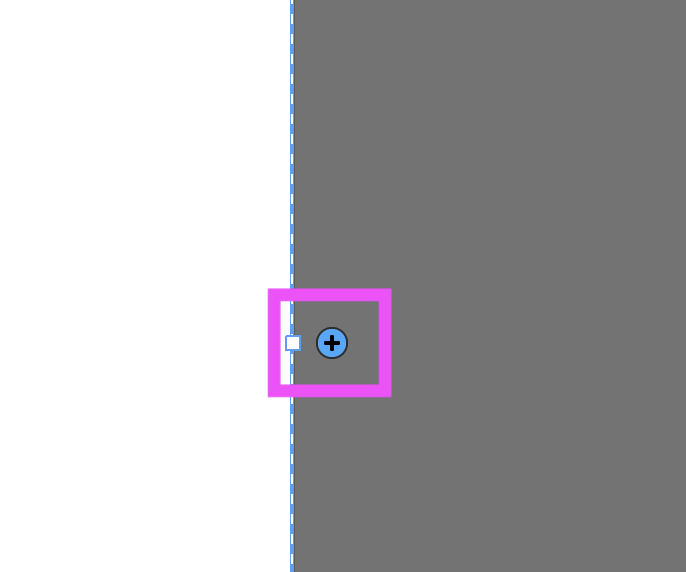
- Hover over the first Artboard and click on the right plus sign to add another one
- Click on the Selection Tool to get out of Artboard mode
- Import the “Symmetrical Scanned Image”
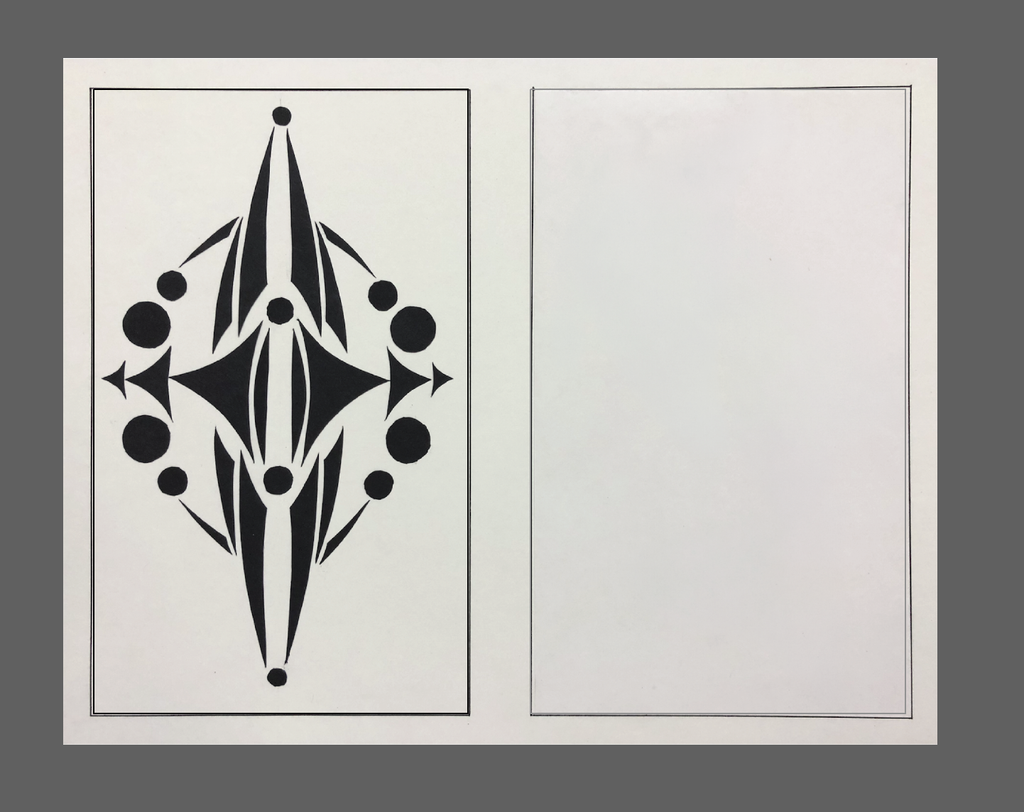
- Remind students they should have come prepared with a scanned image of their symmetrical pieces of their Balance Project. We will be importing this to our project as a reference for recreating them digitally using the Illustrator Tools.
- Go to File > Place…
- Tell students to locate their scanned image. Trainers will select the “Scanned Symmetrical Example” provided within the DS120 Class Files
- Click once on the left Artboard to load image
- With the Selection Tool, resize and align the image’s rectangle border to the artboard
- “Crop” the Image
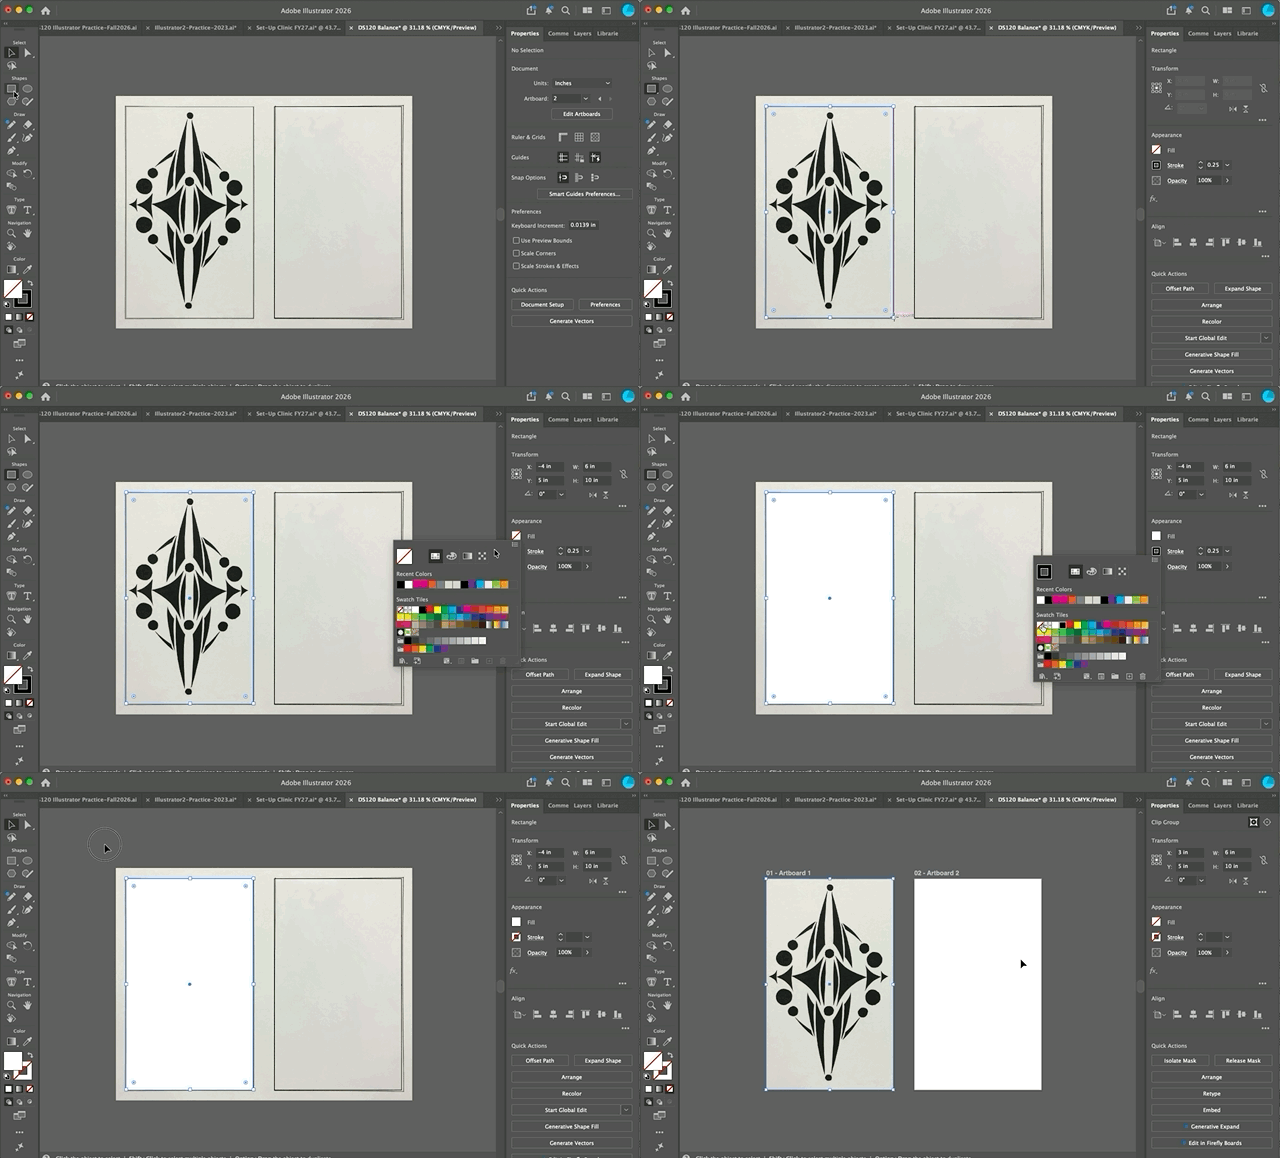
- Currently we have our entire project’s sheet imported when we really only care about the shapes contained within the left rectangle. Let’s crop it out using a Clipping Mask!
- Briefly mention what a Clipping Mask Does
- Create a rectangle (with any Fill Color, no stroke) that is 6x10in and move it to be aligned with the left artboard. Double check size of rectangle from the Properties Panel!
- Highlight both the rectangle and the image below it
- Properties Panel > Make Clipping Mask
- Create Page Border and Lock Layers!
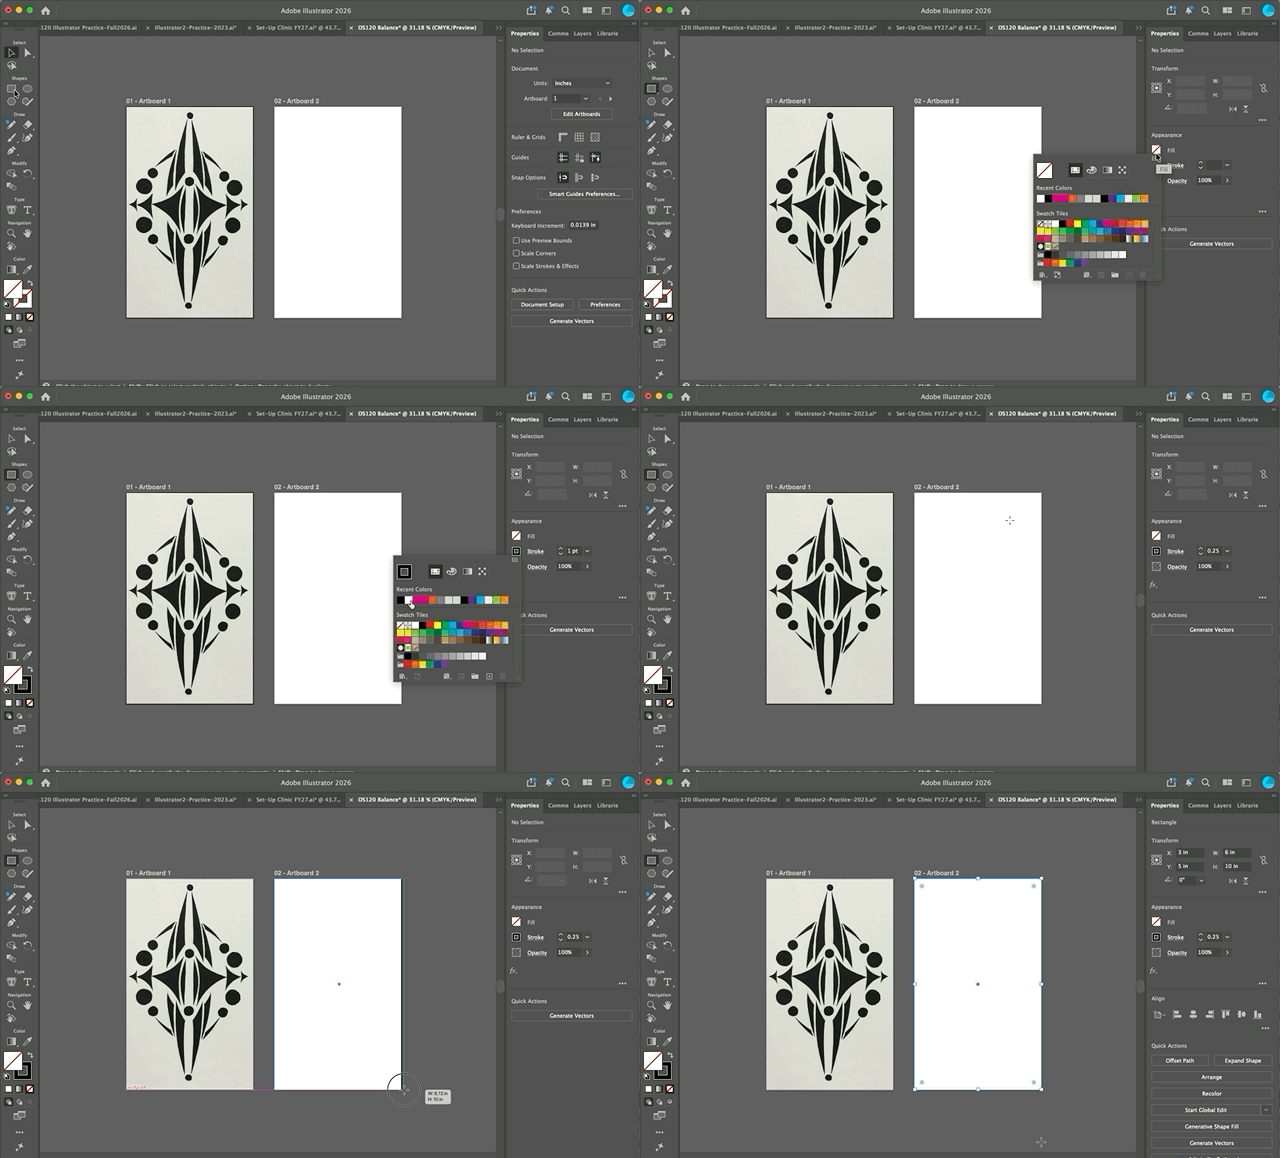
- Eventually everyone will be printing out the right artboard with the asymmetrical work. Let’s create a thin border around it so when we print it out, it will be easier to cut to the perfect dimensions and paste onto our final project board.
- Drag a 6x10in rectangle (no fill, black stroke of .25) on the right artboard. Move/resize as necessary – double check and/or edit size from the Properties Panel
- Go to the Layers Panel
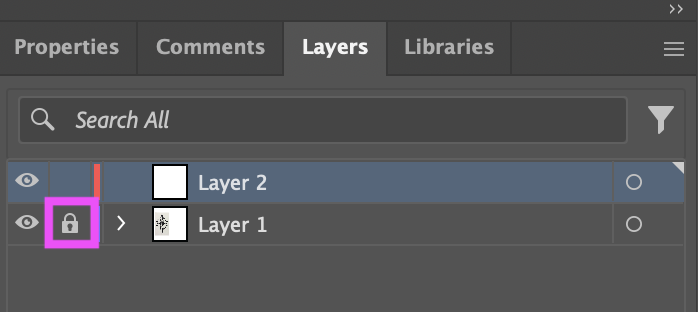
- Lock the only layer – explain this will help keeps things in place
- Create New Layer
- Remind students to make sure they are on the new layer to create objects. If selected on the locked layer, no tools will work!
- Save Project
- As Illustrator File
- File > Save
- Make sure name and location MAKE SENSE!
- Make sure Format is Adobe Illustrator (ai)
- Click “Save”
- Remind students this will now save as an Illustrator file that you can come back to keep edit. Also remind them to regularly save as they work on their project!
- File > Save
- As PDF
- Once students are all finished, they will need to export as a PDF to be able to easily print from any computer attached to a printer!
- File > Save As…
- Make sure name and location MAKE SENSE
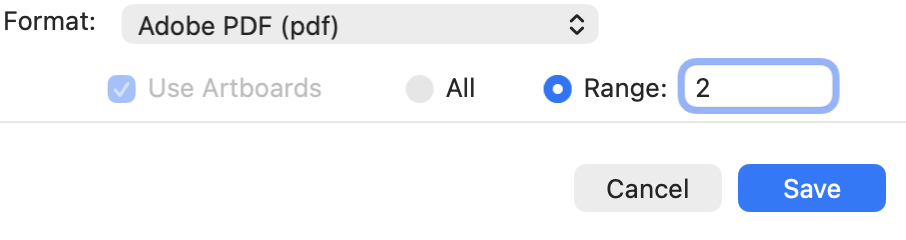
- Change Format to Adobe PDF (pdf)
- Check “Use Artboards”
- Students can choose to only export 1 of their artboards if they change “all” to “range” and select Artboard 2. It’s they’re choice. Just remind them that these settings save for the next exported project!
- Click “Save”
- From the PDF Dialogue box with all of the specific options, Illustrator Default is fine!
- Click “Save PDF”
- Now this is a file that can be opened from any computer connected to a printer. It will print to scale so all that needs to be done is cut along the black border and paste onto the art board.
- As Illustrator File
Bring up the DS120 slideshow and remind students that help is available after class! Drop-Ins at Office Hours are preferable but 1-on-1 appointments can also be made – they just may take longer to connect them with a trainer. Tell students that the rest of the time is work time! STS Trainers will stick around to answer individual questions!
Help Session for Rest of Class
- Go around the room to assist students with their questions — also check in on students even if they seem to be doing fine (you’d be surprised how many questions a student can have while still looking confident working on their project!)
- Tip: Remind students to save work as they are working
- 10 minutes before the end of any session, remind students:
- Of attending STS Office Hours for their questions (slide 9)
- That STS is looking to hire students that know Adobe (slide 10)
- To leave you an evaluation (last slide on the presentation) if you were able to assist them!