DS 120: Introduction to Adobe Illustrator

This manual provides an overview of Adobe Illustrator for students enrolled in Design Studies 120.
Its contents can still be helpful for learners who are not taking in that particular class, but be aware that it contains references to projects or class work that may be unfamiliar.
Adobe Creative Cloud Access For DS 120 Students
If you are enrolled in a course that requires Adobe tools in its syllabus (e.g. Design Studies 120), you have semester-long access to all of the tools in the Adobe Creative Cloud.
How To Activate Your Subscription
To activate your subscription, follow the instructions here:
Resources for Studio Time
There are a number of practice files and other training materials available for use in the in-class help sessions with STS trainers during your studio time.
Those files and the slideshow/additional materials for the sessions can be found here: https://sts.doit.wisc.edu/training-materials/manual/ds120-in-class-help-session-balance-illustrator/
What is Adobe Illustrator?
Adobe Illustrator is a program that allows users to create and edit vector graphics.
The tools and features that it pioneered have become industry standards, especially in fields like graphic design.
Illustrator is the most common app/program for working with vector graphics, but it also requires a paid subscription, which can be cost-prohibitive for many people (as of this writing, the price is $264 USD per year).
Students taking DS 120 receive a license for the full Adobe Creative collection that lasts for the duration of the semester during which they are taking DS 120, but it expires once class ends.
Illustrator is an important tool to be familiar with if you intend to go into graphic design or related fields, but there are alternatives that can do most of the same things as Illustrator for lower or no cost.
For a list of Illustrator alternatives that may be less expensive or free, visit https://alternativeto.net/software/adobe-illustrator/
Vector Graphics
Most of the digital images we see every day are called raster images, which are made up of tiny dots called pixels. Each pixel is a square made up of 1 color, which means you need LOTS of pixels to create images with meaningful detail. Even the relatively small pictures we see on Instagram are made up of more than a million pixels (1024px by 1024px).
The image quality of a raster image is determined by how many pixels it has. If you have a small raster image and try to make it larger, you end up with a blurry, blocky version of the initial image, because there is no additional detail available. You cannot enlarge raster images without them becoming blurry or pixelated.
Adobe Photoshop is the tool of choice when working with raster graphics. This includes things like photo editing, digital painting, collages, etc.
Images in Adobe Illustrator are created using vector graphics, which are a way of creating images using mathematical equations to map out points and connect them using lines. This means that vector images can be rendered at any size without losing detail.
Notice the difference in quality when you enlarge the following small image using raster vs. vector graphics:



When to use Illustrator vs. Photoshop
It’s possible to work with both types of images in both of these tools, but it’s helpful to know which app is a better fit for your particular project.
When to use Photoshop:
- Working with photographs (such as from a phone camera or digital SLR)
- Digital painting or drawing that is meant to resemble a physical painting/drawing
- Complex composite images or collages
- When a lot of graphical detail is required
- Projects that involve both raster and vector graphics that focus more on raster editing
Examples: retouching photographs, creating a vision board
When to use Illustrator:
- Creating and editing vector graphics
- When creating illustrations that are more “cartoon” like
- Working with text
- When the same image or design needs to be able to scale up or down in size significantly
- Projects that involve both raster and vector graphics that focus more on vector graphics
Examples: creating logos and icons, graphics that use “flat” design, creating user interfaces (UI) for websites/apps, flyers, posters
Can’t I just use Canva?
In the past few years, Canva has exploded in popularity as the tool of choice for graphic design – and with good reason! Canva can be a fast, easy way to get professional-enough results.
But it can also be limiting and result in dependence on their provided templates and solutions, which can hinder you from developing the skills that will make you a better designer than someone who is just relying on templates and generative AI: your own creative vision, voice, and taste.
There’s nothing wrong with using Canva, but it’s important to build your skills and aesthetic sensibilities as a designer outside the context of the Canva ecosystem first.
Important Illustrator Concepts
Points and Paths
As we mentioned before, most of what you’ll be doing with Adobe Illustrator uses vector graphics. At their core, vector graphics are made up of points and paths.
Every shape in Illustrator is made up of a series of dots called anchor points, connected by lines called paths.
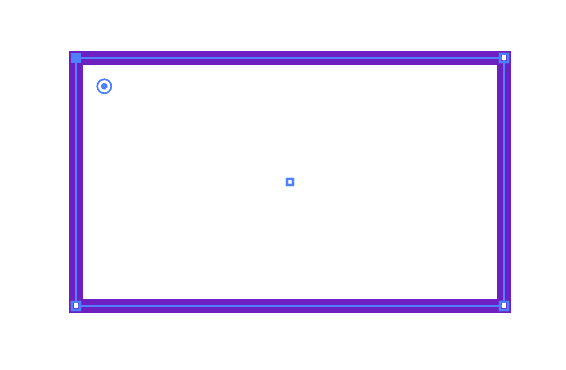
Paths can be straight or curved. When the lines between points are straight, the anchor point will be a sharp corner. When the lines are curved, the anchor point will be a rounded curve.
A curve anchor point will have two control handles (little antenna-looking lines with a dot at the end) that determine the angle of the curve.
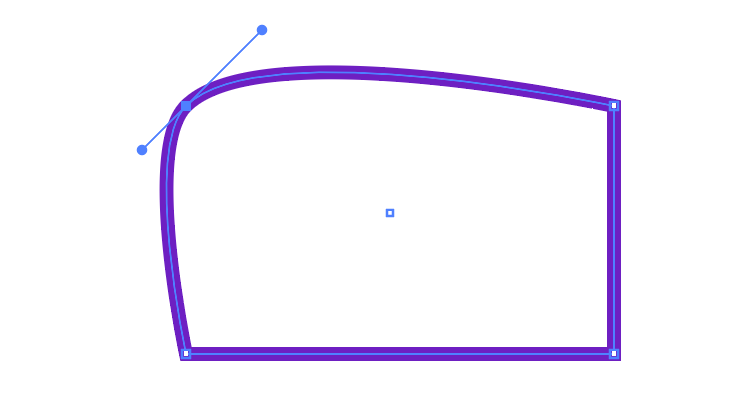
To select individual anchor points, you’ll use the Direct Select tool, which is the filled-in white arrow from the Tools menu:

We’ll talk more about the Direct Select tool and how it’s different from the normal Selection tool later on in this guide.
Corner vs. Curve
You can use the Convert function to toggle an anchor point between being a corner (pointy) or a curve (smooth):

This will appear in the Properties panel or in the Control bar (Window > Control) when a single anchor point is selected with the Direct Select tool
Strokes and Fills
Every shape created in Illustrator has a line around the outside called a Stroke and an area inside the stroke called a Fill.
The stroke can be any width (including 0) and be any color attached (including no color).
The Stroke makes up the “border” of the shape, and the area inside it is called the Fill.
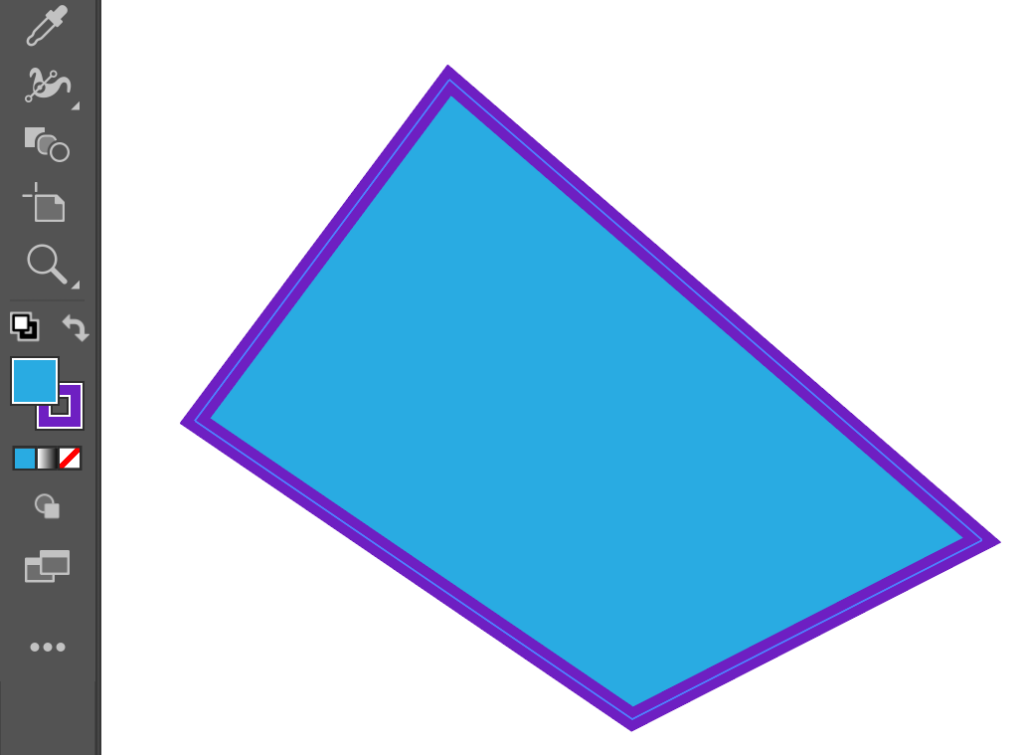
To choose a stroke color, click the square with a hole in the middle from the Toolbar. For the fill, click the filled-in square.

Once you’ve clicked on the stroke/fill, you can set a color from the Swatches, Color, or Color Guide panels.
You can also double-click the stroke or the fill from the toolbar to set a color via the color picker.
If you have a shape selected when you choose a new stroke or fill color, it will apply that change to the selected shape.
If not, the next shape you create will use the stroke and fill colors you’ve chosen.
For the Illustrator portion of your Balance project, all of the shapes will use a black fill color with no stroke, but it’s important enough that you should still spend a little time getting familiar with how strokes and fills work.
Artboards
An important concept that is unique to Illustrator is the Artboard. An artboard is like a workspace within a given Illustrator project file.
A single Illustrator file can have multiple artboards. This can be helpful if you are working on multiple items that are related but still distinct.
For example if you were working on branding for a company, you might one artboard for the company’s logo, another artboard for their business card template, another for their app icon, etc.
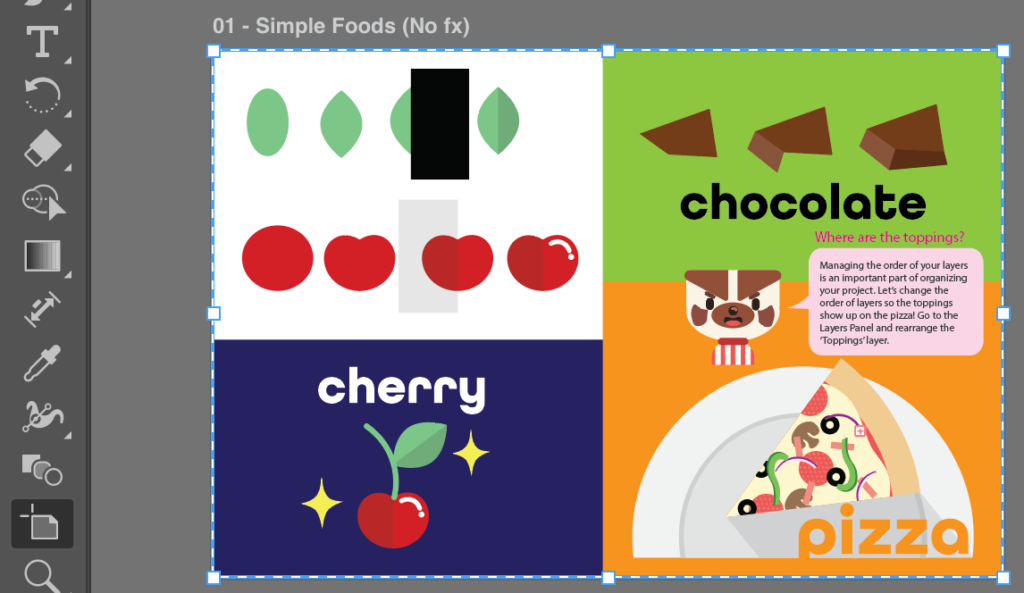
The project below has 5 separate artboards, each with its own artwork:
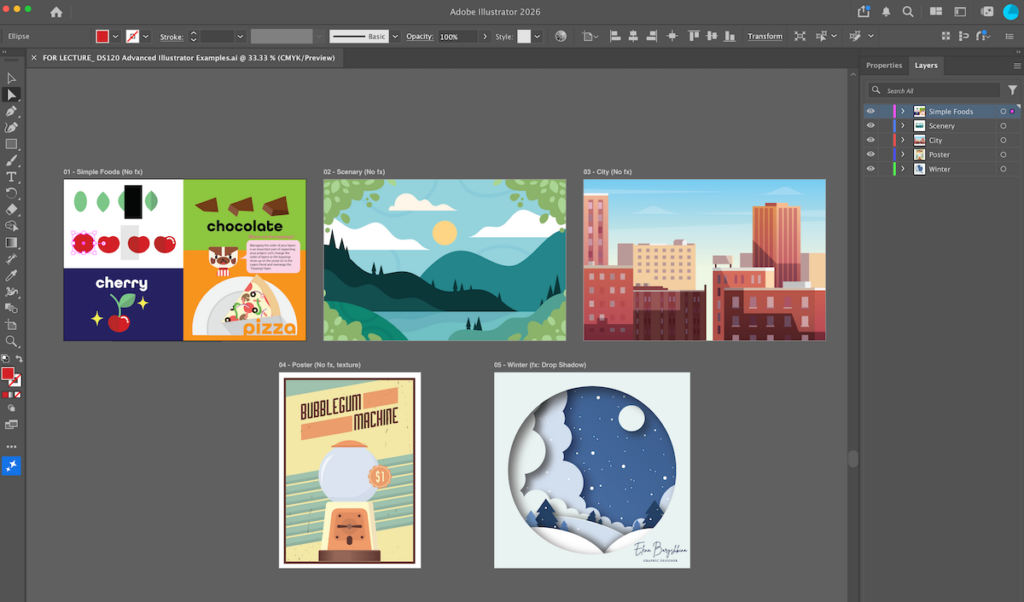
To add, remove, or edit artboards, you can use the Artboard tool:
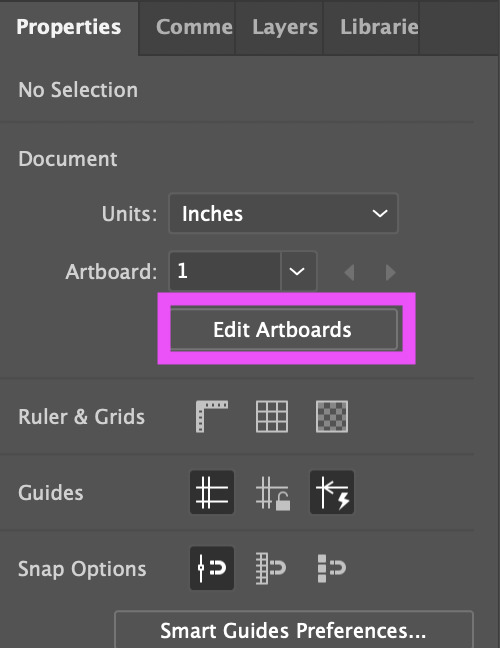
You can also use the Edit Artboards button from the Properties panel:
The project file for the Illustrator portion of your Balance project will have two artboards:
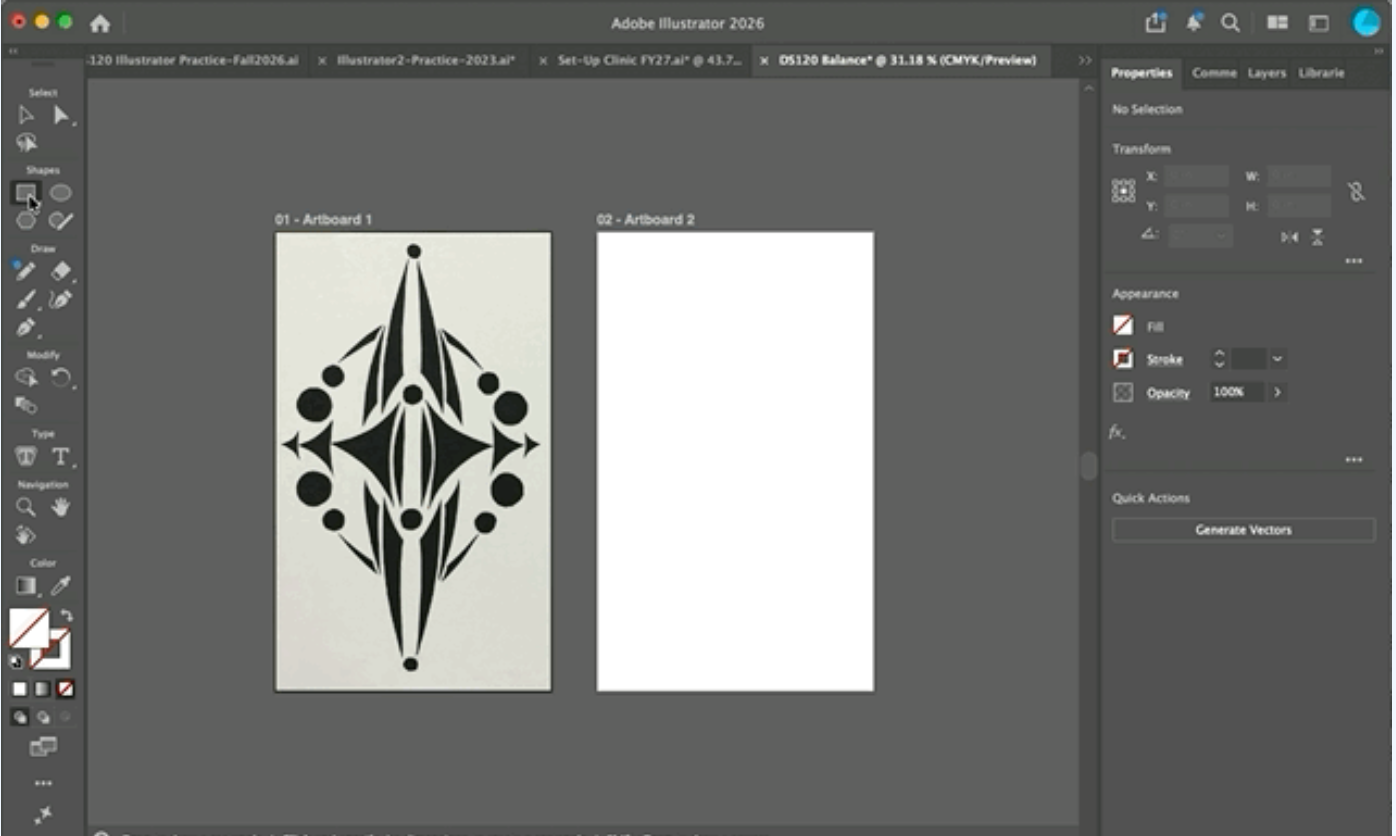
The trainer for your studio section will help you create these.
Layers
Another important organizational concept in Illustrator is called Layers.
Every item in your Illustrator project exists on a Layer, which you can see in the Layers panel:
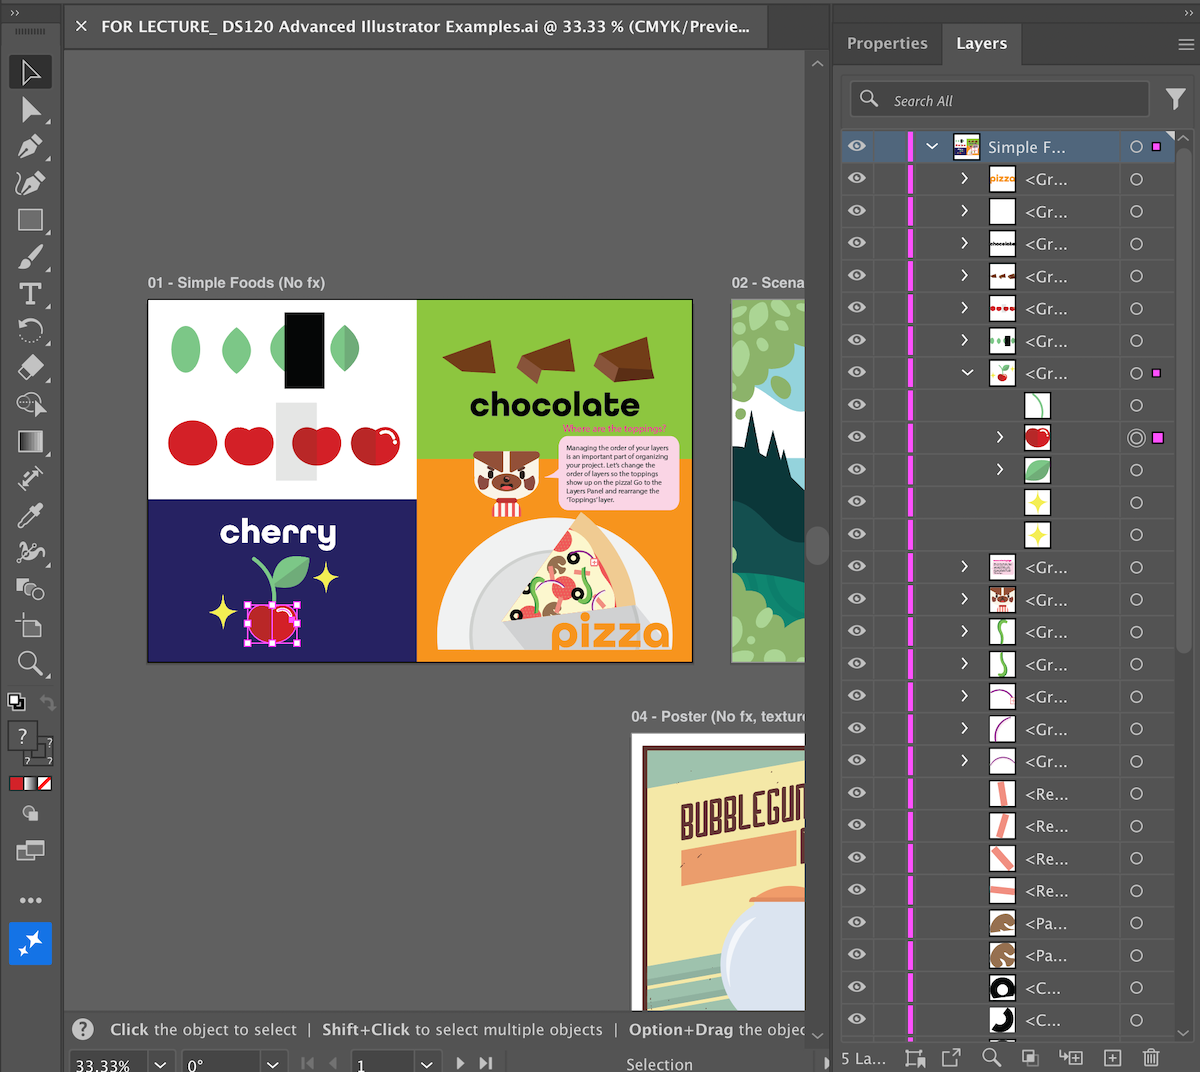
When shapes overlap, their order in the layers panel determines which items are visible.
The closer to the top of the layers panel something is, the closer in the foreground that shape will appear to the viewer.
Click and drag the item’s name to move items up or down the layer stack.
The Layers panel can also be used to select specific items in your project. This can be helpful when multiple shapes overlap or are otherwise hard to select, for example if they are too close together to easily select one or the other.
Choose the circle on the right side of the panel to select the corresponding item:
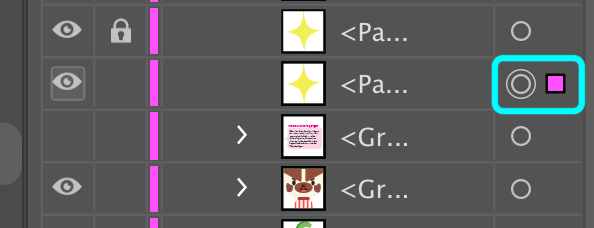
You can also toggle visibility for a given item by clicking the eye icon.
To lock an item or layer, click the empty space next to the eye icon. A lock icon will appear when a layer is locked.
Groups
The last organization tools that we’ll cover are called Groups.
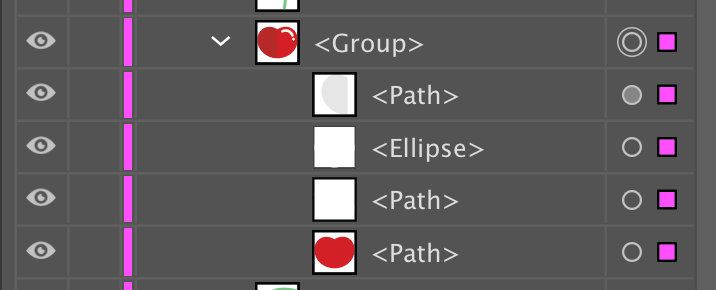
A group is a way to deal with multiple separate items as if they were one item.
To group items together, select the items you wish to group and hit Control (Windows) or Command (Mac) + G.
To ungroup, select the group and hit Shift + Command/Control + G.
Groups will appear as a combined sublayer within the Layers panel:
Isolation Mode
When working with Groups, you can edit the individual items by entering Isolation Mode.
To edit the items, double-click the group to enter Isolation Mode.
You can tell you’re in isolation mode because the non-group items in your project will be a dull grey, and you’ll see the name of the group and the layer at the top of the interface:
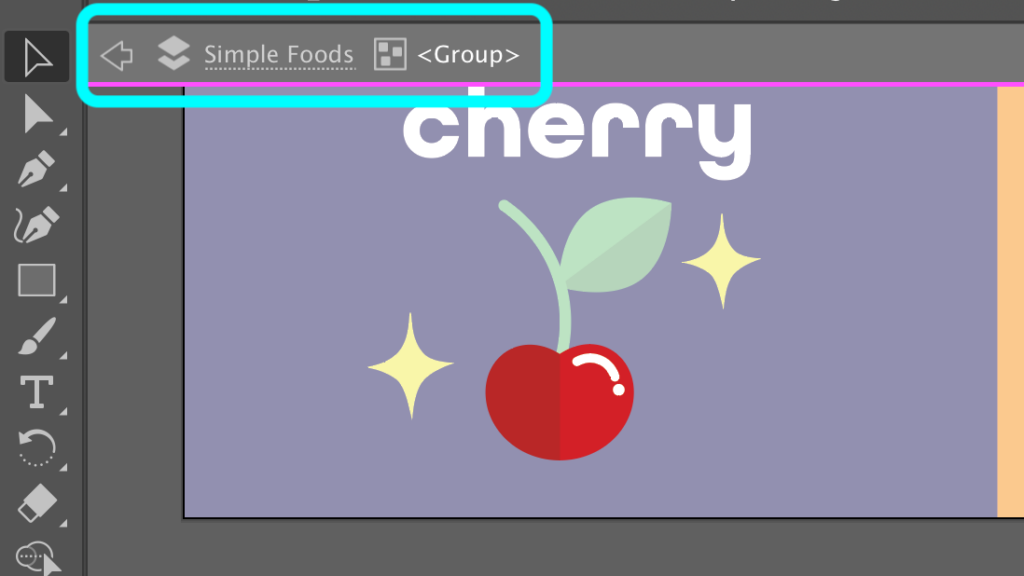
To leave Isolation mode, click the left arrow at the top of the screen or simply hit the Esc key on your keyboard.
You can access individual items without entering Isolation Mode by using the Direct Select tool.
Important Tools and Features in Illustrator
There are countless different tools and features available in Adobe Illustrator, but most Illustrator users end up spending the majority of their time using the following tools.
Selection Tool

The selection tool is the default tool for selecting entire shapes.
You can use this to resize and rotate shapes, as well as select multiple shapes by holding the Shift key or clicking and dragging a box around the shapes you want to select.
Quick Copy
While using the Selection tool, holding the Alt (Windows) or Option (Mac) key on the keyboard while dragging a shape creates a duplicate copy of a selected shape quickly and easily.
Direct Select Tool
The Direct Select tool is the tool for selecting anchor points and adjusting the angle of curves.
To select anchor points, click the entire shape first to select it, and then click the individual anchor points to edit them.
You can hold the Shift key to select multiple anchor points at once.
If an anchor point is part of a curve, selecting the point with the Direct Select tool will cause control handles to appear, which will allow you to adjust the curve:
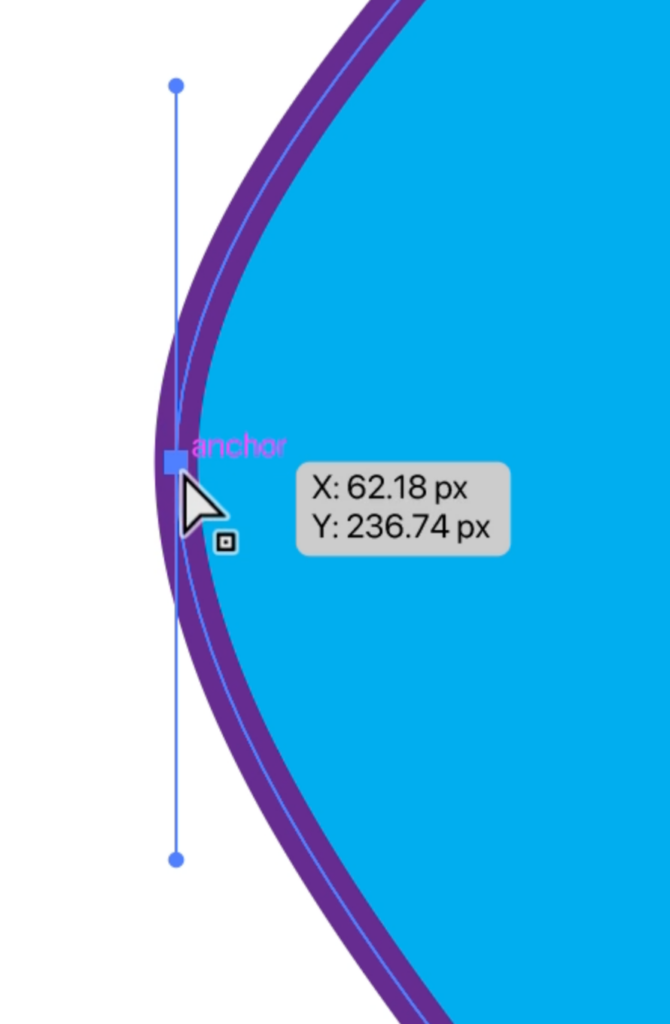
Clicking the little circle at the end of each handle allows you to adjust the curve of the path. Holding the Alt/Option key will allow you to move each handle independently.
Pen Tool
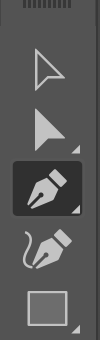
The Pen tool is a powerful feature of Illustrator, but it often confuses new users of Adobe Illustrator at first.
The Pen Tool does not work like an actual pen!
The Pen Tool works by creating individual points one at a time.
You can create curves by clicking and dragging when creating a point, but it is not meant for drawing freehand the way many people tend to assume it is.
If you are looking for a tool that will let you draw lines in a more intuitive way, try the Pencil tool. It works the way people usually expect the Pen tool to work.
The Pen tool lets you create individual anchor points. A way to use the Pen Tool that many people prefer is:
- Select the Pen Tool
- Click once to start add a point to your shape. This kicks off the Pen tool process.
- Click again for each additional anchor point you want to create.
- When you are done, either click the first point you created to close the shape OR hit the Esc key to leave the shape un-closed (meaning there will be a gap between the start and end points).
If you have a Fill color selected, Illustrator will try to figure out how to “close” the shape based on the current points you have created, and you will see your Fill color appear in different shapes as you add more points.

You can adjust the curve of the path between the points you create by clicking and dragging while creating them:

Drawing curves by hand is challenging, especially for newer users.
A more intuitive process for creating curves that many users find easier is to first create straight lines with the Pen tool, and then hold Alt/Option and drag to transform the straight path into a curve:

Shape Tools
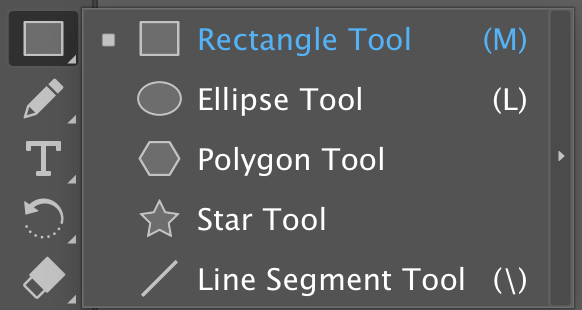
The shape tools are used to create common shapes. These are available from the Tools menu, and the icon will appear as the last shape you created:
Nested Tool Menus
If you see a small triangle in the corner of the icon when selecting a tool, it means more tools are nested underneath the same button.
Click and hold the tool icon to choose from the additional tools in the nested menu.
The following shapes have their own tools:
- Rectangle
- Ellipse
- Polygon
- Star
- Line Segment
Pencil Tool

The Pencil tool allows you to draw lines and shapes more intuitively than the Pen tool.
It works like an actual pencil: simply click and drag to create a path using your mouse or trackpad.

Shape Builder Tool
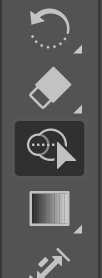
The Shape Builder tool is the tool to choose when you want to create complex shapes.
The Shape Builder lets you take simpler shapes like circles and squares or even custom shapes you make yourself and combine or subtract the places where they overlap.
To use the Shape Builder tool, select all of the shapes you’d like to unify and then drag the tool over the shapes to combine them into one:
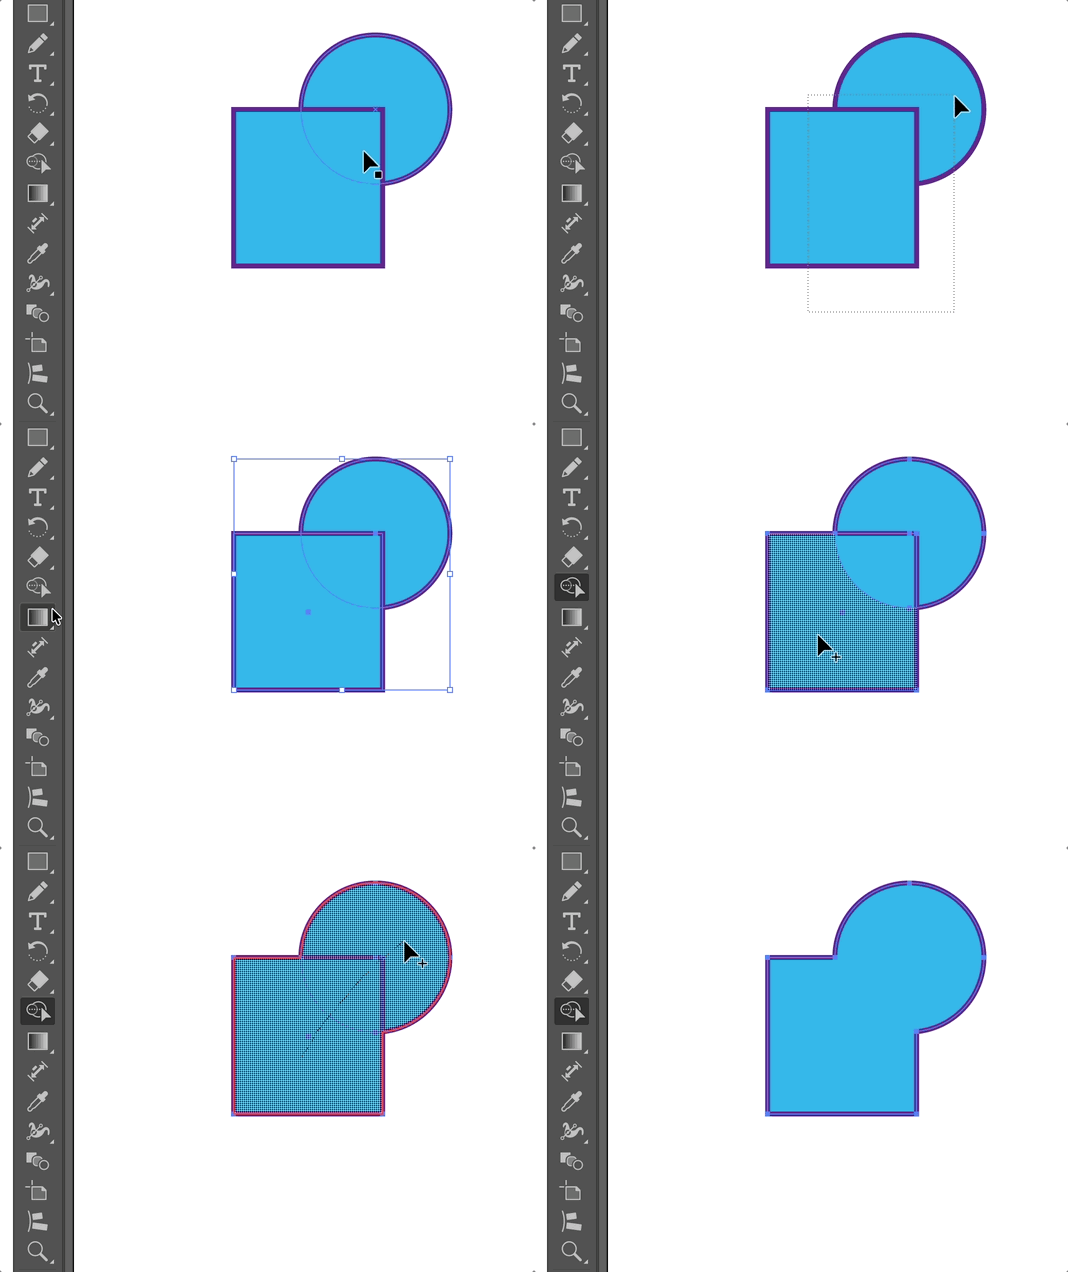
You can also hold the Alt/Option key while clicking/dragging to subtract rather than combine:
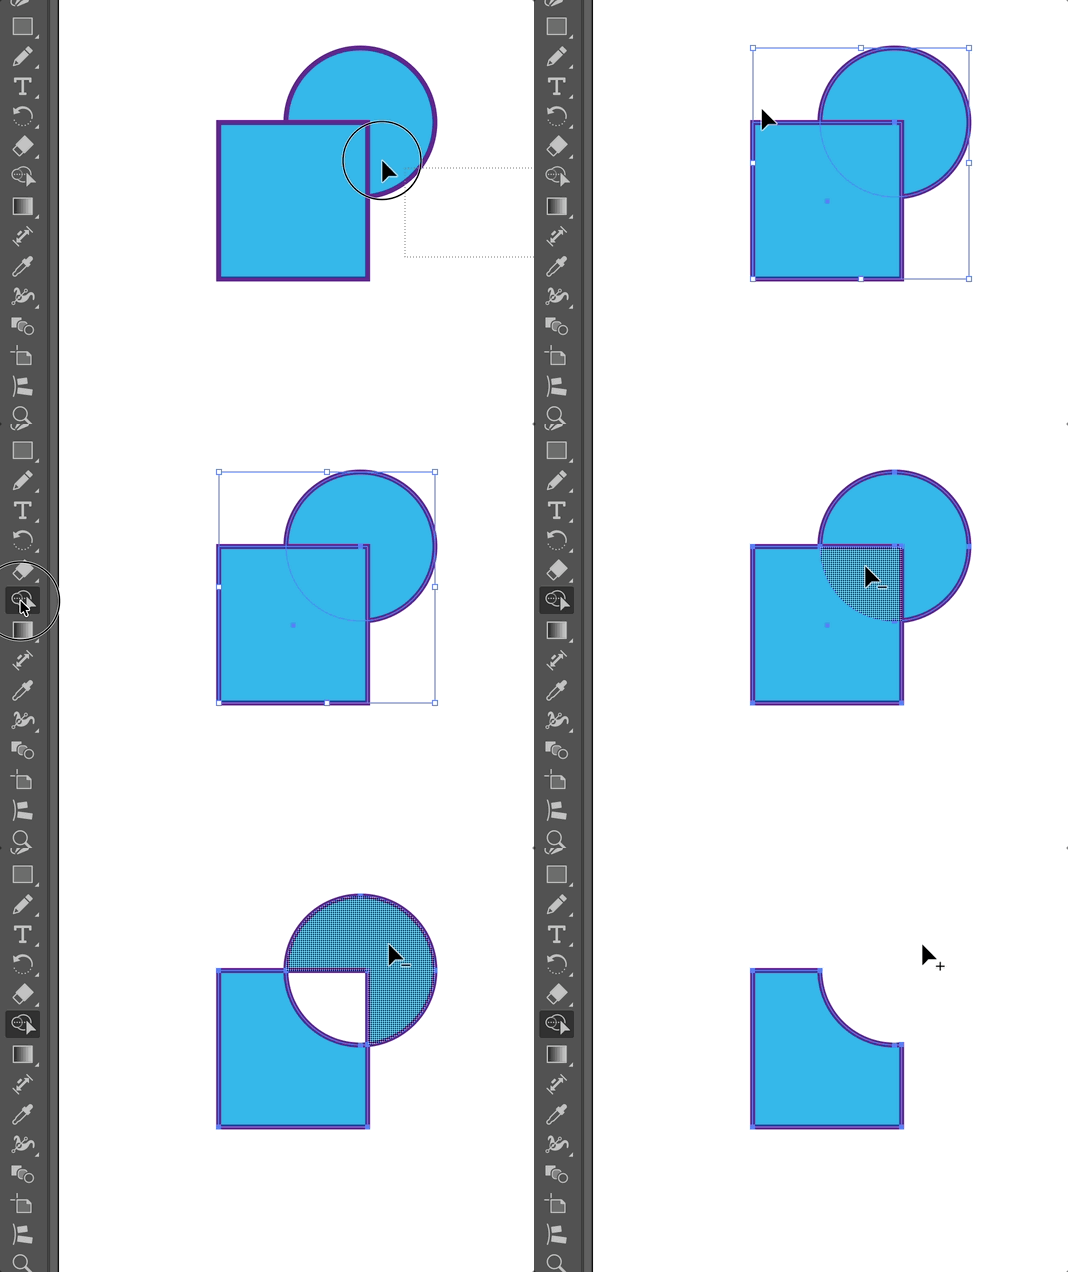
Be sure all the shapes you want to use are selected before you start using the Shape Builder!
If you don’t, nothing will happen when you click on them.
Type Tool
Illustrator is exceptionally powerful when it comes to working with text using the Type tool.
Because working with text isn’t needed for the Balance project, we won’t go into everything the Type tool can do, but it’s important enough that we wanted you to know that it’s something worth putting time in to learn.
If you are going to be using Illustrator more in the future, you can learn about the Type tool (and much more!) by attending one of the Illustrator 1 workshops from STS or consulting our Illustrator 1 manual for more information.